
Setting up a remote camera for sports photography
Have you ever looked at a photograph from a major sporting event and been unable to wrap your head around how they’ve captured it from a seemingly impossible position? The answer is most likely a remote camera.

It is not uncommon to see a bank of remote cameras at the 100m finish. Photo courtesy Pocketwizard.
You’ll find remote cameras in a heap of different sports in many different situations. Sometimes they’re used where there just isn’t room for a human to sit operating a camera and sometimes they’re used in situations where it is too dangerous for a human like on the outside of a sweeping corner at a motorsport rally.
Some of the most common remote camera shots that you’ll see come from:
Behind the backboard at a basketball game.
Up in the rafters at an ice hockey or basketball game. This can give an amazing top-down shot that seems almost impossible to comprehend.
Behind the goals at a soccer match.
All over the place at Olympics track and field events.

This type of setup might not be for you if you aren’t a fan of heights! Photo courtesy Pocketwizard.

I’m not shooting the Olympics and we certainly don’t have much ice hockey here in Australia, so where am I using remote cameras for my sports photography work?
My remote camera uses
The vast majority of my sport photography work is in mass-participation events including triathlons, trail running, road running and mountain-bike racing. I’ve used remote cameras in the following situations:
MTB racing at locations on the track where I know there is an amazing shot, but it is too dangerous for myself or the competitors to have me sitting there. I’ve used remotes on the inside of deep sweeping corners, or right at a big drop. In those instances I would rather the competitors not know they are being shot, because if they do they tend to take unnecessary risks.
Trail running. There are some beautiful locations out in the bush for trail running photos, but often there isn’t really enough room to get myself next to the track and frame the shot properly. In that instance I’ll hang a remote camera on a tree trunk.
Road running. If I’m shooting a relatively large event by myself, I’ll use a remote camera at the start line. I like to capture a telephoto shot of the competitors coming towards me from the start line, but I also want a nice wide shot right at the start so I’ll use a remote for that.
Triathlons. A bit of a mix of everything from above. There are some locations on the bike where I don’t want to distract the competitors, so I’ll set up a remote on the inside of a sweeping corner etc. I also use a remote at the finish line, particularly for busy races. I usually catch a shot of each competitor finishing with my 70-200, but if there are multiple competitors finishing at the same time they can often obscure one another. To account for that, I have a remote camera set up with a wide angle lens either adjacent to the finish line or hanging from above on the finish gantry. It might not make for the most perfect photo, but at least it is a shot of them finishing!
Setting up your remote camera
The basics that you need for a remote camera setup:
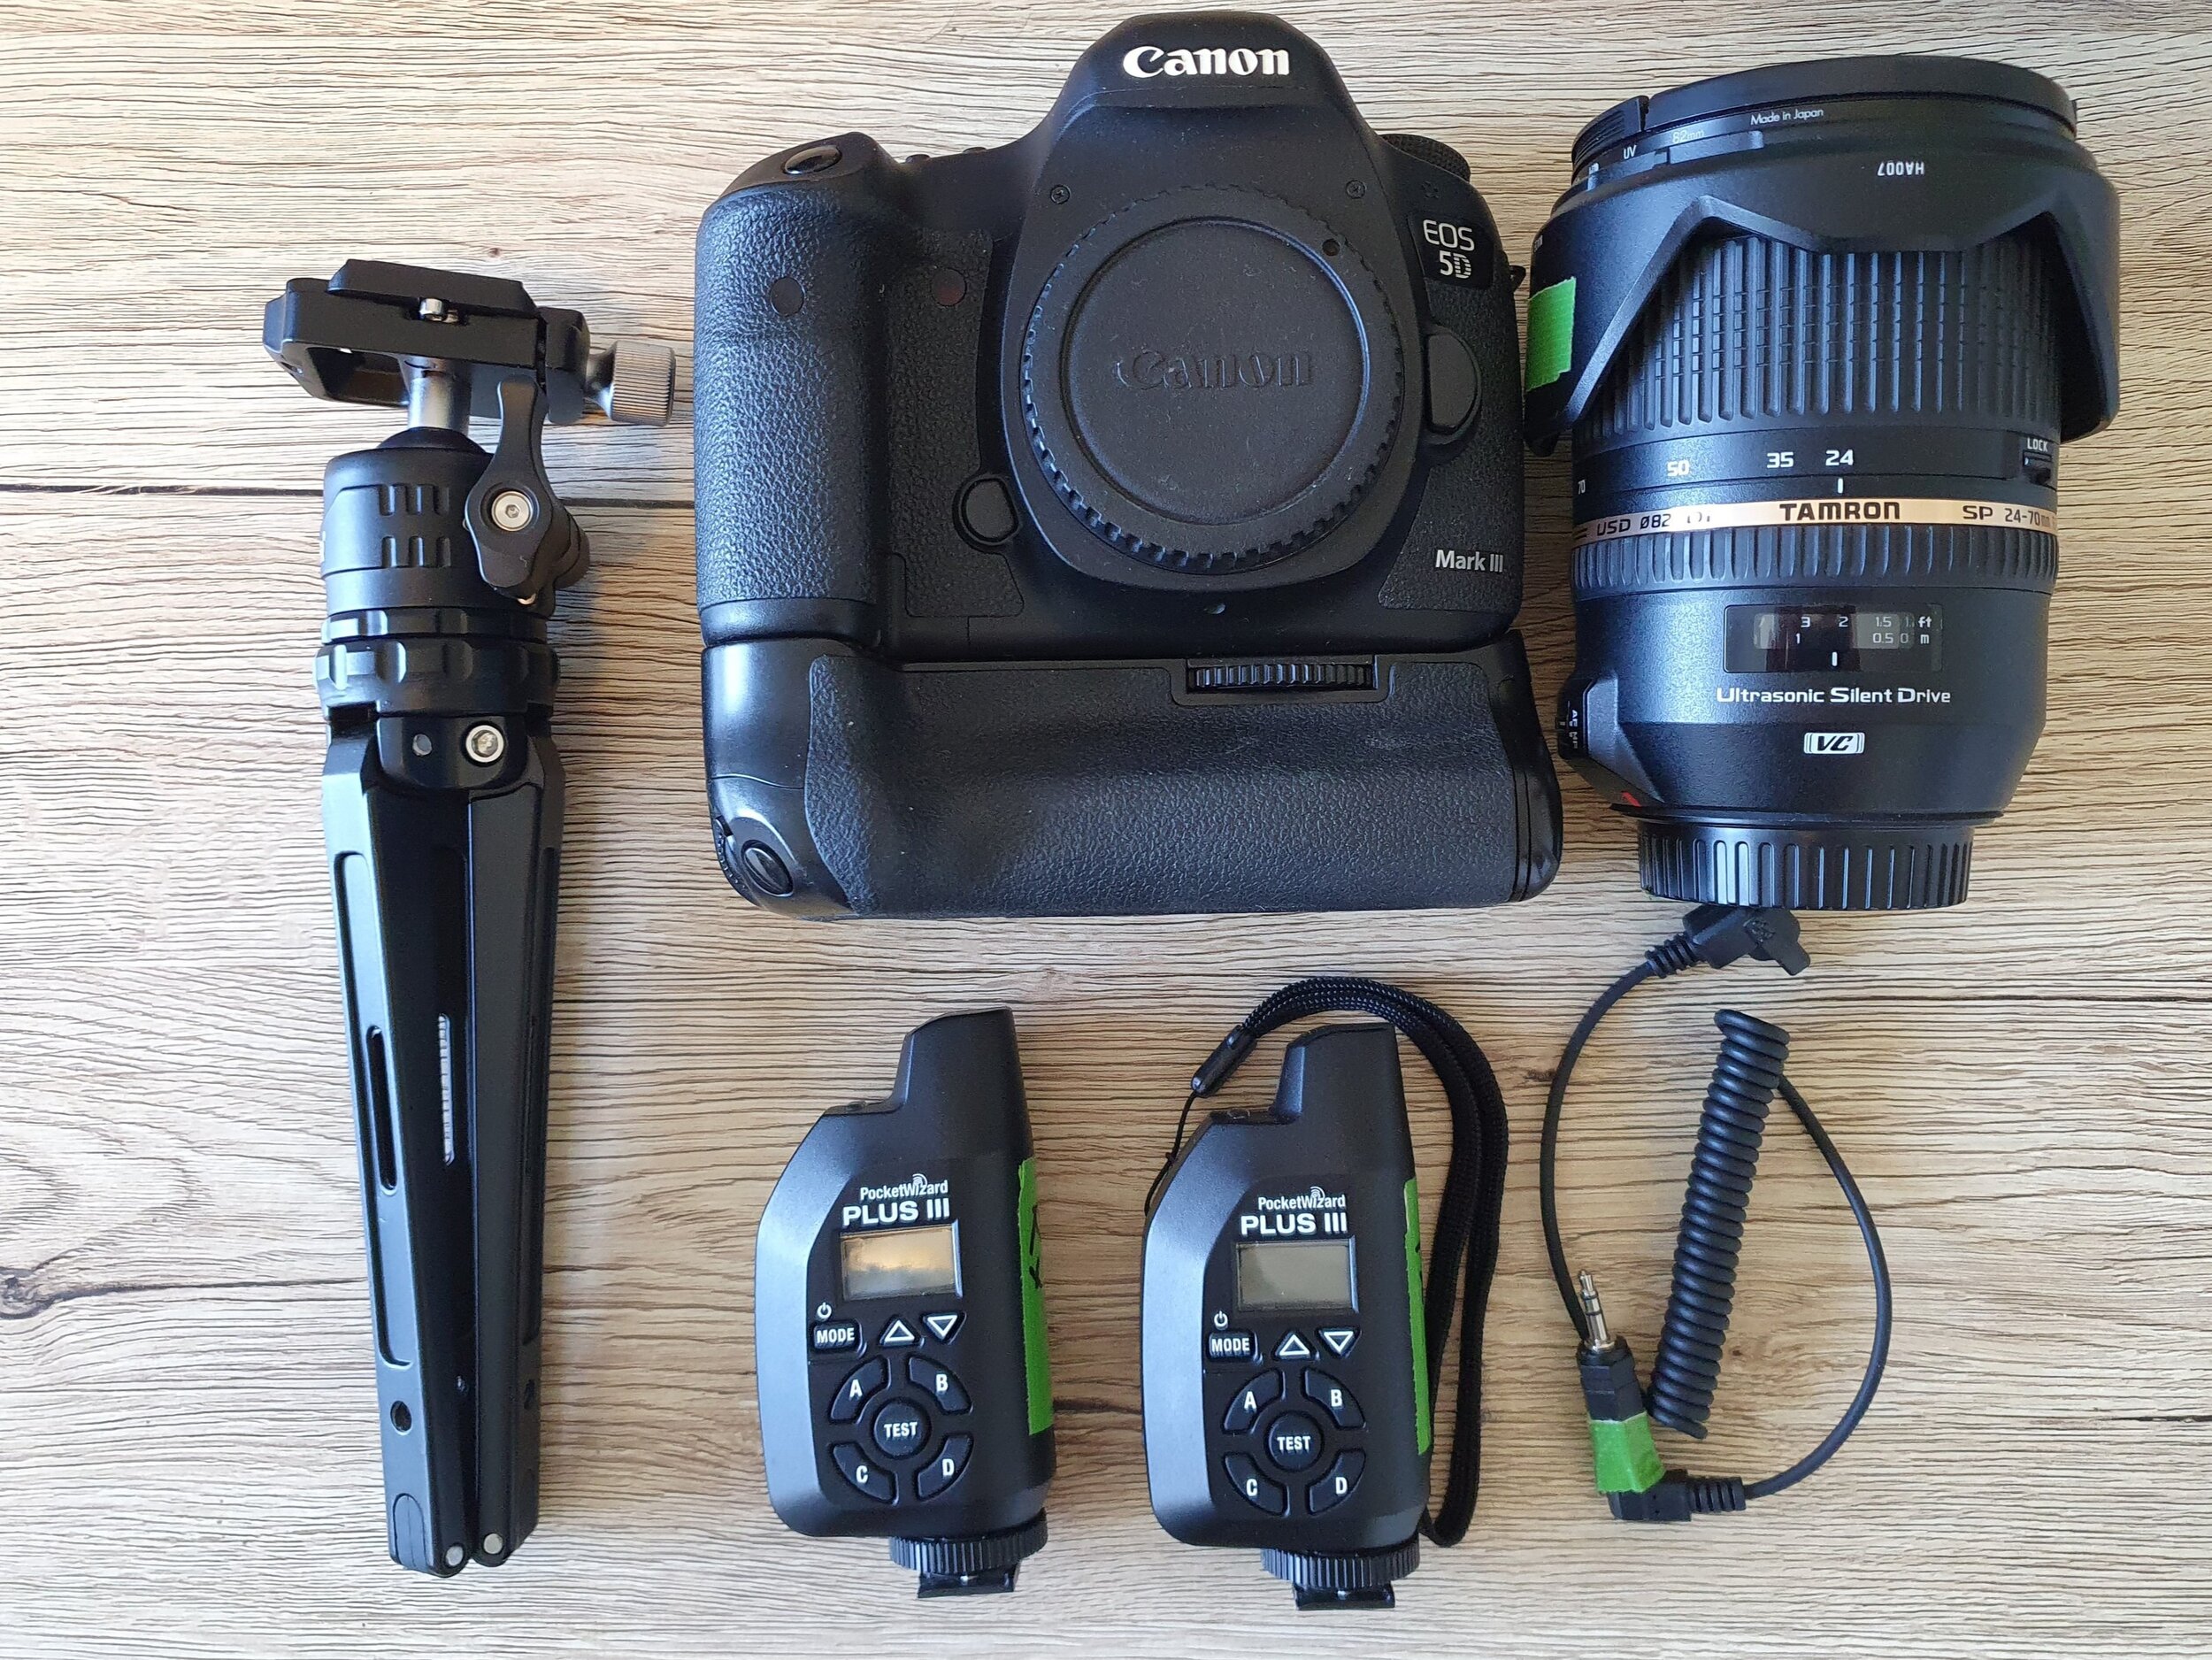
My basic remote camera kit
1) Camera and lens. This will depend on what sort of shot you’re aiming for. I tend to use a 24-70mm f/2.8 for my remote.
2) Remote triggers. I use Pocketwizard Plus III remotes, but if you are on a budget there are some cheaper options that work well enough for beginners.
3) Camera support. Depending on here you are placing your remote, this could be a mini-tripod, a ground plate, or something like a Manfrotto Magic Arm if you are going to be hanging the camera. I LOVE this Neewer mini-tripod; it is full-metal construction and is extremely sturdy. I’ve tried using a GorillaPod in the past, but they tend to droop over time with the weight of the lens.
4) Safety gear. If you are going to be hanging the camera, you absolutely must ensure that it can’t come free. Not only will it wreck your gear, but a camera + lens falling from the rafters is going to cause some serious damage to any humans in the way. Some thin steel cable attached to the camera strap mounts and then looped around a beam etc will catch your camera if the primary support fails.
How to set up your remote camera
Pick your spot. Think about composition and trying to capture peak action. For me, this would be on the inside of a fast corner at a MTB race, or at the finish line of a triathlon.
Get everything connected. Set up the receiver on your camera, mount the camera to your support, and fire off the transmitter to make sure everything is working. You will need to pick a channel that isn’t going to interfere with other photographers. Most large events will allocate channels, but if it is only a couple of you it should be easy enough to have a chat and work it out amongst yourselves.
Get your rig in position. Set your composition using the live view, and then focus on where you want to capture your subject. Once you have the focus point set, do not move your rig! Switch your lens to manual focus so it doesn’t try to re-focus when you trigger it, and tape the focus ring with some gaffer tape so that it can’t move.
Test, again. After making sure you’ve got cards in the camera, go to your shooting location and fire off a couple of shots with the trigger. Check the camera has fired properly. Now you’re ready to go.

A simple ground remote setup.

Have a play around with the different perspectves you can capture with a remote camera.
A few things to keep in mind:
Be mindful of your camera going to sleep. If it has gone to sleep, the first press on the transmitter will likely just wake the camera, it won’t actually take a shot. You can purchase a pre-release cable, but I find it’s just easier to set the camera to its longest sleep duration and then periodically fire off shots to keep it awake.
Think about how you want to trigger your remote. With Pocketwizards, you can either just fire them by pressing the button on the transmitter, or you can mount them into the hotshoe of your camera and it will fire the transmitter every time you take a photo with that camera. That can be an advantage because it means you don’t have to worry about a separate action to trigger the remote, but it will also mean that you end up with a bunch of photos that you might not want because the remote is firing even if you’re maybe shooting something completely different. I usually stick with triggering it manually using the transmitter in my hand.
Practice. It might take you a while to get a hang of the timing or placement of a remote camera. Technology can also sometimes go wrong. Do not rely on it to capture any “must capture” shots!
Other resources
“One Shot: Photographing the Olympic Games” is an amazing short-film produced in 2017. It has some great footage of remote cameras in use. The bank of cameras at the end of the 100m straight is absurd.
Pocketwizard.com has a great blog section with plenty of ideas for remote cameras