
A full day on the Coastrek course—from a storm-lashed Palm Beach sunrise to a dramatic finish line—capturing endurance, connection and the shifting light of the NSW coastline.
Read MoreTasmanian Holiday 2022 Photography
Tasmanian Holiday 2022
A springtime escape to the Apple Isle
My wife and I recently set off on our first proper holiday in nearly three years. Tasmania had been on our bucket list for a while, and Spring is meant to be the ideal time to visit, with the wet, cold winter giving way to crisp Spring days. I have travelled to the North East of Tasmania a number of times for MTB trips with mates, but this was the first time travelling to the South East since I was a child.
Pictures at the end if you want to skip the text
Photo gear I took with me
The natural beauty of Tasmania is a photographers paradise, and for me this was a perfect opportunity to rediscover some of that spur-of-the-moment photographic artistry after shooting commercial clients and events for the better part of three years.
I agonised over what photography gear to take with me. I didn’t want to find myself yearning for a particular piece of gear, but I’ve also made the mistake in the past of taking too much gear with me, so I ultimately settled on the following load out:
Canon 5Dmk3. I used the time away as an opportunity to send my R6 and 1Dx off for a service with CPS, and I looked forward to the opportunity to spend some time with this old faithful body that served me well for so many years.
24–70mm f/2.8. In the interest of travelling light, this is the only lens that I took with me.
DJI Mini 3 Pro. My current drone of choice, and a nice small package.
M1 MacBook Pro. This was a necessity because I had some video work to deliver to a client while we were away.
IPad Air.
What I could have left at home
The drone! I should have done some more research before leaving, it turned out that everywhere scenic that I would have liked to use the drone was in a National Park where they are prohibited. The drone did not get powered on a single time.
It was a necessity to bring the MacBook Pro, but I really wished I could have left it at home. It adds such unnecessary weight to my kit. In the future I’ll probably assign any remaining video editing to my editor so that I can just travel with my IPad for photo editing.
What I wished I had with me
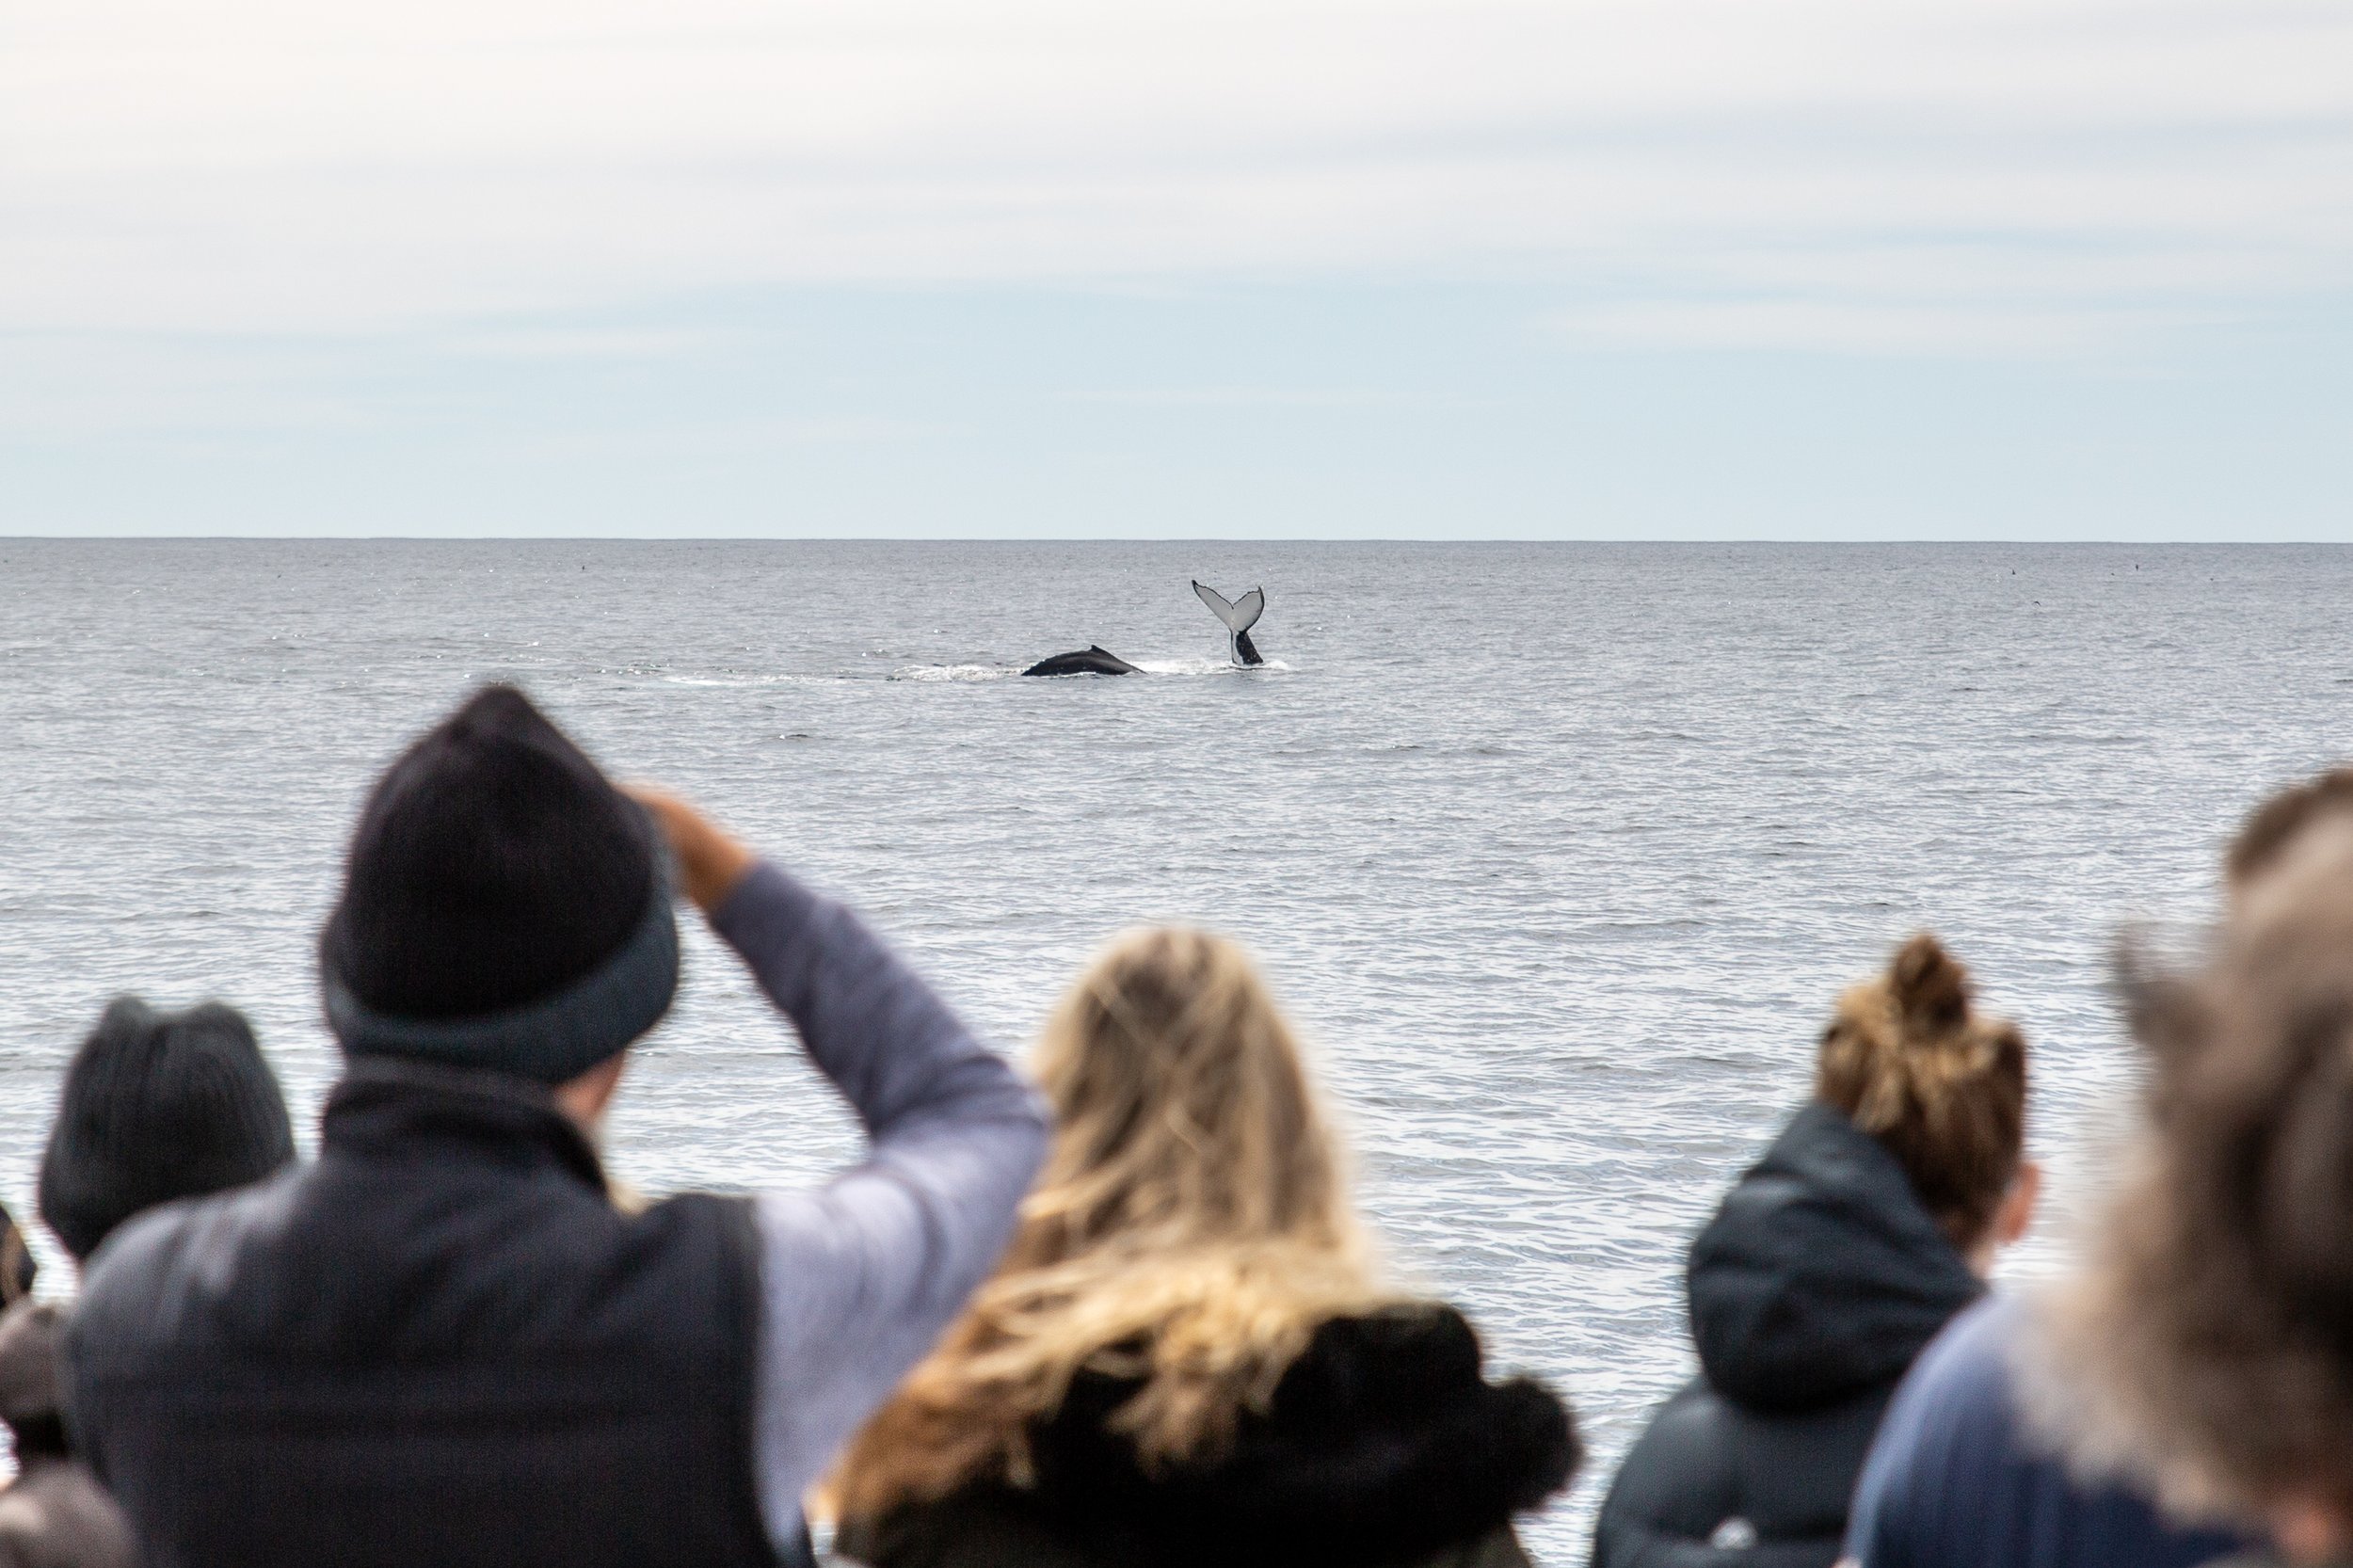
A longer lens. I agonised over bringing a longer lens with me, but upon reflection there were so many opportunities where a 70–200 with a 1.4x teleconverter would have been amazing. Whales, seals, birds…all out of reach with my 24–70.
A travel tripod. Another choice to leave at home, but the amazingly dark skies of Bruny Island really lent themselves to some astrophotography and I had wished I had a tripod with me instead of having to try to prop my camera up with a pillow!
What I loved about my holiday photography
Rediscovering how much of an amazing body the 5Dmk3 is. There is just something about the colour rendering and quality of the files that isn’t found in my R6. It is a valuable reminder to myself and others that you don’t need the most recent body to create some amazing images.
Shooting with no particular purpose. Walking around and finding compositions without any pressure is what got most of us into photography in the first place.
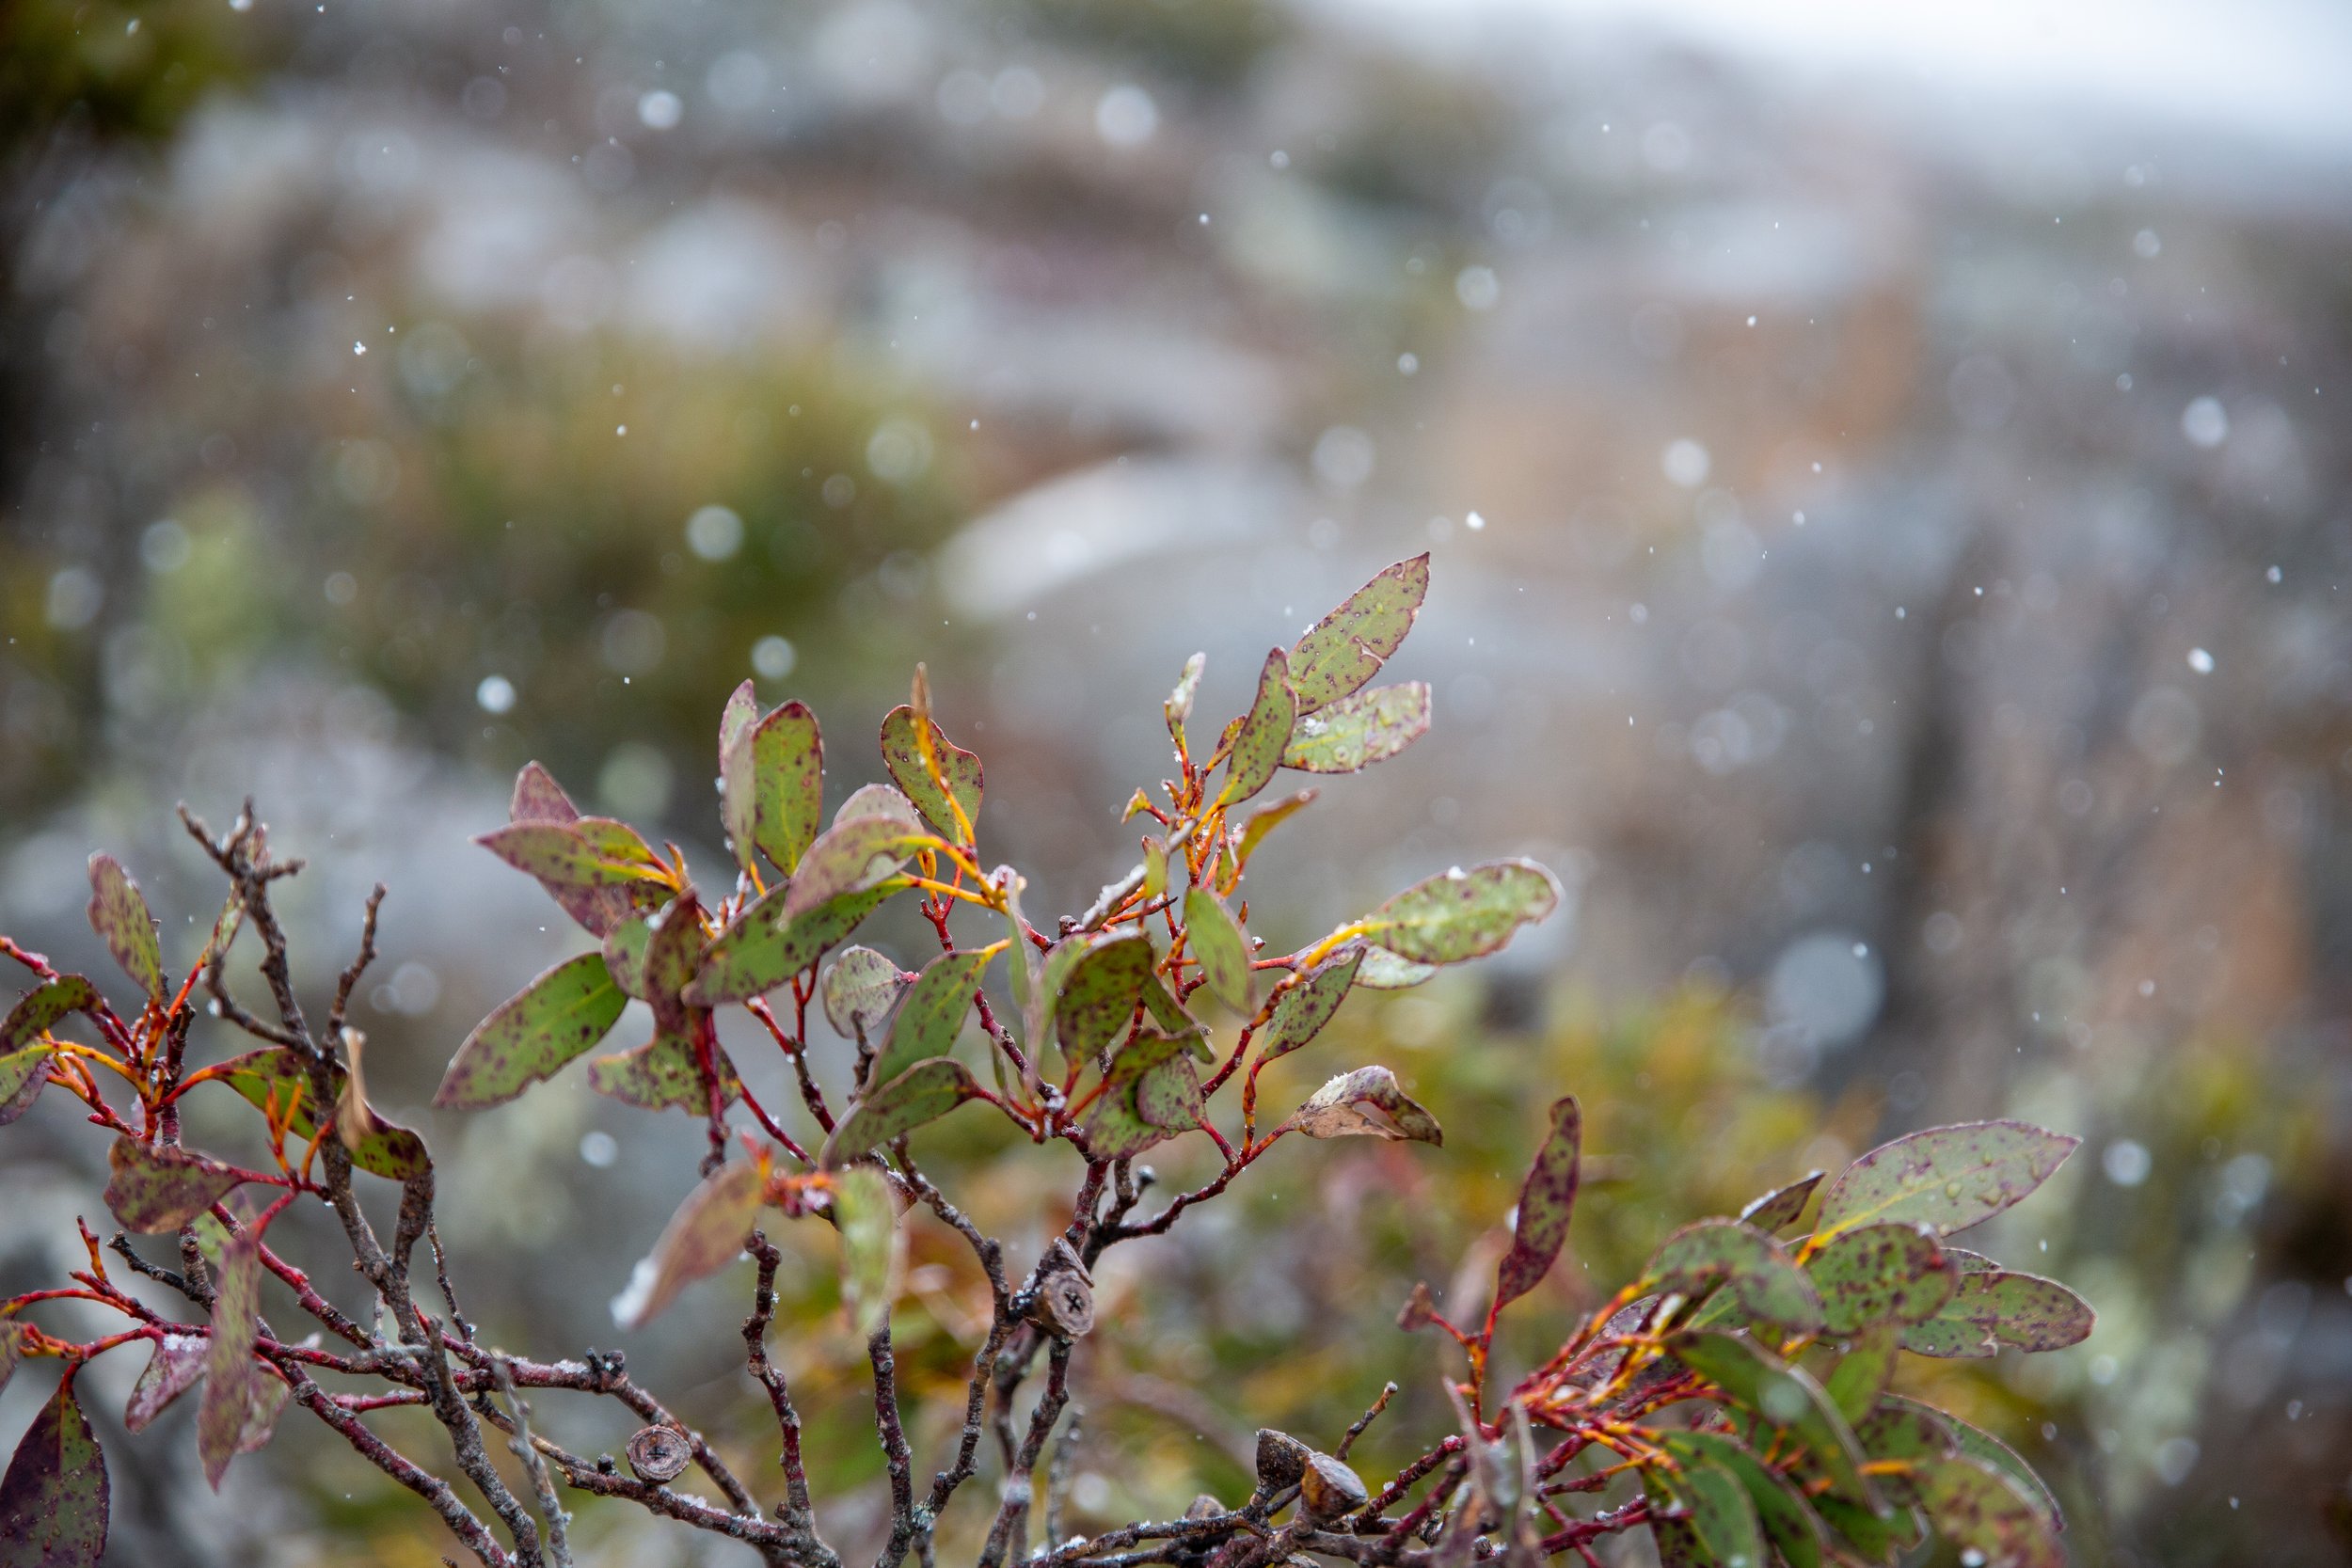
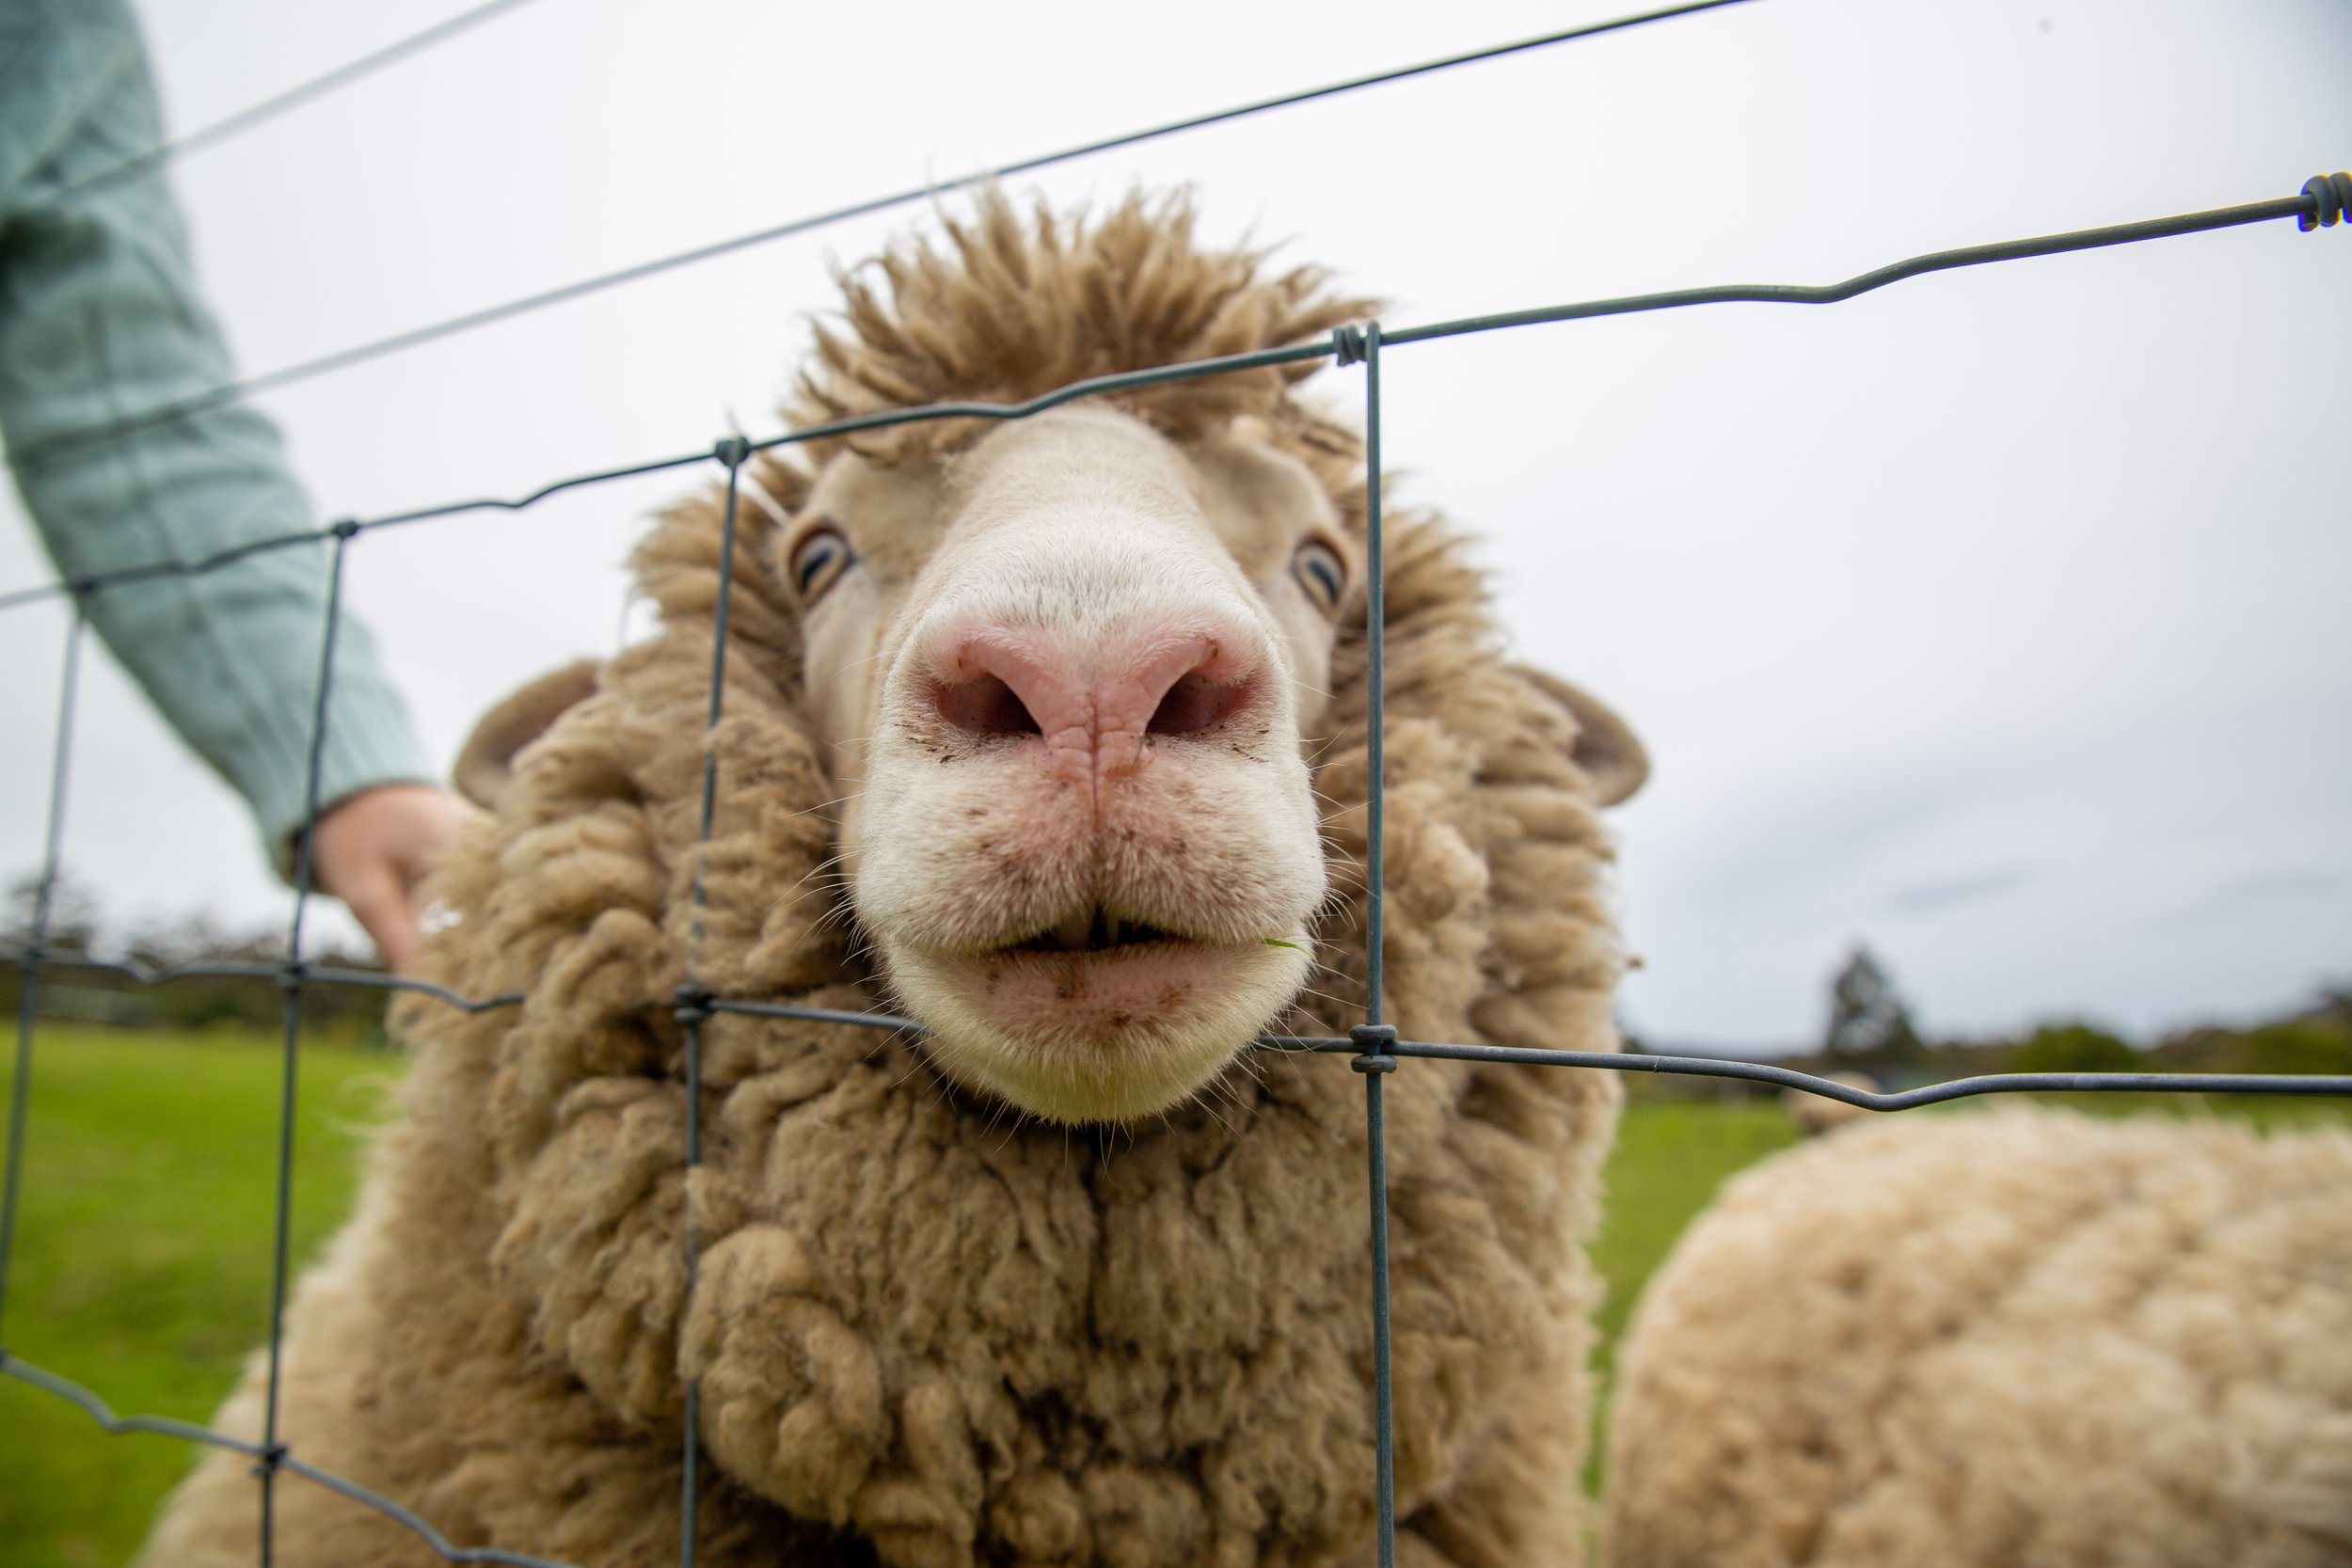
Landscapes. I realised that I hadn’t really shot any landscapes or nature in over three years. Tasmania is such a wild and rugged environment.
Dark skies. The light pollution in Sydney makes seeing stars a rarity, but the dark skies outside of Hobart are an astrophotographers paradise. I wasn’t really equipped for it and hadn’t planned on it, but I was still thrilled to be able to capture some Milky Way shots from our amazing accomodation at the Hundred Acre Hideaway on Bruny Island.


8 Event Photography Tips and Tricks to Help You Take Better Photos
Are you about to shoot your first event? Whether it's a wedding, corporate function or family gathering, there are a few things you need to know in order to take great photos. Event photography requires a different skill set than other types of photography. In order to take great event photos, you need to be prepared for anything and everything. In this blog post, we will discuss 8 tips and tricks for shooting better event photos. We'll also touch on camera gear and software that can help make the process easier. So whether you're a beginner or an experienced photographer, read on for some helpful advice!
1) Be Prepared
Event photography is all about being in the right place at the right time. This means that you need to be prepared for anything and everything. Make sure you have a list of must-have shots, know your equipment inside and out, and pack extra batteries and memory cards.
2) Arrive Early
Arriving early to an event is always a good idea, but it's especially important for photographers. This gives you time to scope out the best locations for taking photos, as well as time to get acclimated to the lighting conditions.
3) Dress Appropriately
Dressing inappropriately is one of the quickest ways to ruin your event photography. Not only will you stand out like a sore thumb, but you'll also be more likely to draw attention away from the event itself.
4) Be Ready at All Times
This means having your camera in your hand and being prepared to take photos at a moment's notice. You never know when something amazing is going to happen, so it's important to be ready at all times.
5) Get Close
One of the most common mistakes made by event photographers is not getting close enough to their subject. This results in photos that are either too blurry or too small. So make sure you get close enough to get the shot you want.
6) Use a Flash
A flash can be your best friend when taking event photos. It will help you to get better photos in low light conditions and can also be used to create some interesting effects. Just be sure not to use it too much or you'll end up with some very bright photos.
7) Take Lots of Photos
It's always better to have too many photos than not enough. This way you can choose the best ones when you're editing your photos later.
8) Edit Your Photos
Editing your photos is a great way to make them look their best. There are a lot of different editing software programs out there, so find one that you're comfortable with and start playing around with it.
These are just a few event photography tips to help you get started. Experiment with different techniques and see what works best for you. And most importantly, have fun! Capturing the right moments at an event can be a challenge, but with proper preparation it can be a lot of fun.
What is your favourite type of event to photograph? Let me know in the comments below. I’d love to hear about your experiences as an event photographer.
Top Sports Photography Accessories 2022
Top Sports Photography Accessories in 2022
Sports photography is more than just a camera and a lens
A nice camera body and a fast, sharp lens are the “sexy” part of sports photography, but it is often the accessories that can make or break your sports photography experience.
With a seemingly endless array of accessories on the market, it is easy to get caught up in overpriced gear that you don’t actually need. To help, we’ve put together a list of our essential sports photography accessories to help you take your photography to the next level.
Essential Sports Photography Accessories
Bag
Rain cover
Monopod
Harness
Seat/stool
Memory card pouch
Multitool
Speedlight/off-camera flash
Remote triggers
Bag
A good bag is essential. You need a way to carry ALL your gear safely to and from your sporting events because the last thing you want to be do is trying to juggle your gear as you try to find your perfect spot. Most career photographers have a cupboard full of camera bags, which should highlight just how difficult it can be to find the perfect bag.

My advice; have a think about your current selection of gear, and then buy a bag bigger than you think you need because you will inevitably end up adding gear to your repertoire. My bag of choice is a Lowpro Pro Runner BP 450 AW II. It is big enough to carry two full-size bodies, a 300mm f/2.8, a 70-200 f/2.8 and a 24-70 f/2.8, plus my selection of accessories.
Rain cover
This is a boring, disgustingly overpriced accessory, but a good rain cover is absolutely essential for both the longevity of your gear and your career. If you are shooting professionally, you can’t just say “it’s raining, I’m going home”. You need to be able to stick it out in the worst of conditions, and a good rain cover is the first piece of the puzzle.
I personally use two thinkTANK Hydrophobia 3.0 covers; one that will fit my 300 f/2.8, and the other that will accomodate my 24-70 and 70-200. There are other great options available from Aquatech, and there are also some off-brand options available on Amazon.
Monopod
Another piece of equipment that isn’t particularly exciting, but an absolute back-saver on long shoot days. There are far too many photographers in their mid-40’s with bad backs and bad wrists from repetitive strain injuries suffered as a result of wrangling with heavy gear for too many years.
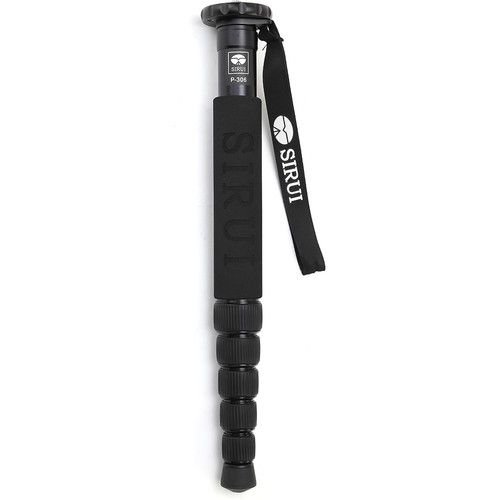
I always use a monopod when shooting with my 300mm, and I’ve even been known to use it with my 70-200 at events such as trail runs when I’m in the same place shooting for hours on end…..there’s simply no need to lift 3kg up to my eye 3000 times.
My favourite monopod is a pretty simple Sirui P306 aluminimum monopod which is a steal at $109, or you can upgrade to a carbon fibre model for another $60. There are plenty of other options available online and in-store at most camera shops.
Harness
A good camera harness will change your photography life. The ability to carry two cameras on you without having to worry neck strain from neck straps, or having to put down one camera to shoot opens up so many additional shooting possibilities.

The BlackRapid Breathe Double Harness is the go-to choice for many sports and event photographers. It is super comfy, and does a great job of transferring weight away from your neck onto the larger muscle groups in your back. I can comfortably shoot with two bodies and lenses with no neck/back pain at the end of the day. It isn’t cheap, at around $AUD200, but it is one of those accessories that is worth every dollar.
There are some other styles also available, including the beautiful MoneyMaker leather harness from Hold Fast or the amazing chest-mounts from Cotton Carrier.
Seat/stool
This is a simple one. If you’re shooting an event where you are going to be crouching for hours on end, just cut out the pain and get yourself a simple camp chair. This $15 stool is the perfect combination of lightweight and compact.
Memory card pouch

Don’t be one of those photographers with a selection of memory cards floating around in the pocket of their camera bag, get yourself a memory card pouch to keep everything protected and organised. I’ve used these ones from ThinkTANK for years, and keep a few on hand to lend to my other photographers when I need to send them away with multiple cards.
Multitool
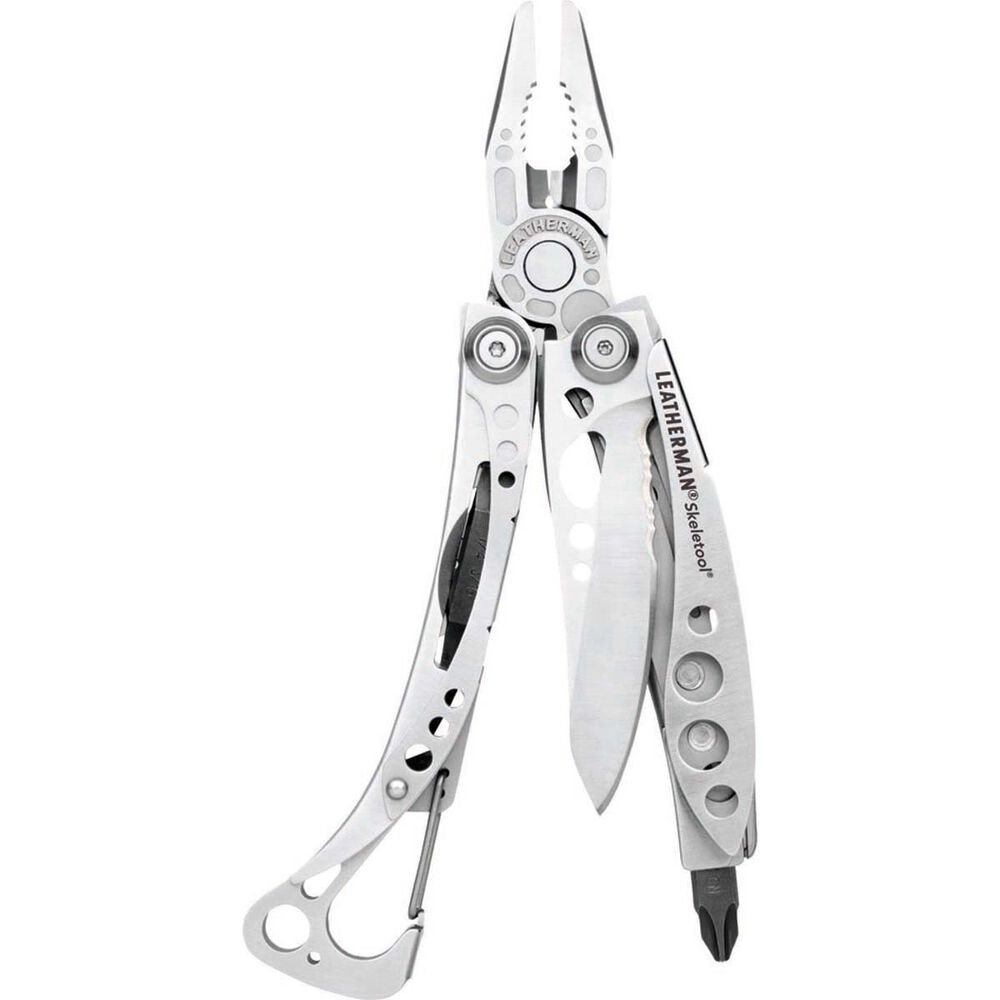
Many of you might already carry a multitool in your vehicle or even in your everyday bag, but I couldn’t count the number of times I’ve pulled my multitool out when shooting sports photography. There is always a camera plate that needs to be tightened, a screw that has come loose on a light stand, or something that needs to be cut. I love my Leatherman Skeletool because it includes interchangeable screwdriver bits (including torx bits that you’ll find on some photography gear), but there are literally countless options out there ranging from a few dollars to a few hundred dollars.
Speedlight
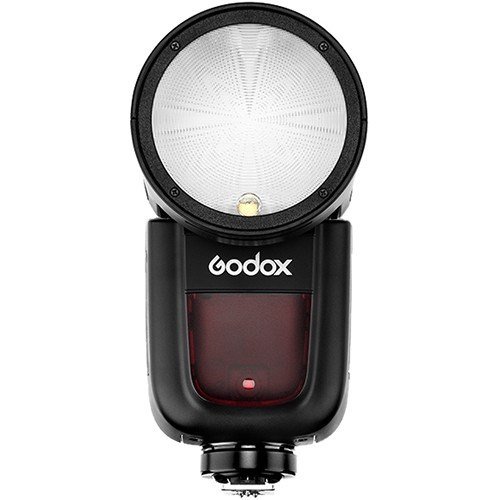
This is now starting to get away from the cheaper accessories into the more expensive side of things, but at some stage in your sports photography journey you will need some form of speedlight to capture those post-game celebrations or presentations. It is VERY easy to spend a lot of money on lighting, so don’t jump into this purchase until you actually need it. My go-to speedlight is a Godox V1, which ties in with all my other off-camera lighting (a topic for another day).
Remote triggers
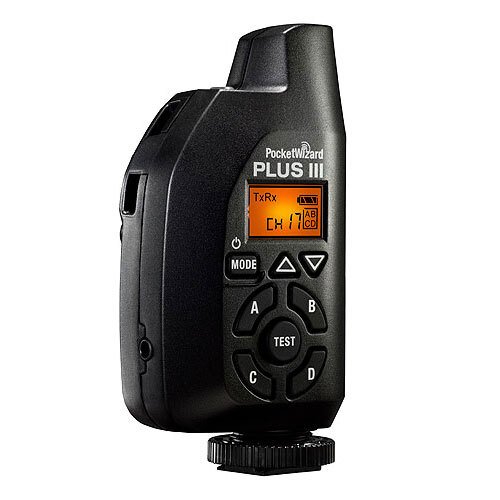
Remote triggers (for firing a remote camera) are another item that you probably shouldn’t buy until you know you need them, because they really are a special use-case for most photographers. Situations where I’ll use a remote camera include MTB races where it isn’t practical/safe for me to be at a particular location, on a finish line where I want to be grabbing a wide shot of someone finishing while also grabbing a tight shot of the individual. The go-to triggering system for most professional sports photographers is a set of Pocketwizard Plus III triggers, but if you’re just starting out with experimenting with remote triggers you can get some much cheaper options on Amazon.
All the gear and at least some idea
So that’s it for my list of essential sports photography accessories. It isn’t an exhaustive list, but these items should keep you going for many years to come. Have I left off anything that is a must-have for you? Let me know in the comments.
If you’re interested in what gear is in my triathlon photography kit, you can check that out here
Canon EOS R6 for Sports Photography - 1 year on
Canon EOS R6 for Sports Photography
It’s been close to a year since I picked up my Canon EOS R6, and I figured it was time to give an update to my first impressions after nearly a year of shooting.
The Canon R6 is a camera that sits in the sweet spot for many photographers looking to get into the mirrorless market without having to jump to something like the Canon R5 or the Canon R3, and it’s frame rate, image quality, and lightning fast autofocus has seen it become a favourite amongst sports photographers, amateur and pro alike.

Some previous concerns
When I wrote about my first impressions of the Canon R6 for Sports Photography, there were a handful of things that I hadn’t yet been able to determine, so I figured I would tick those off the list here first.
1) Battery life. I was a little bit concerned about the quoted battery life for the R6 (380 shots when using the EVF). I understand that measure is taken using a specific set of circumstances, and my real-world experience is so far above that it isn’t funny. Shooting with a battery grip with 2x LP-E6NH batteries I can easily shoot over 2000 photos. I’ve shot a full 8 hour day (photo+video) without having to change batteries. Conclusion: battery life is not a problem.
2) Low-light performance. One word: excellent. I have no issue shooting at 16000 ISO if needed. When using in-camera noise reduction the images come out cleaner than anything I’ve seen before.
3) Electronic shutter. With the sports I shoot a lot of, I really haven’t run into any serious issues with rolling shutter. However, my one major concern with the electronic shutter remains: the lack of any sort of tactile feedback that you’re firing off frames. I just can’t get used to not hearing the shutter. Not a biggie for many people, and I tend to avoid the 20fps electronic shutter anyway, but it is just something to keep in mind.
My real-world experiences using the Canon EOS R6 for Sports Photography
You can read as many technical reviews as you like, but at the end of the day cameras are made to be used out in the field (or in the studio), not in a lab. Below I’ve broken my experience down into the key areas that I think make a good sports camera.
1) Autofocus. This is honestly the biggest leap forward compared to other camera bodies I owned or have owned in the past. The autofocus on the R6 is lightning fast, and they eye AF is super sticky once it locks onto a subject. I have my R6 set up with two focus modes. “AF-on” activates spot AF, and the star button activates eye AF. This allows me to easily switch between AF modes depending on the situation. If I’m filling the frame with one person, eye AF is the way to go for me, but if there are multiple subjects in the frame I’ll tend to revert to spot AF so that I can easily pick which subject is in focus.
2) Frame rate. The 12 frames per second mechanical shutter is more than enough for the sports I shoot and thankfully all of my lenses are compatible with the full 12 fps mechanical shutter. This is something that is an important consideration if you’ve got some older Canon or third-party lenses, which may not be compatible with the full shutter speed. The 20 fps electronic shutter is a bit wasted on me and I only use it on rare occasions. I don’t avoid it because of image quality issues, I avoid it because I don’t like the excessive number of frames I end up with. A lot of my work relies on shooting with discipline, and even a quick burst with the electronic shutter will net you 5-10 frames. I wish Canon would allow you to select a lower fps with the electronic shutter.
3) Weather sealing/durability. When you are buying into the Canon mirrorless ecosystem, you need to be aware that the R6 weather sealing is not up to the same standard as the R5, and is nowhere near that of the traditional sports bodies like the 1Dx series. I’ll happily shoot my 1Dx in pouring rain (coupled with an appropriately weather-sealed lens), but the same can’t be said for the R6. I’ve shot it in light drizzle, but even then I have had a number of issues. The most frustrating issue is the inside of the EVF fogging up when there’s even a little bit of moisture present. There is no way to clear this other than leaving it time to dry, and it can be incredibly frustrating to deal with. The solution to this is to use the R6 with an appropriate rain cover, but my go-to when it is pouring with rain is just the workhorse 1Dx. It is bulletproof, and Canon Professional Services will sort it out if I do something stupid and get it too wet.
4) Megapixels. The 20MP sensor is brilliant for the type of sports work I do. I’m never having to do huge crops, so I don’t need to be coming from a high MP base, and I love the manageable file size; I can shoot roughly 2000 RAW + medium JPEG to a 64GB CF card. Over time I’ve also transitioned away from carrying a laptop to most of my events and instead just carry an Ipad Air. The R6 RAW files are a breeze to upload, edit and export on the Ipad.
Final thoughts
The Canon EOS R6 is an exceptionally good camera for most sports photographer. Whilst the top tier agency shooters, and even some enthusiasts, will opt for the R3, at a saving of over AUD$4k the R6 is a no-brainer for most. It combines exceptional autofocus capabilities, frame rate, and manageable file size into a package that will suit most sports photographers for many years to come. If you are willing to manage the not-so-excellent weather sealing, and the need to fork out for a rather expensive battery grip, I couldn’t recommend the R6 highly enough. If I had my time over would I purchase the R6 again? The answer is a resounding YES. In addition to my sports photography work, it has also served me exceptionally well for my event photography/videography, and my sports portrait work. If/when my first generation 1Dx finally kicks the bucket, a second R6 will almost certainly be on the cards.
You can see more of my Canon R6 sport photography at www.instagram.com/_freshie_photography

Coastrek Sydney 2022 in photos
A Coastrek photo story
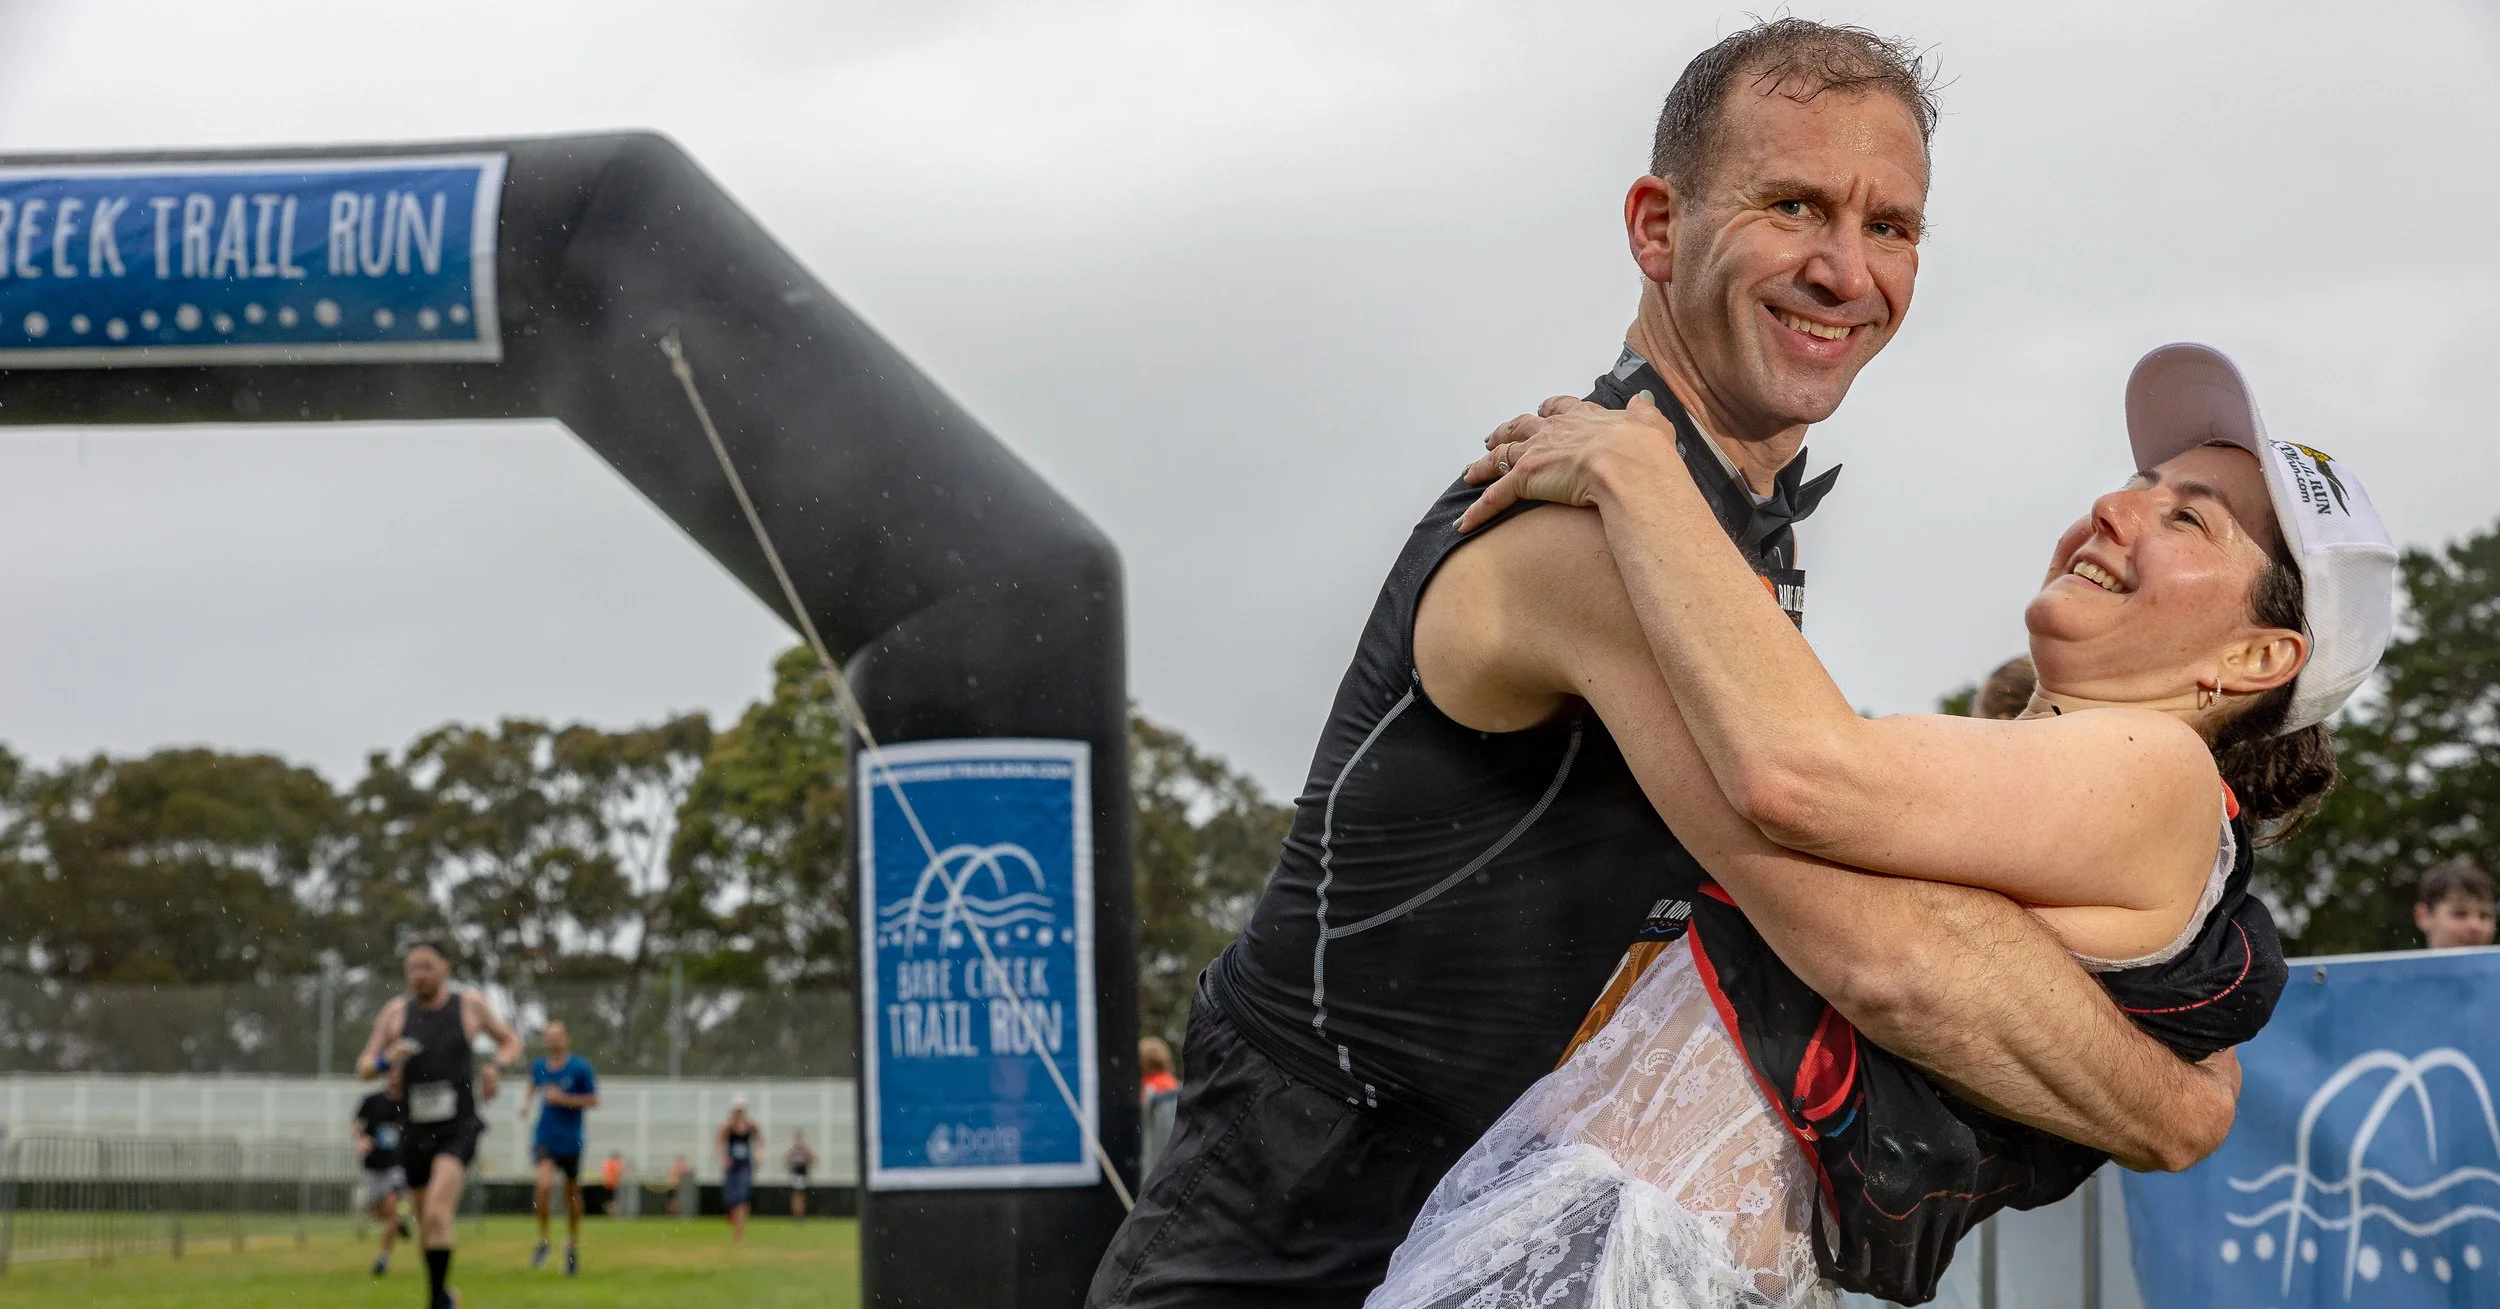
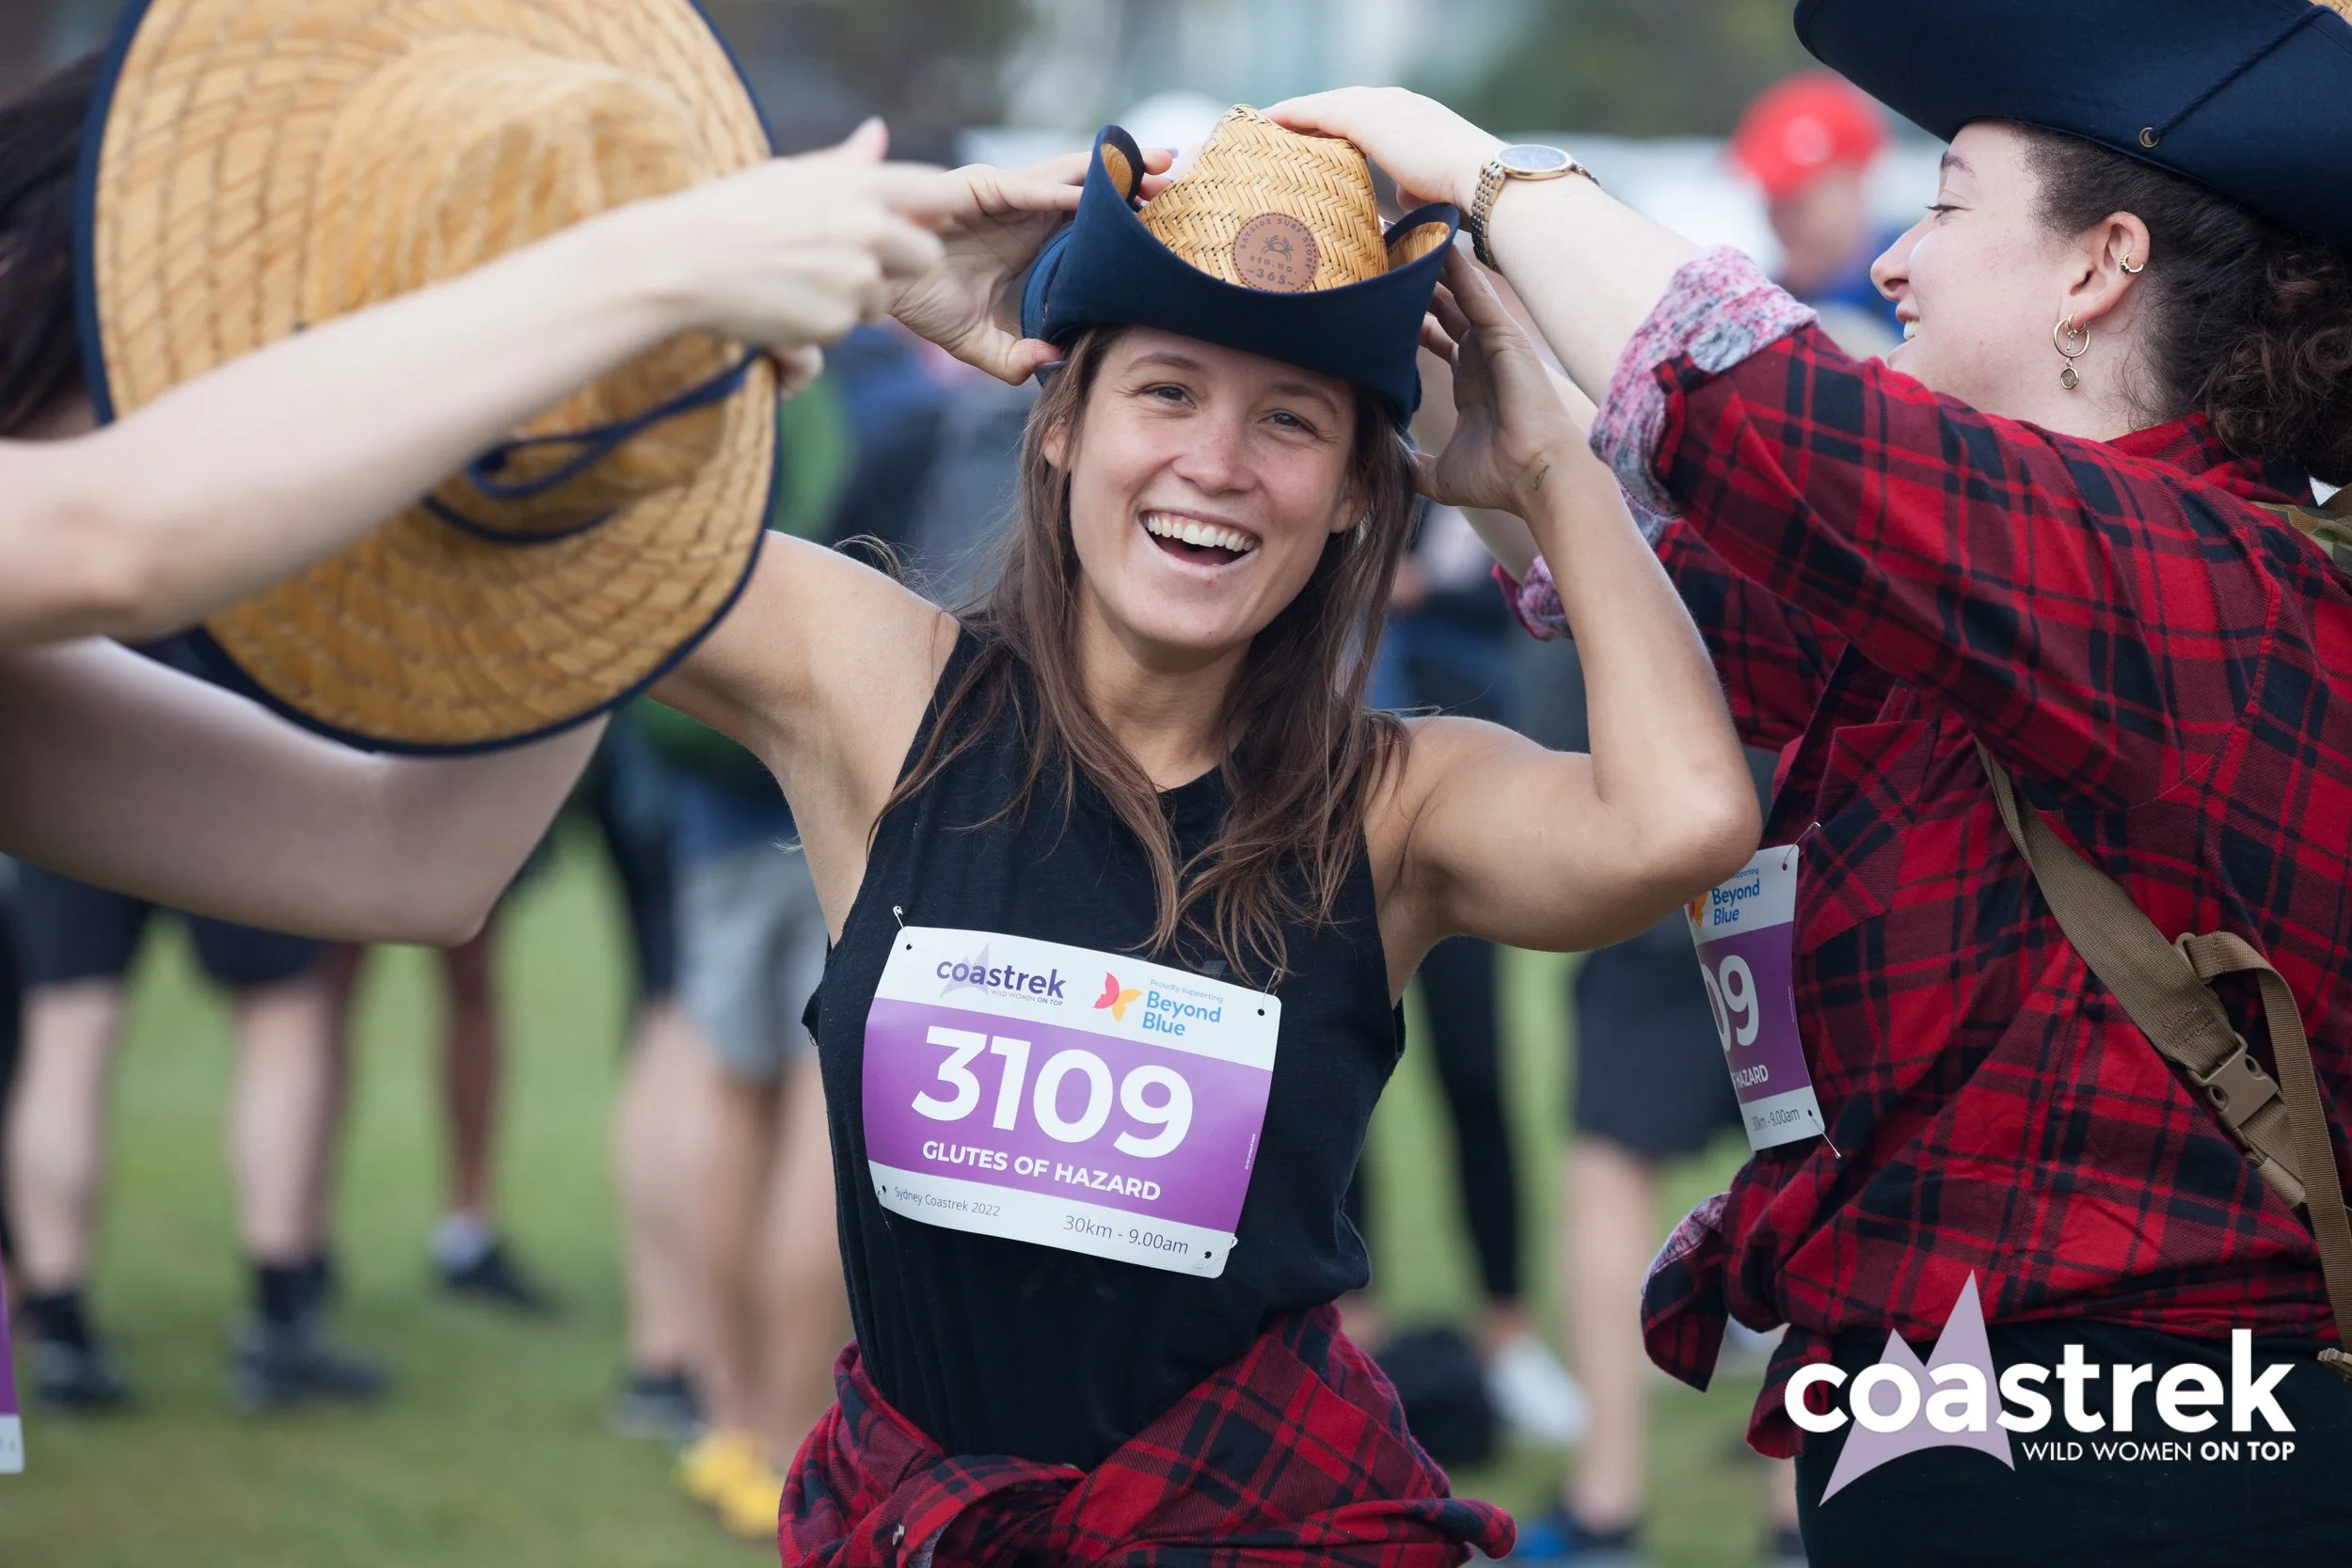
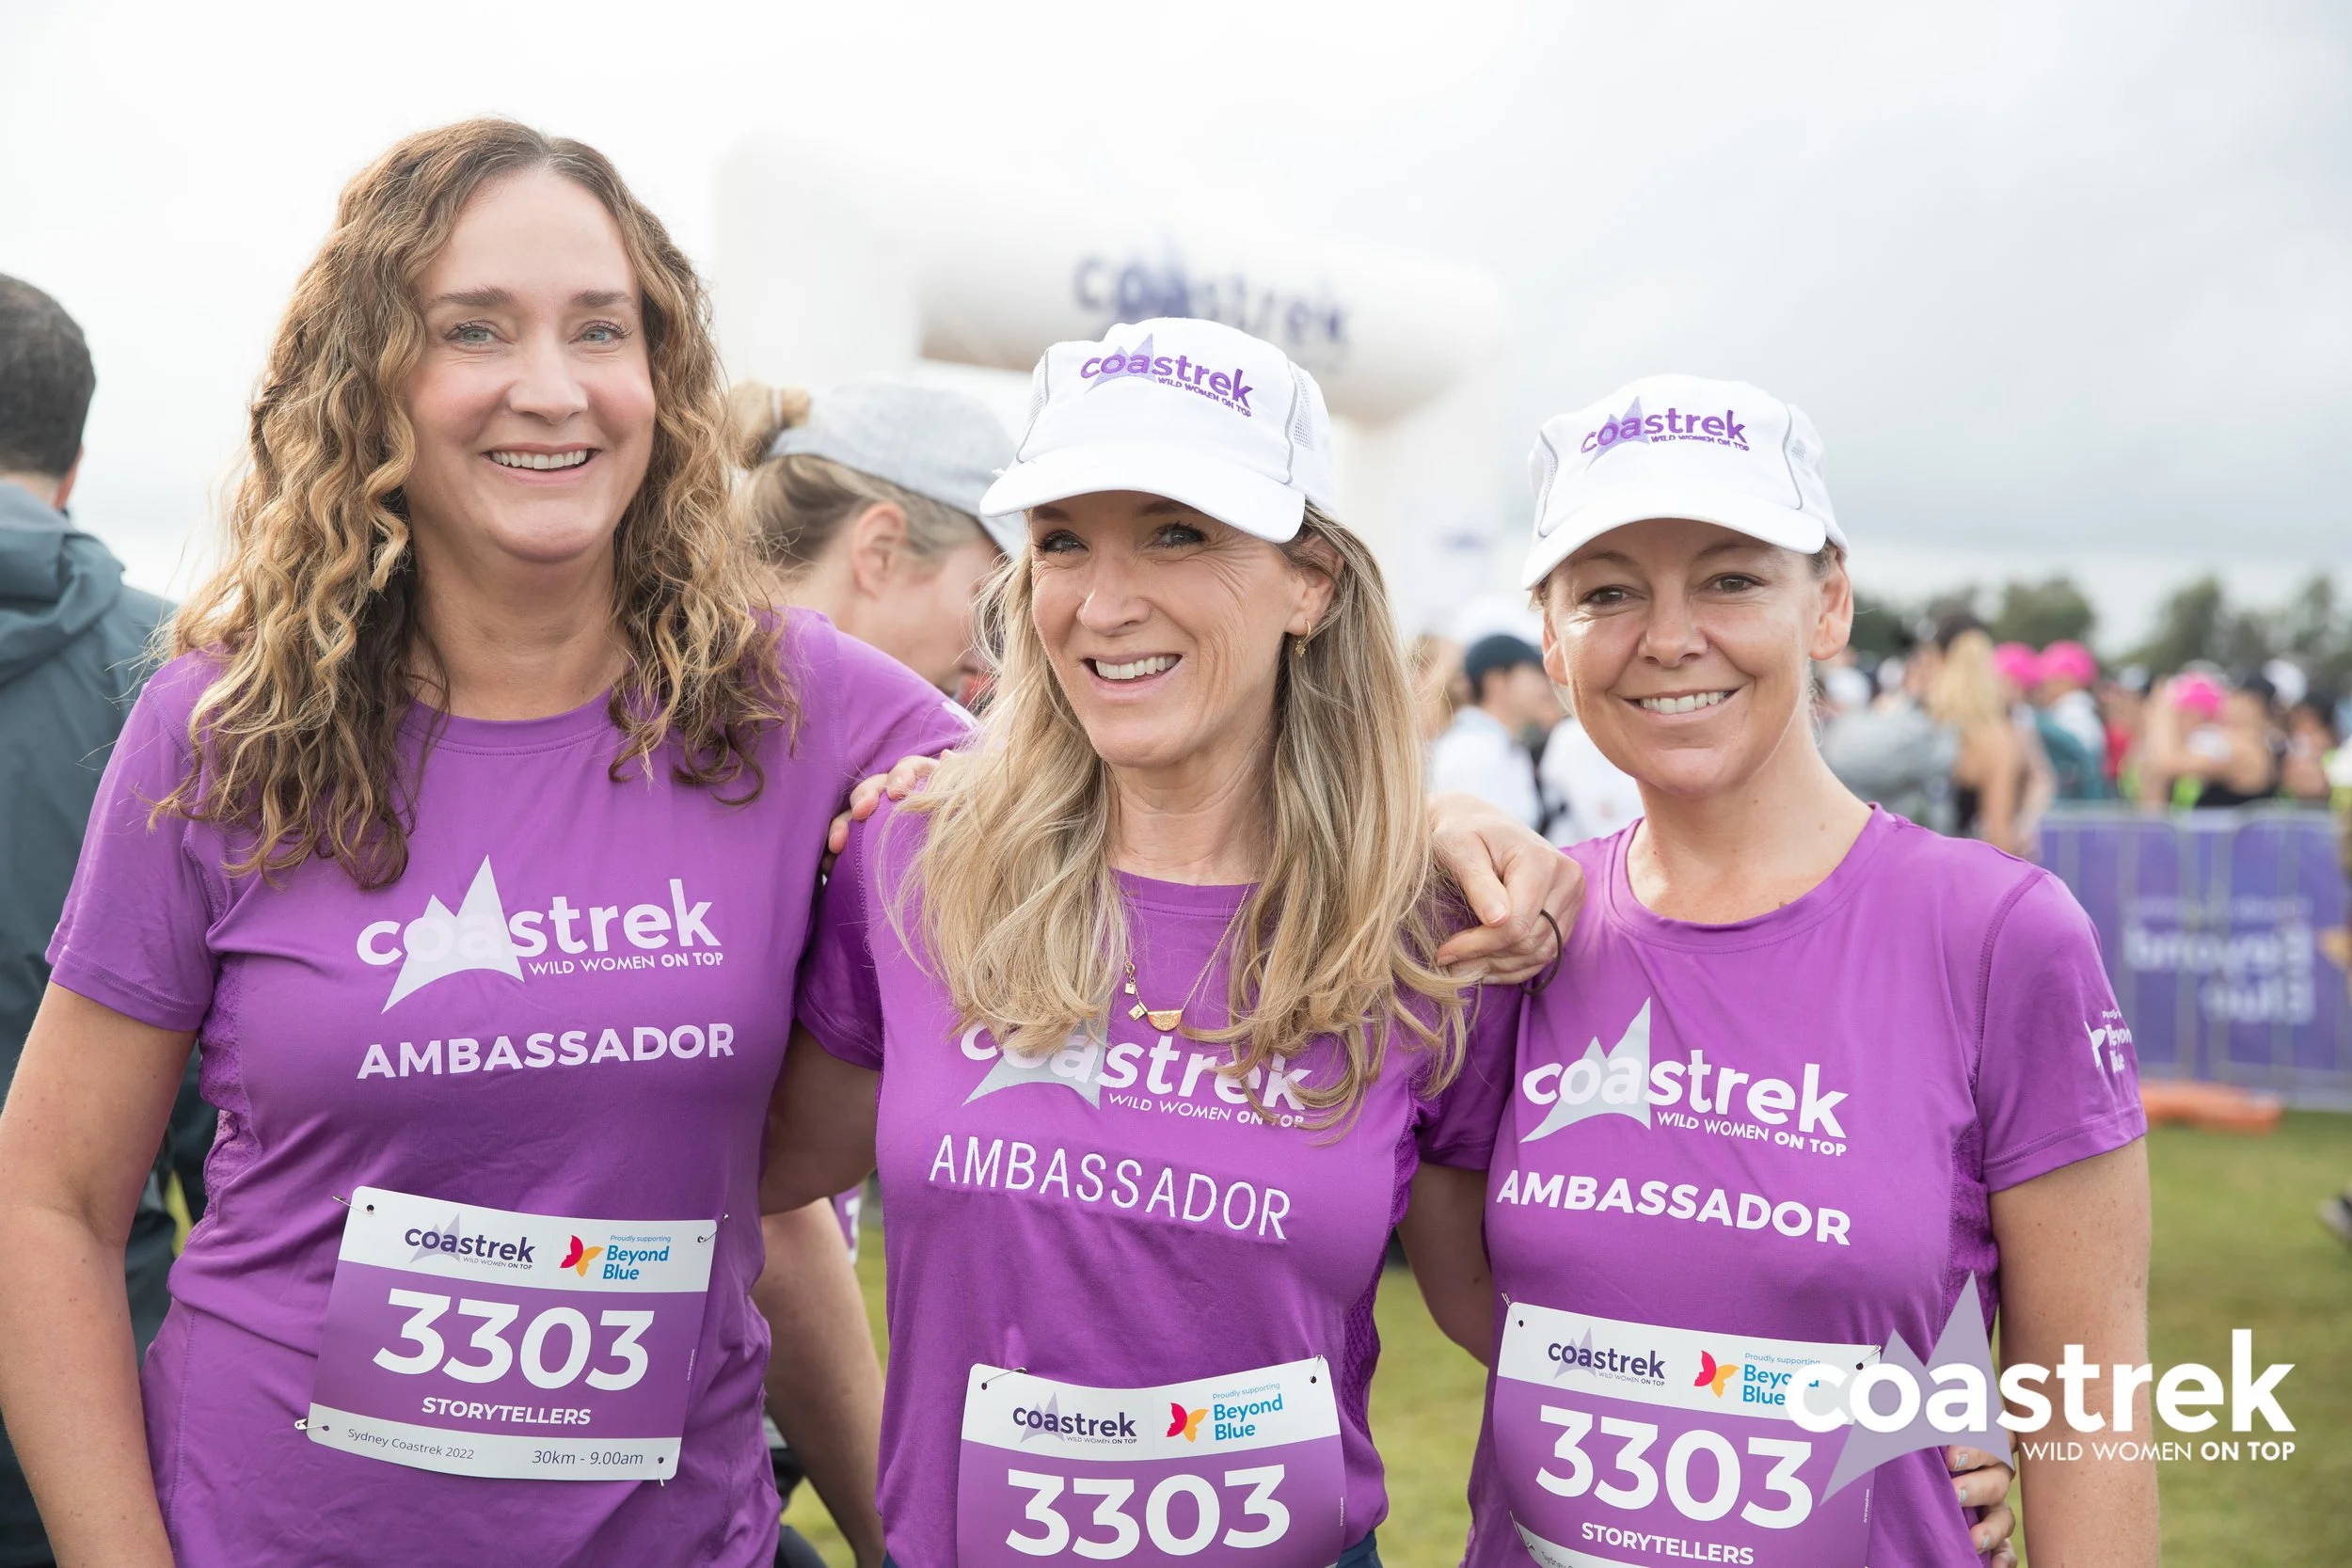
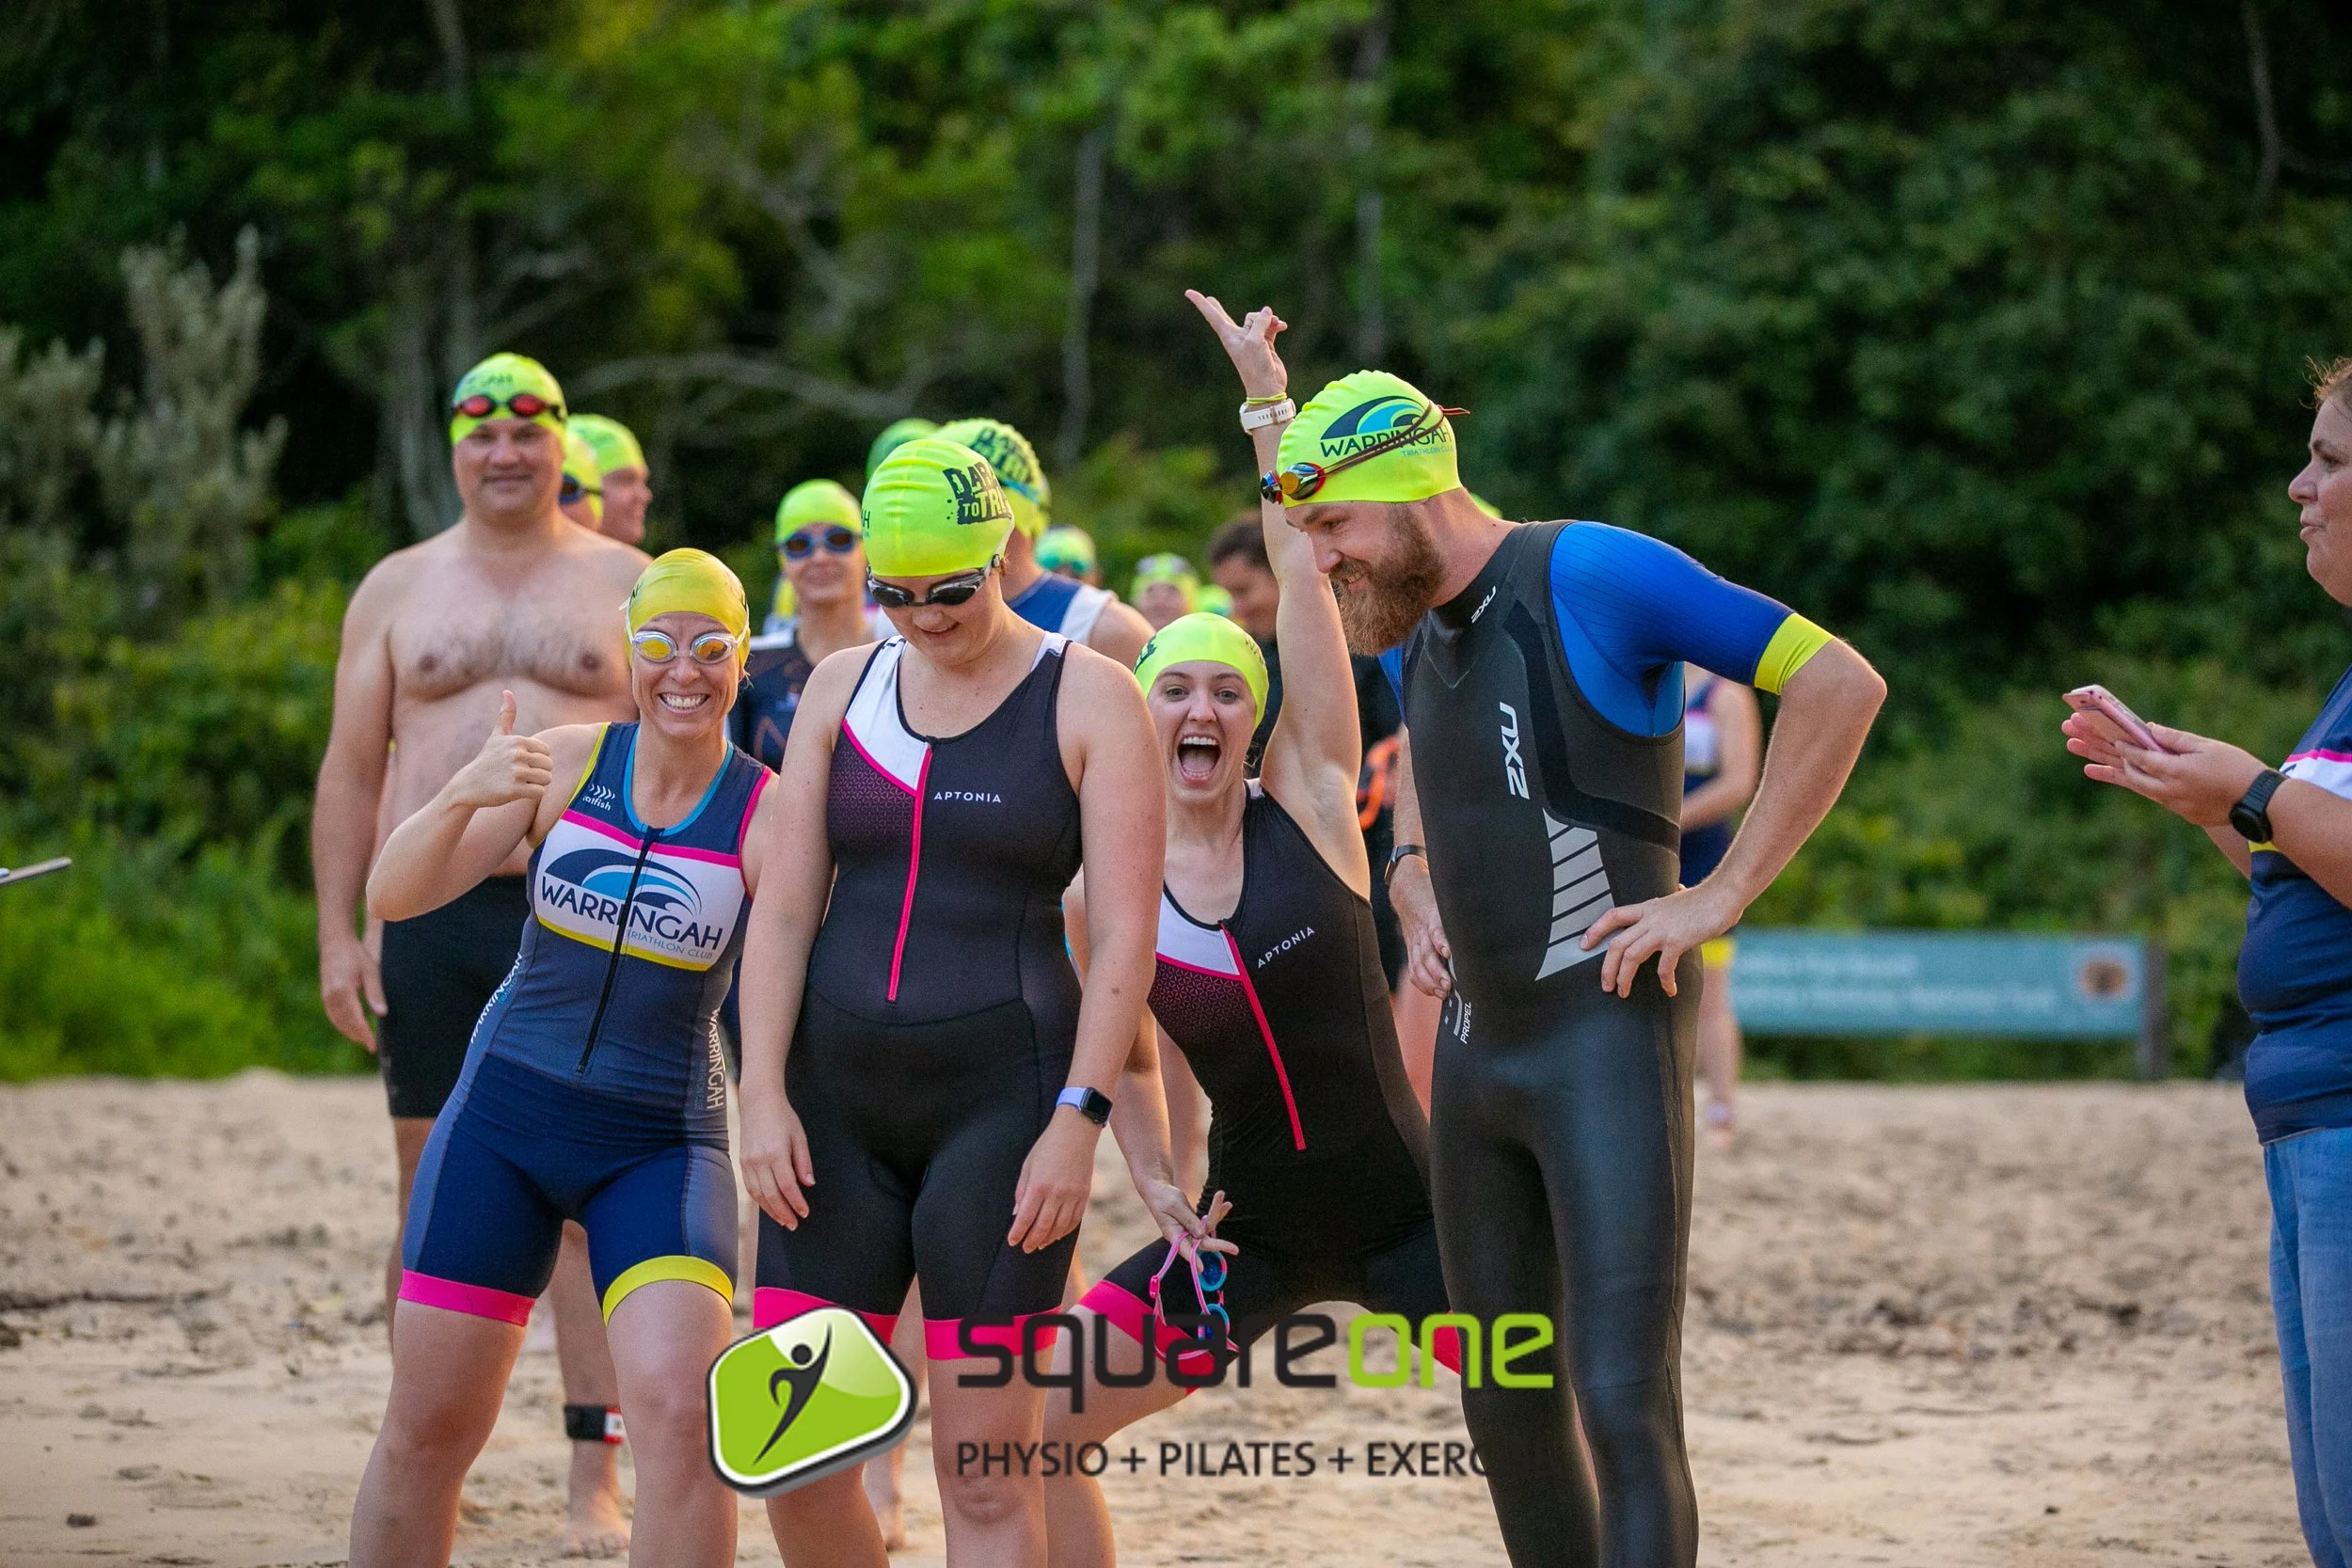
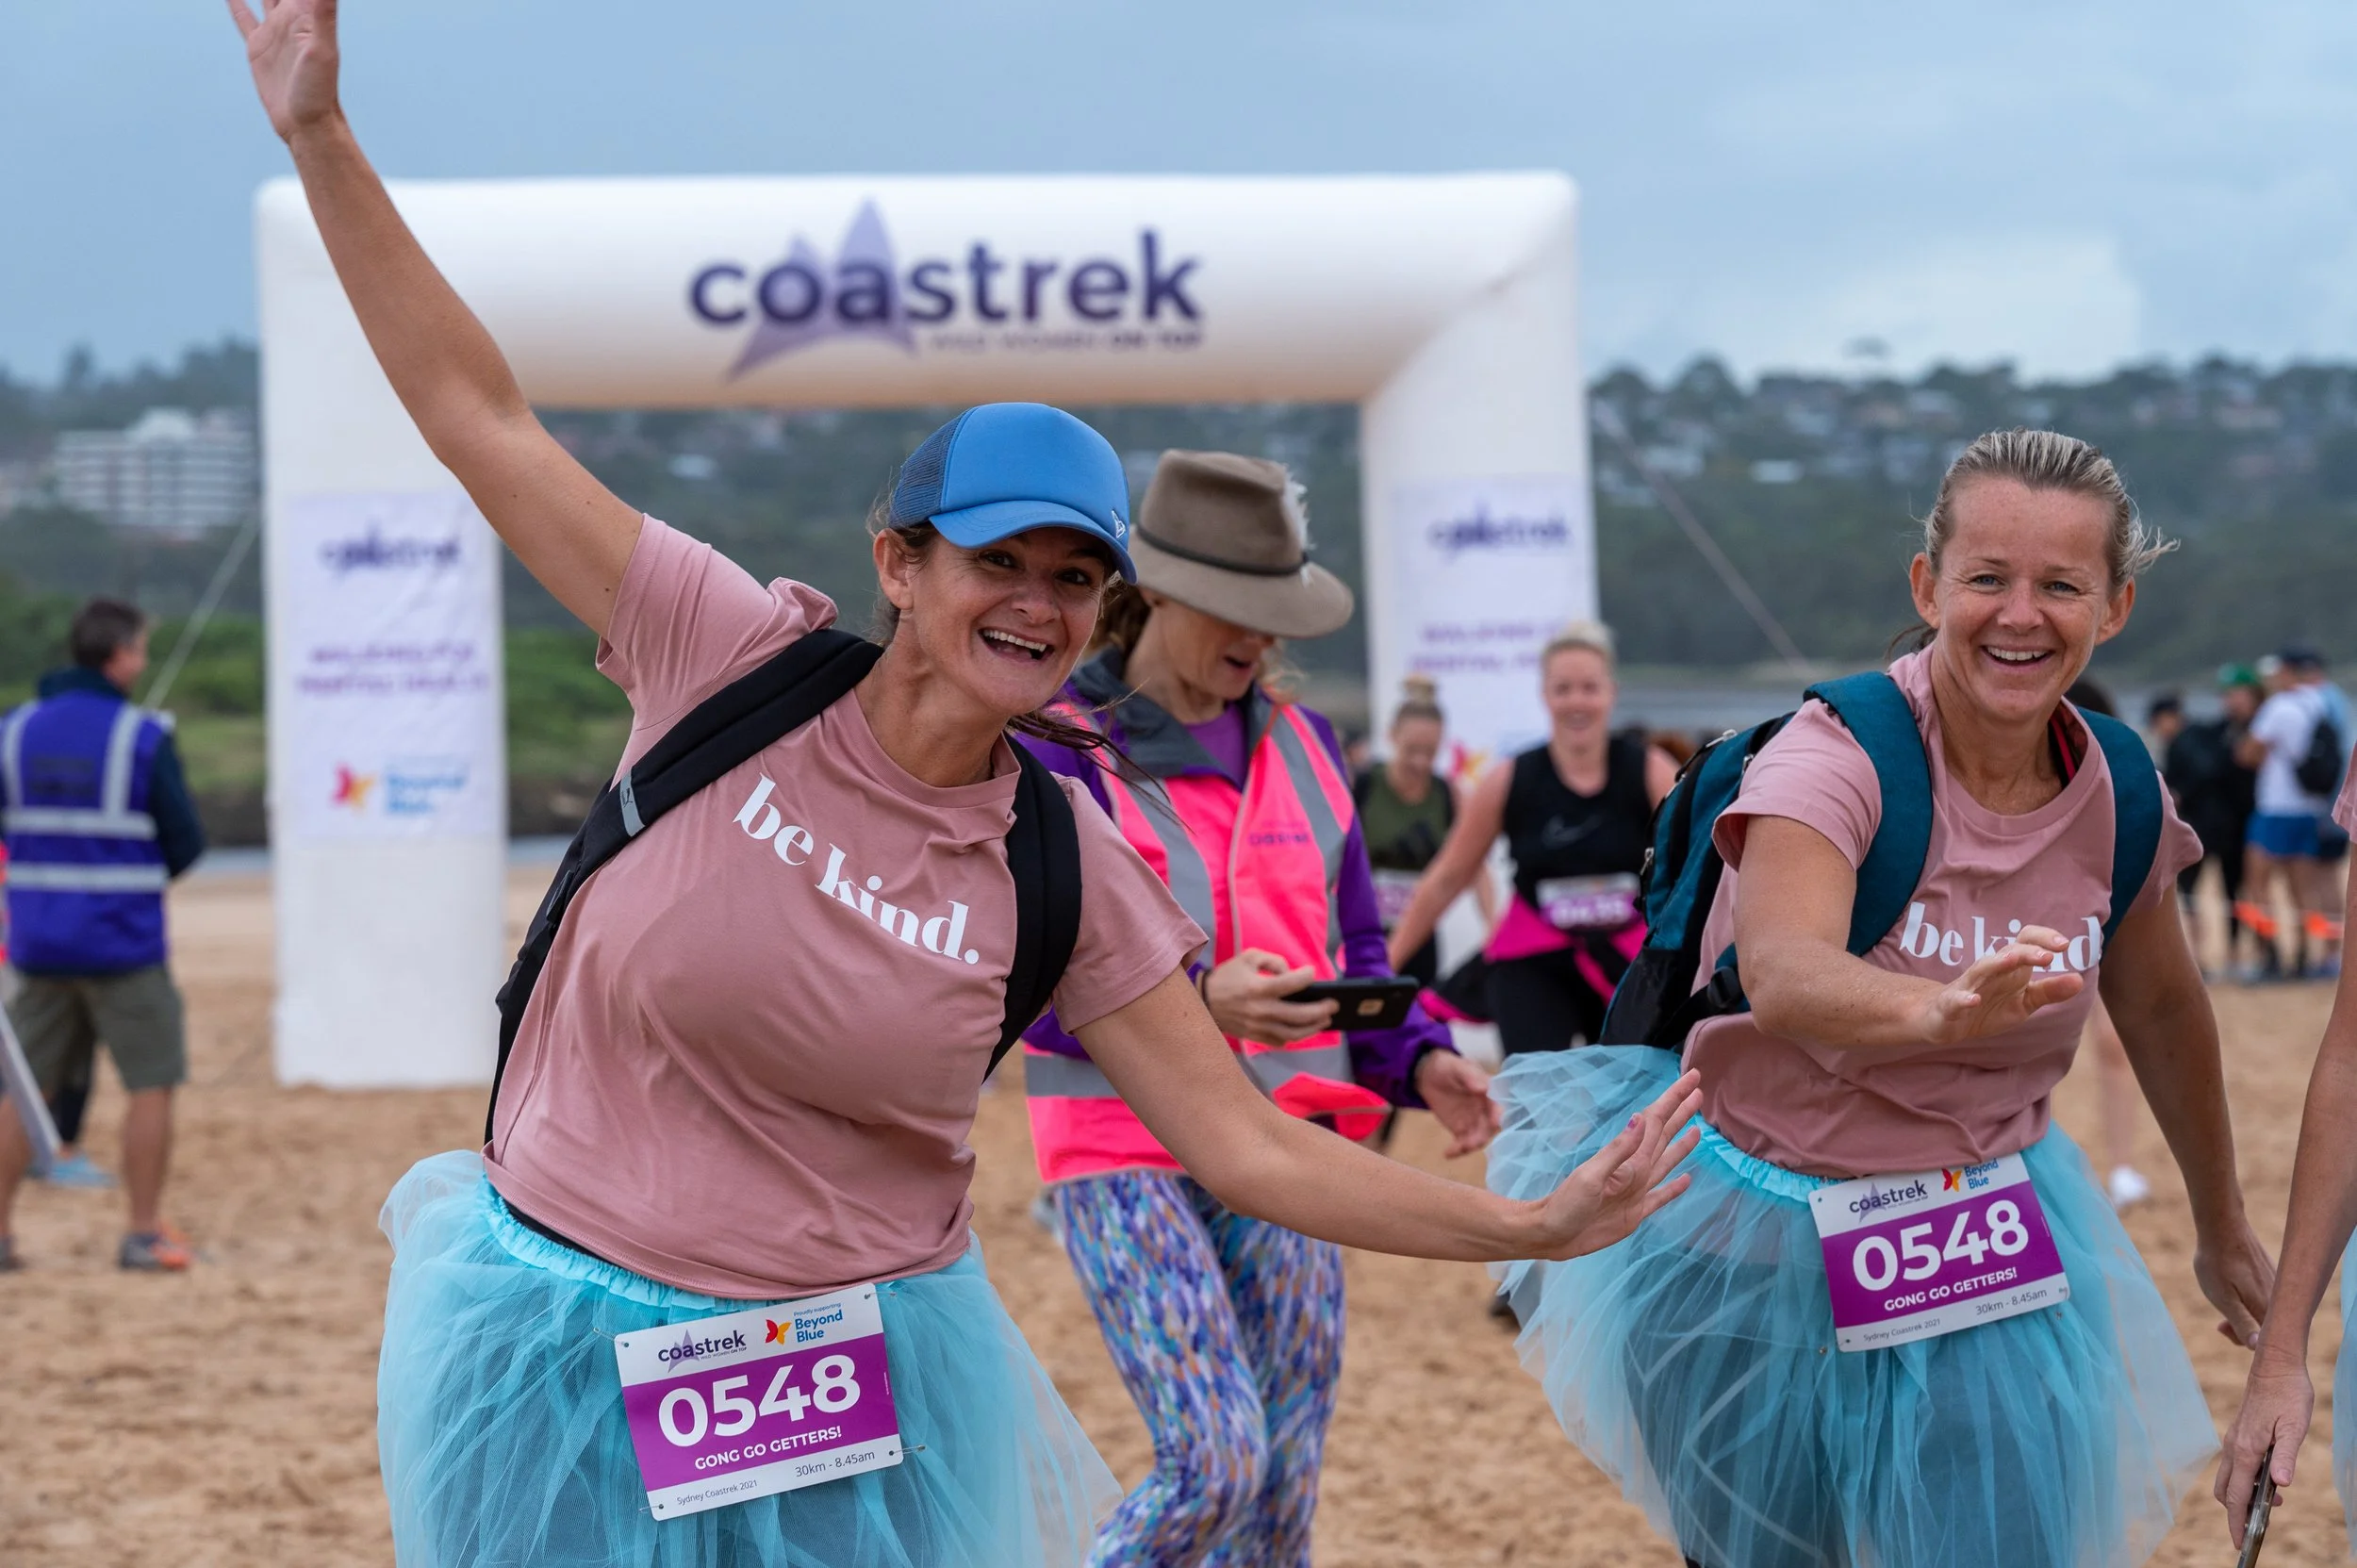
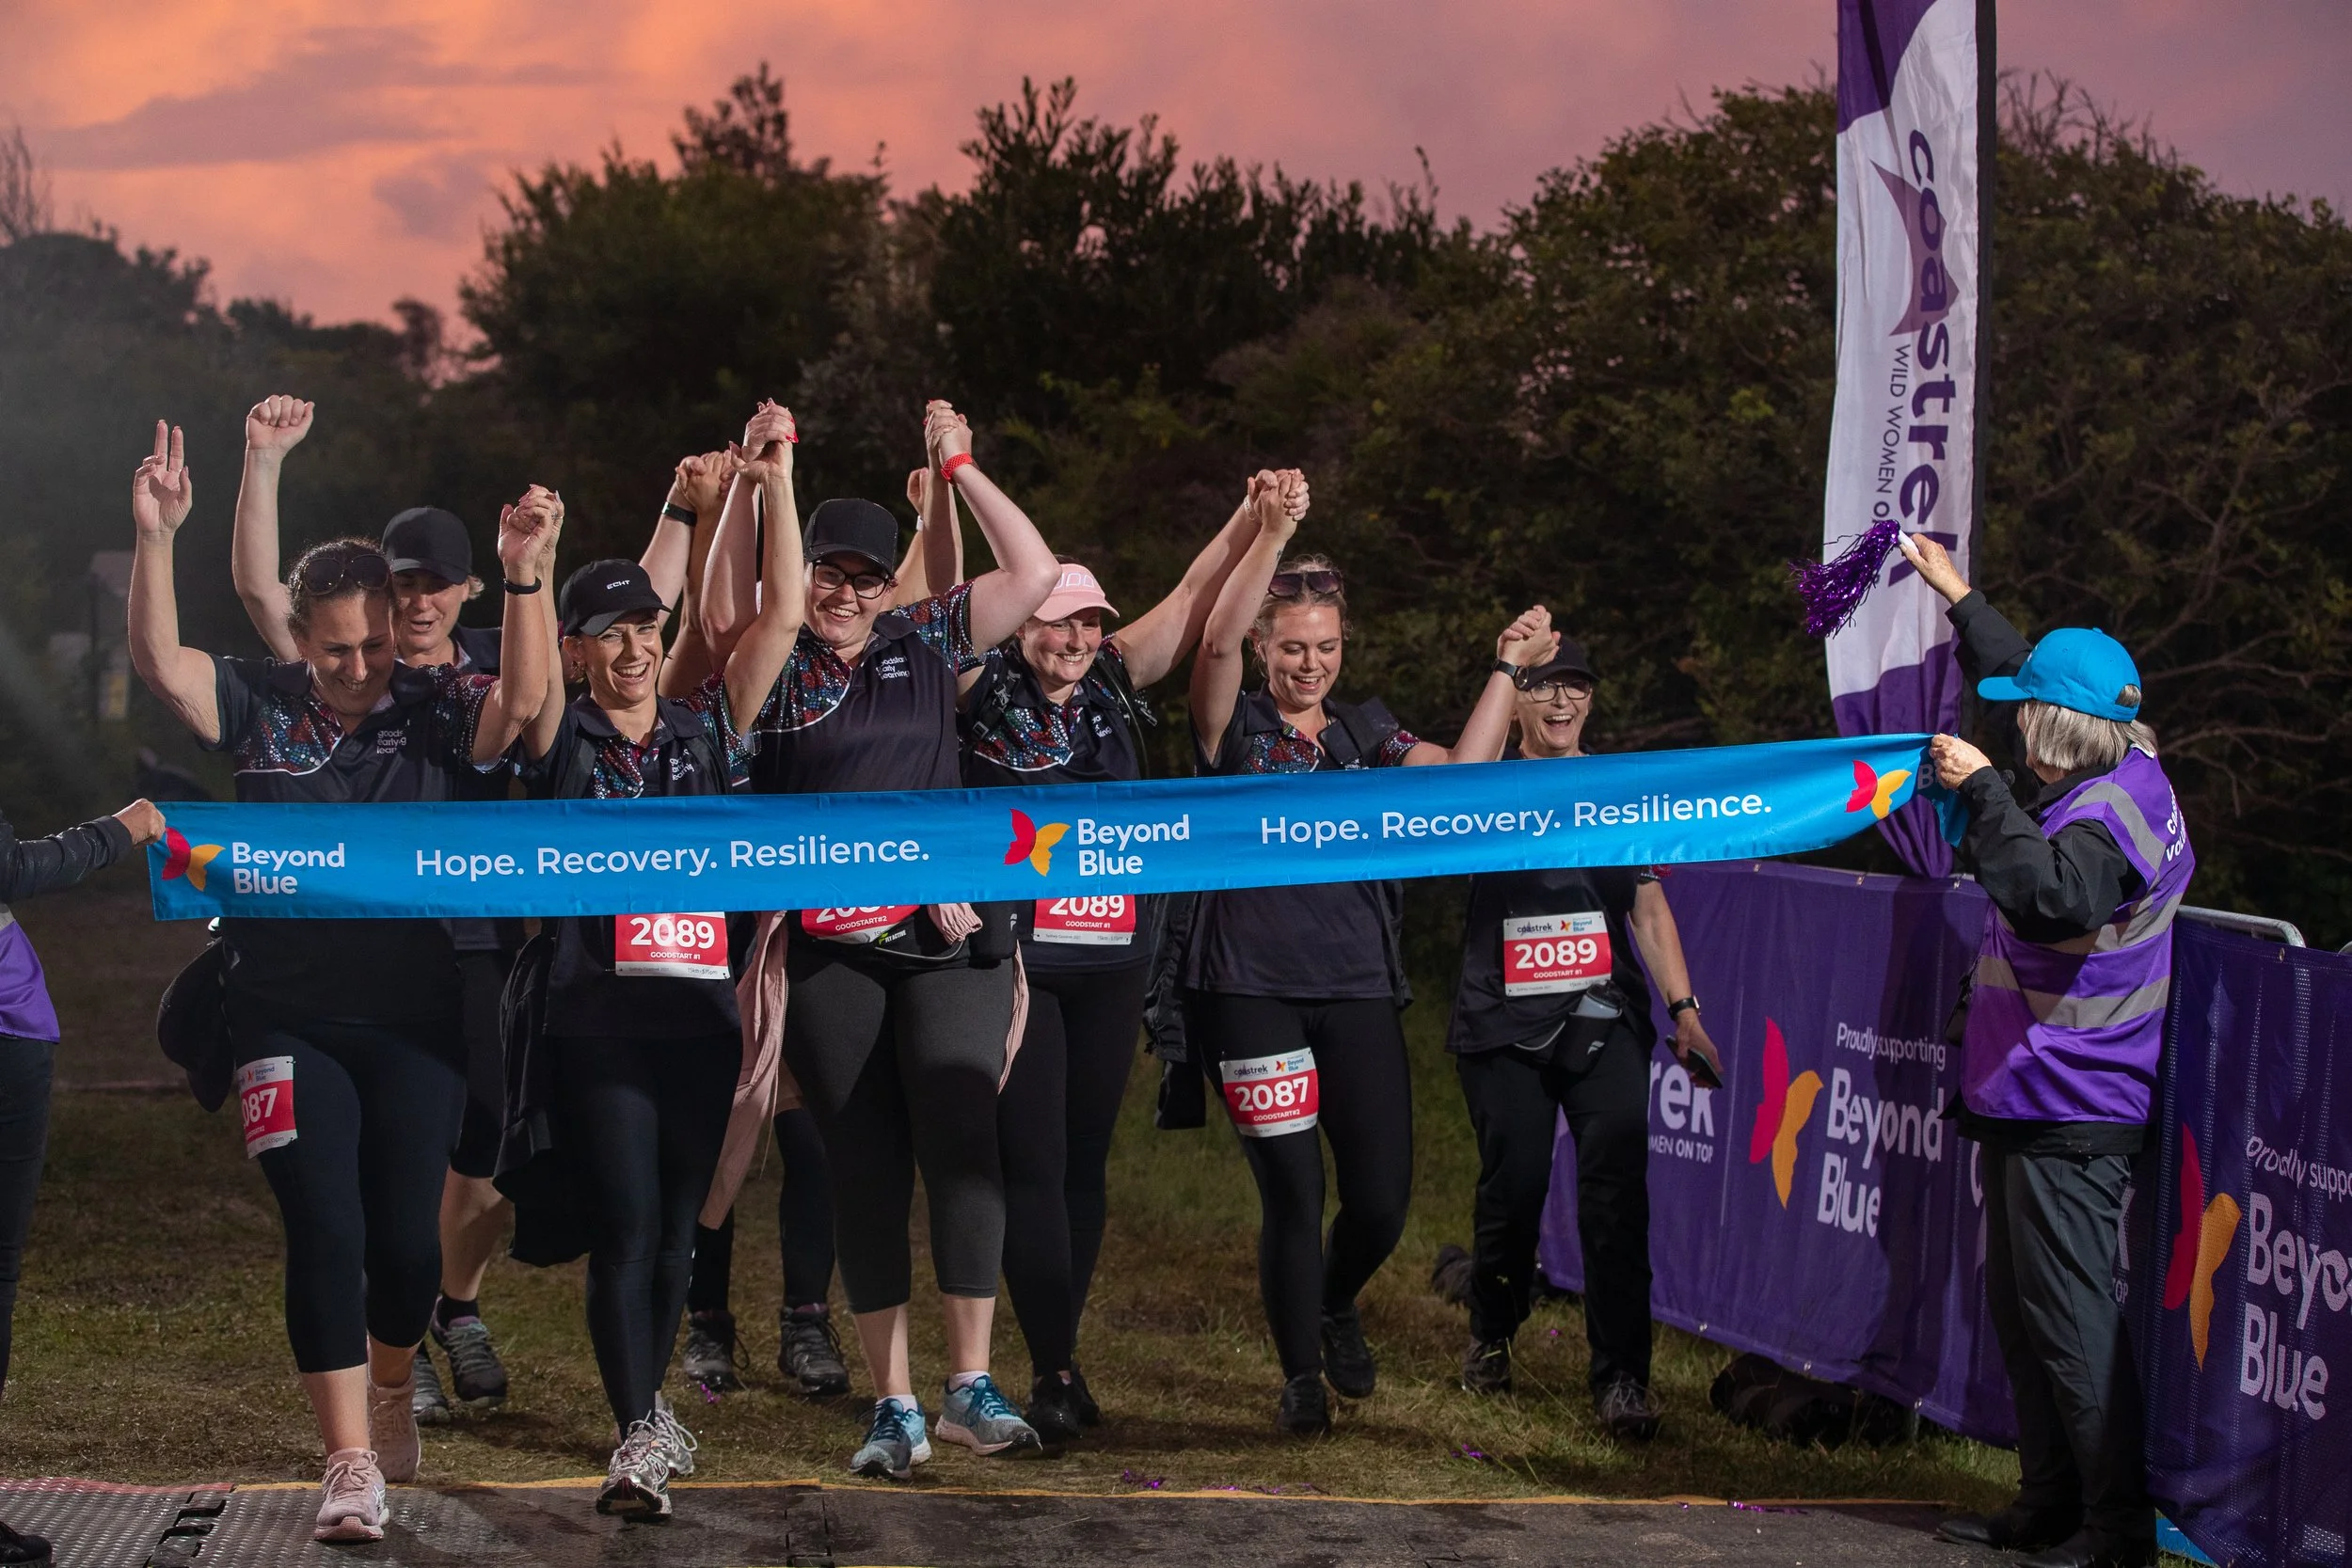
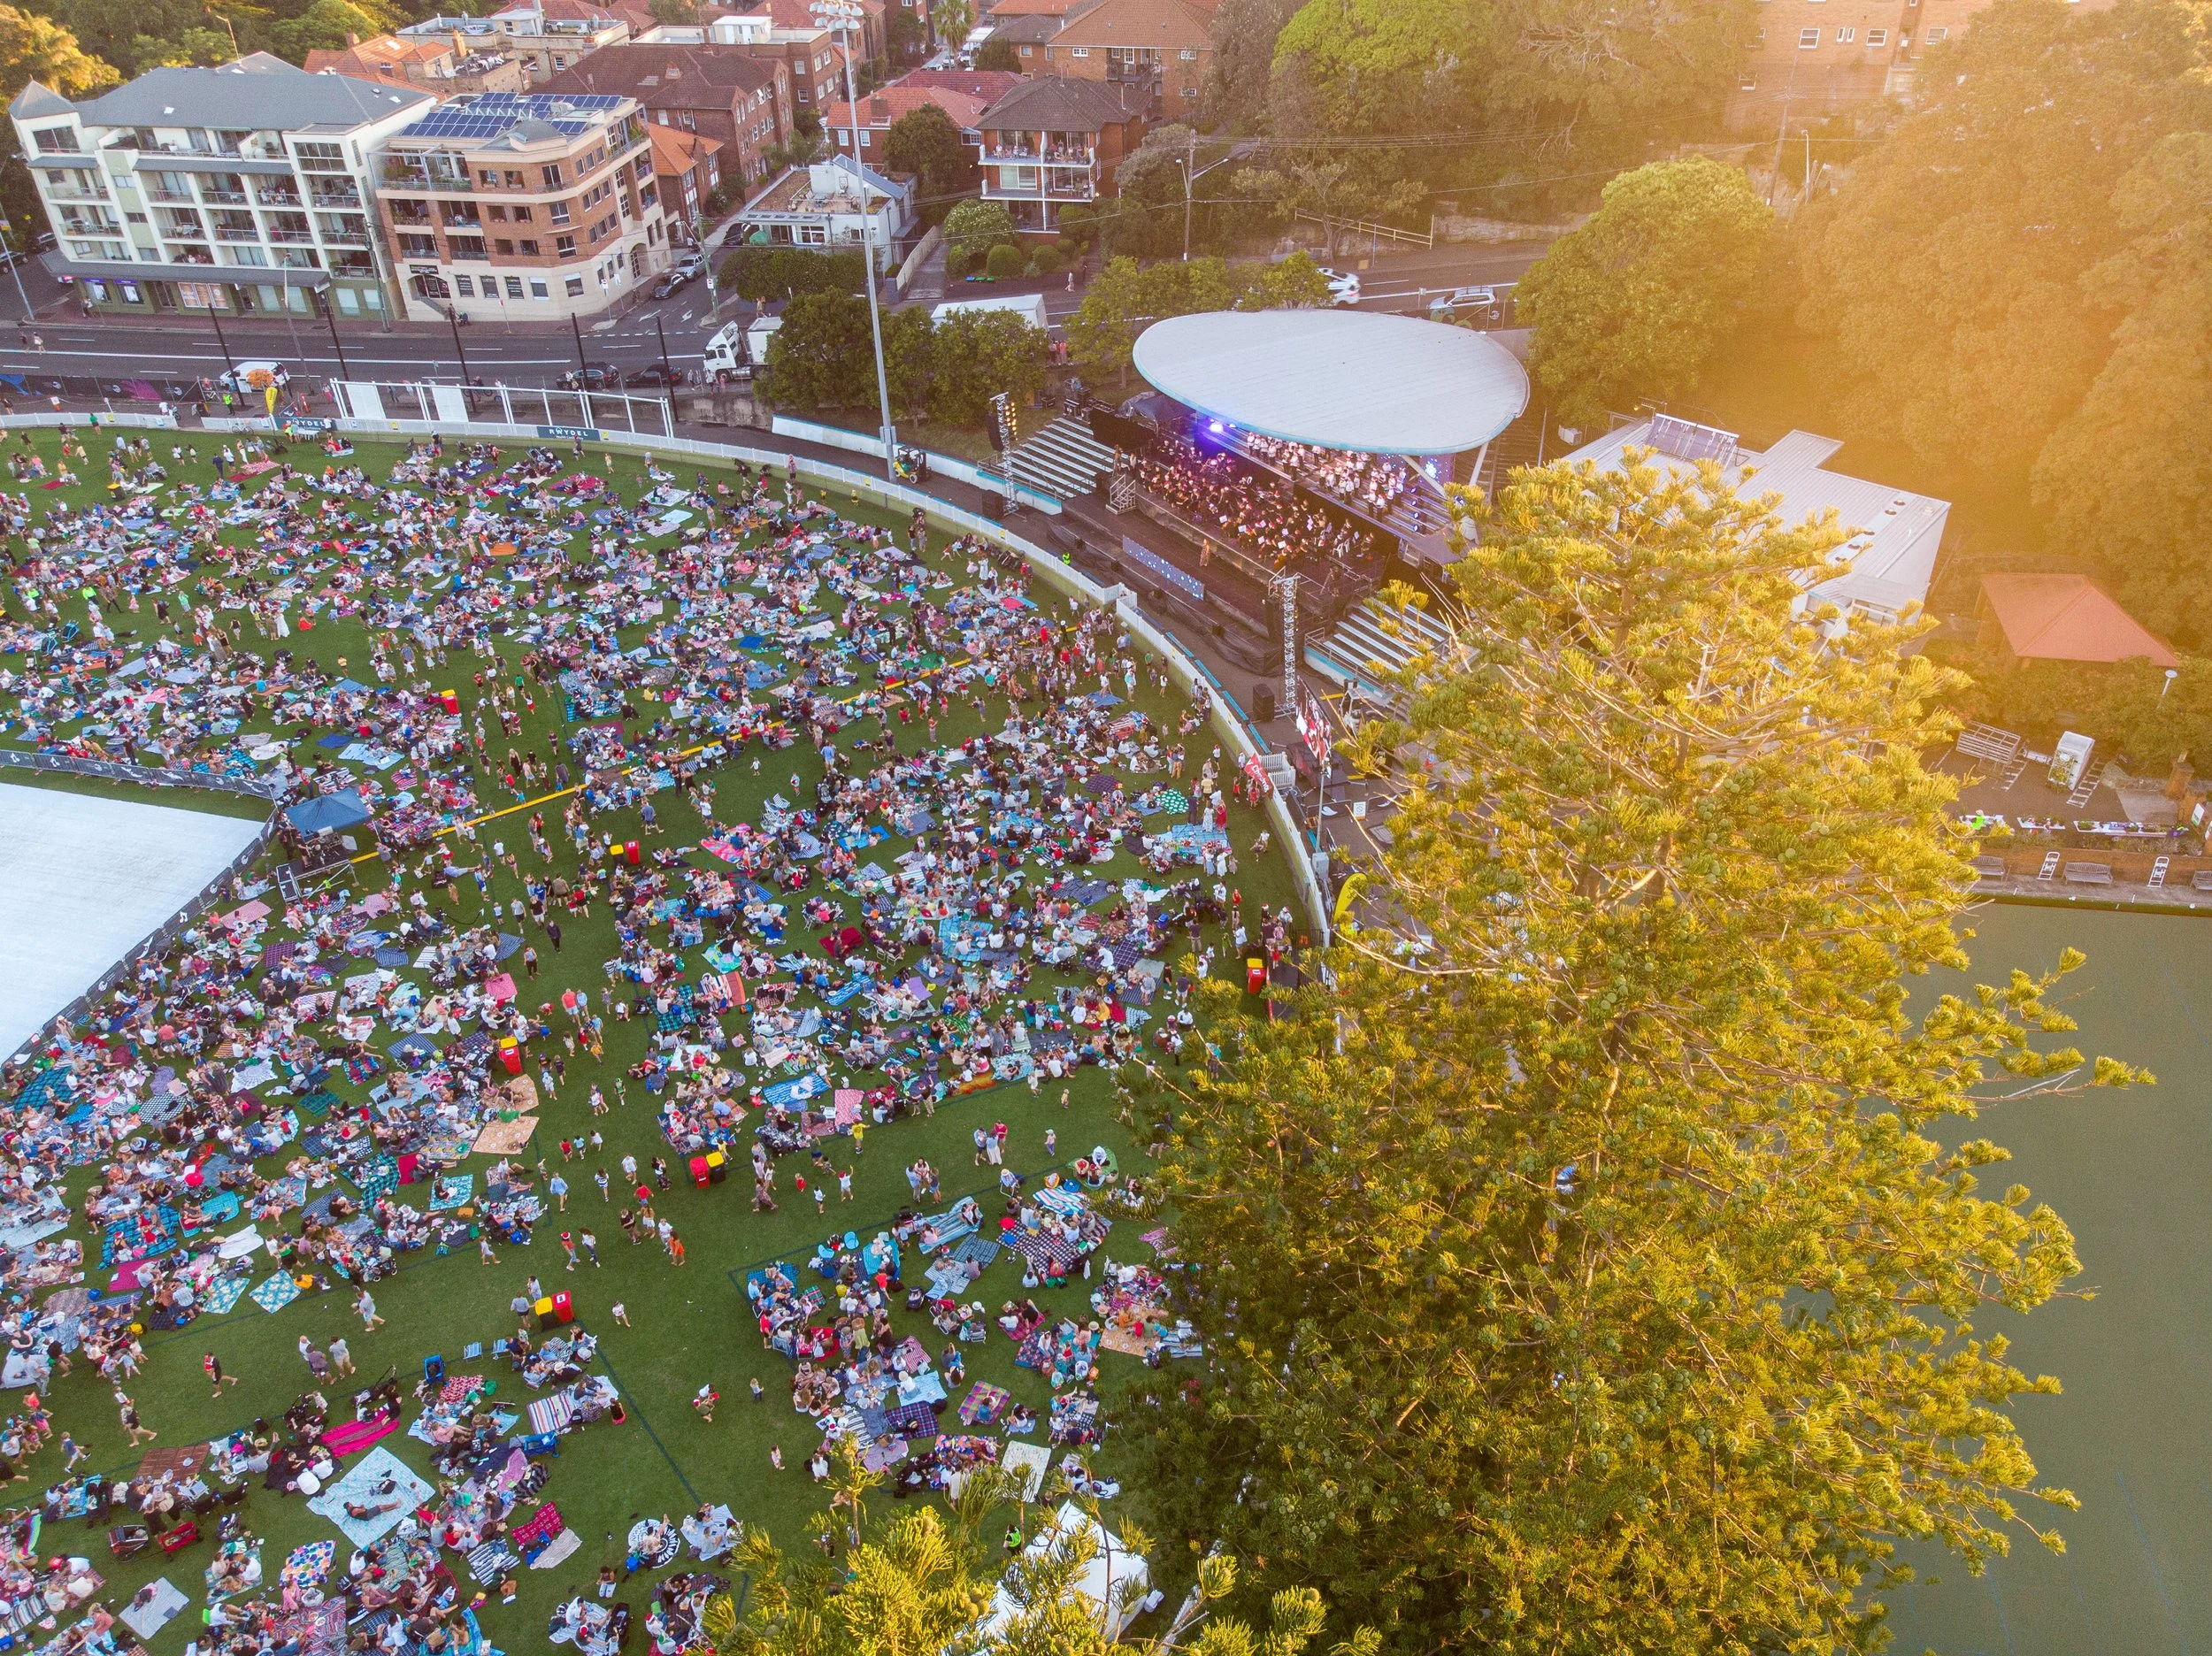
On Friday the 25th of March, the Freshie Photography team shot Coastrek Sydney, which saw some 4500 trekkers taking on the 60km, 45km, or 30km routes stretching from La Perouse to the finish line at Kirribilli. In doing so, the trekkers raised over $2 million for Beyond Blue.
Coastrek is my favourite event of the year. It is a massive day requiring around 18 hours of shooting, but there is just something magical about the vibe around the event. The emotions that start to flow at the finish line as the sun goes down is incomparable to anything else we shoot. There are no "winners", it is not a race and it is not a competition, but the support that every trekker gets along the way is simply amazing. It is an event where even as photographers, we feel invested in the participants. We are there to see them off into the darkness at 6 am in the morning, and we are there to capture them crossing the finish line late into the evening. I've even been known to get a bit misty-eyed at the finish line, when you come to recognise how much of a personal achievement it is for some of these teams to complete the event, and how much it means to them.
The photos below give a brief snapshot of our day out on course shooting Coastrek Sydney for Wild Women on Top.


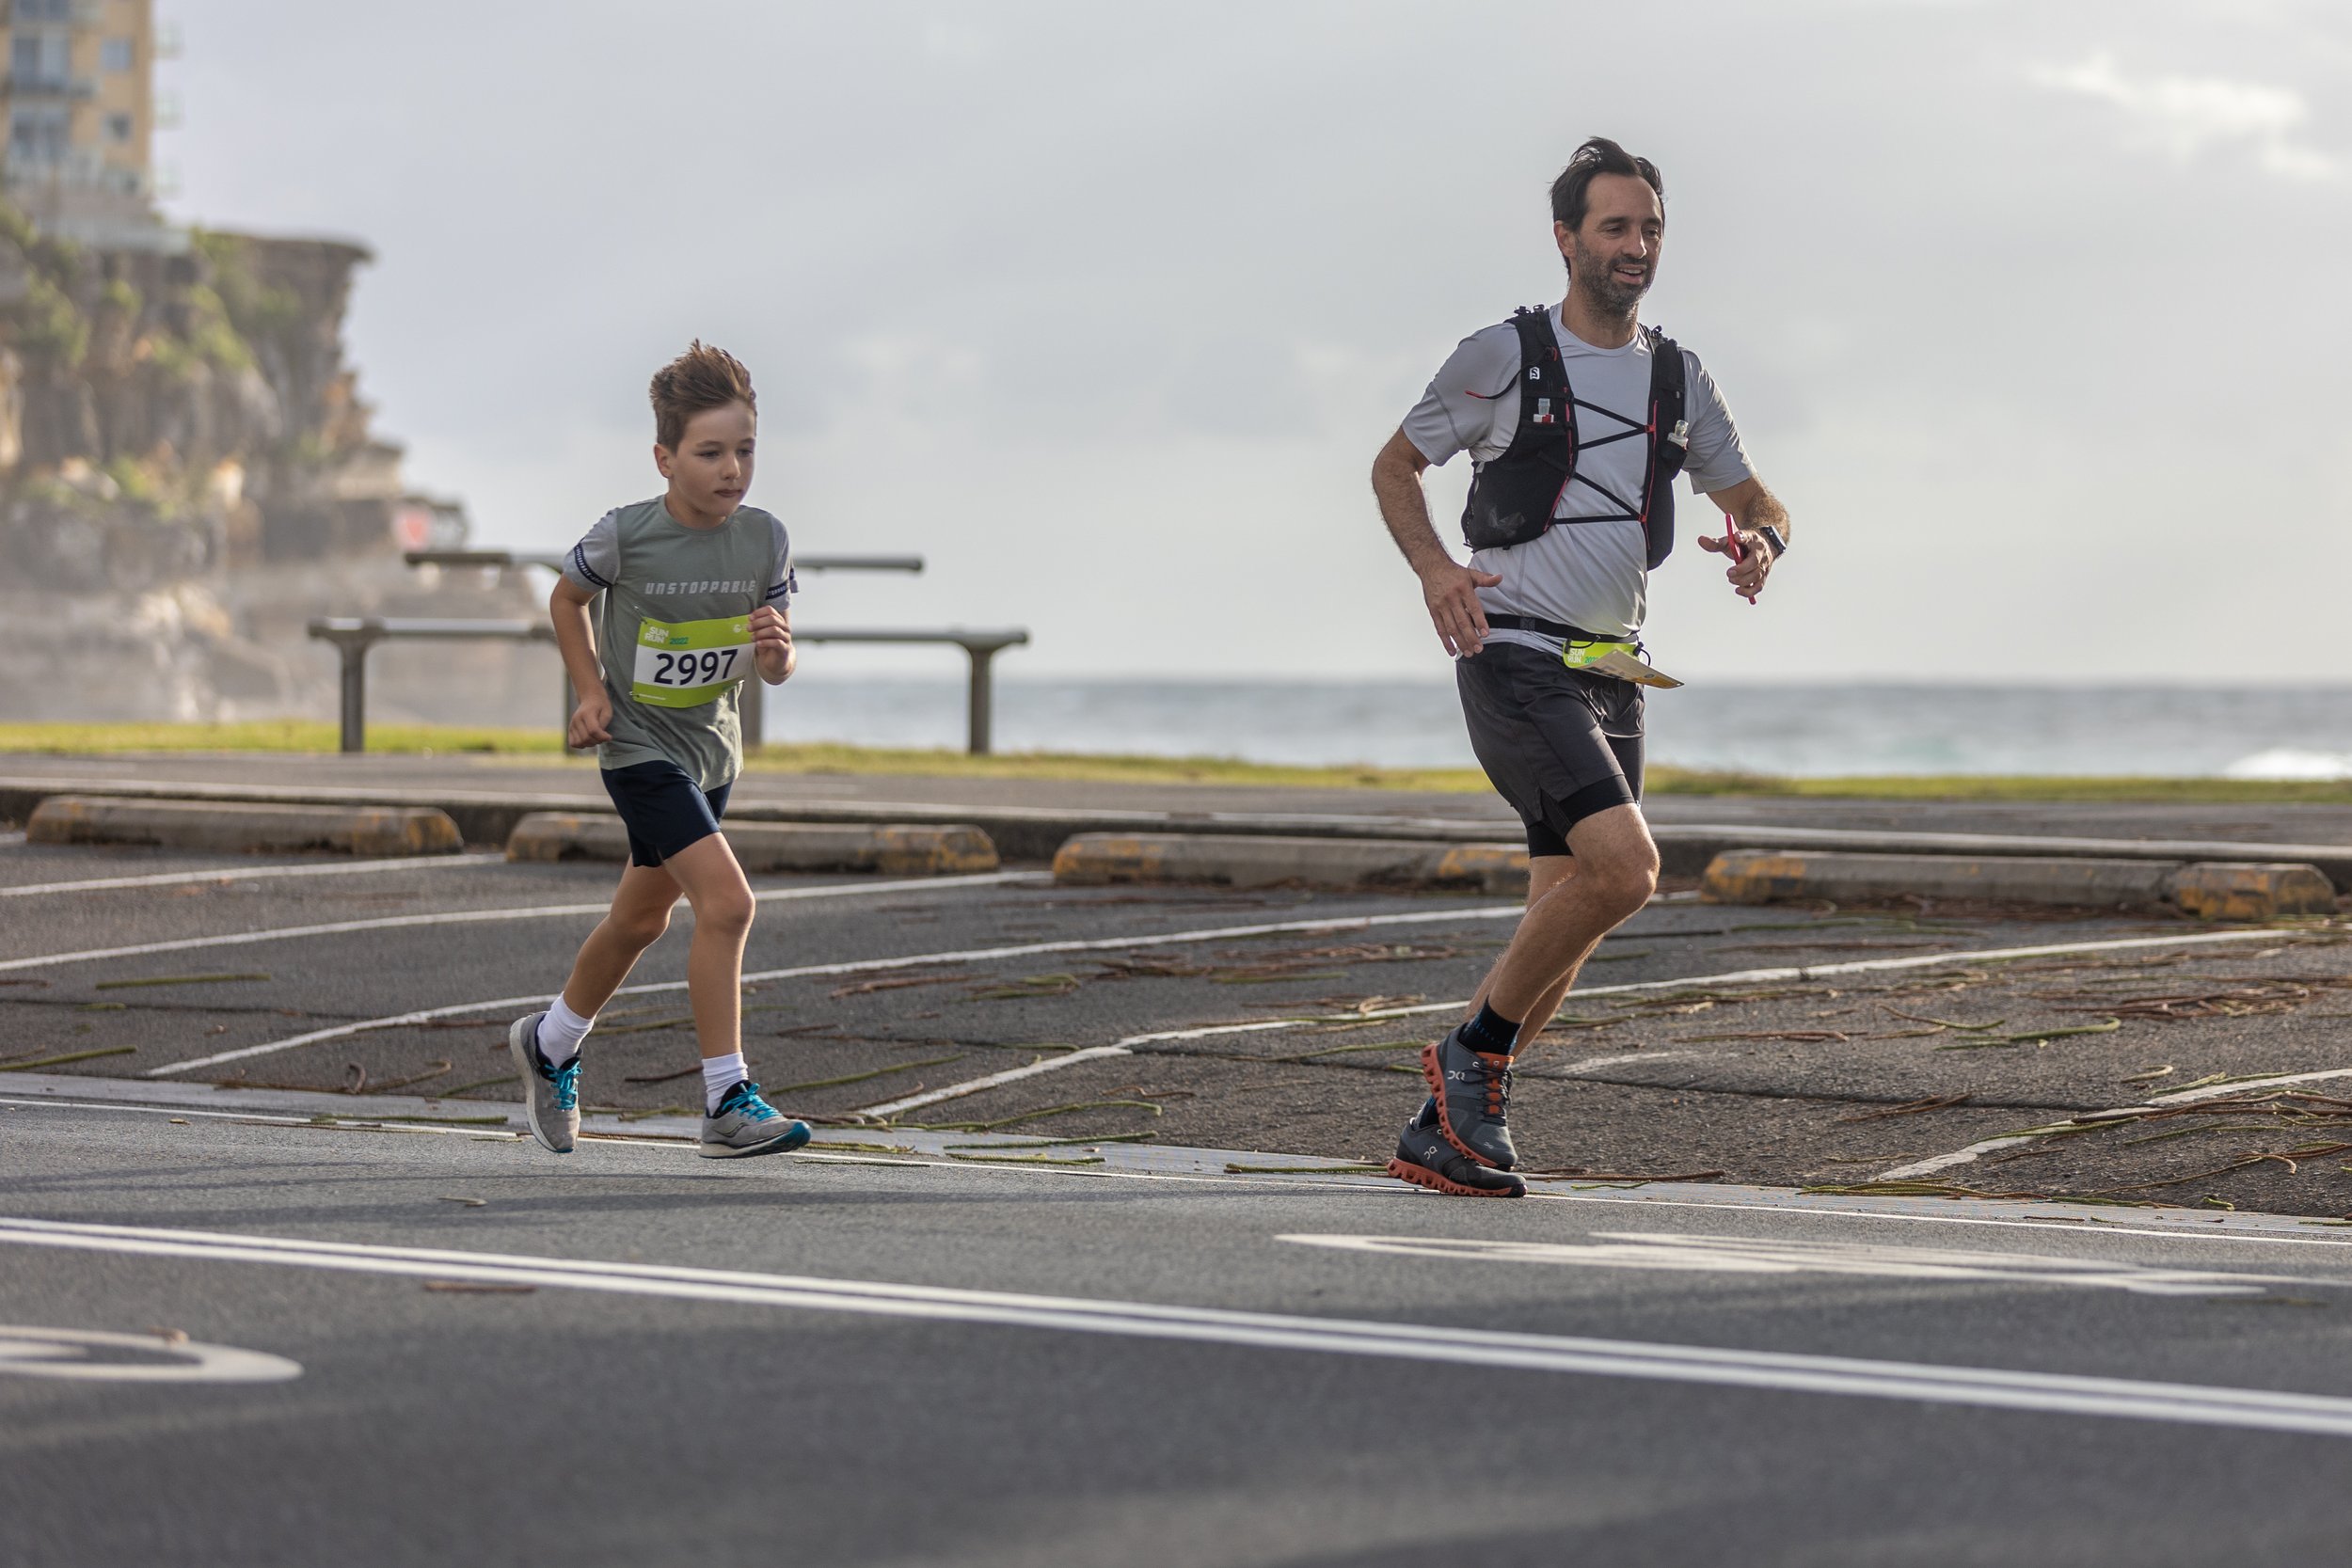
Shooting the Sun Run 2022
The largest fun run in Sydney since the start of the pandemic!
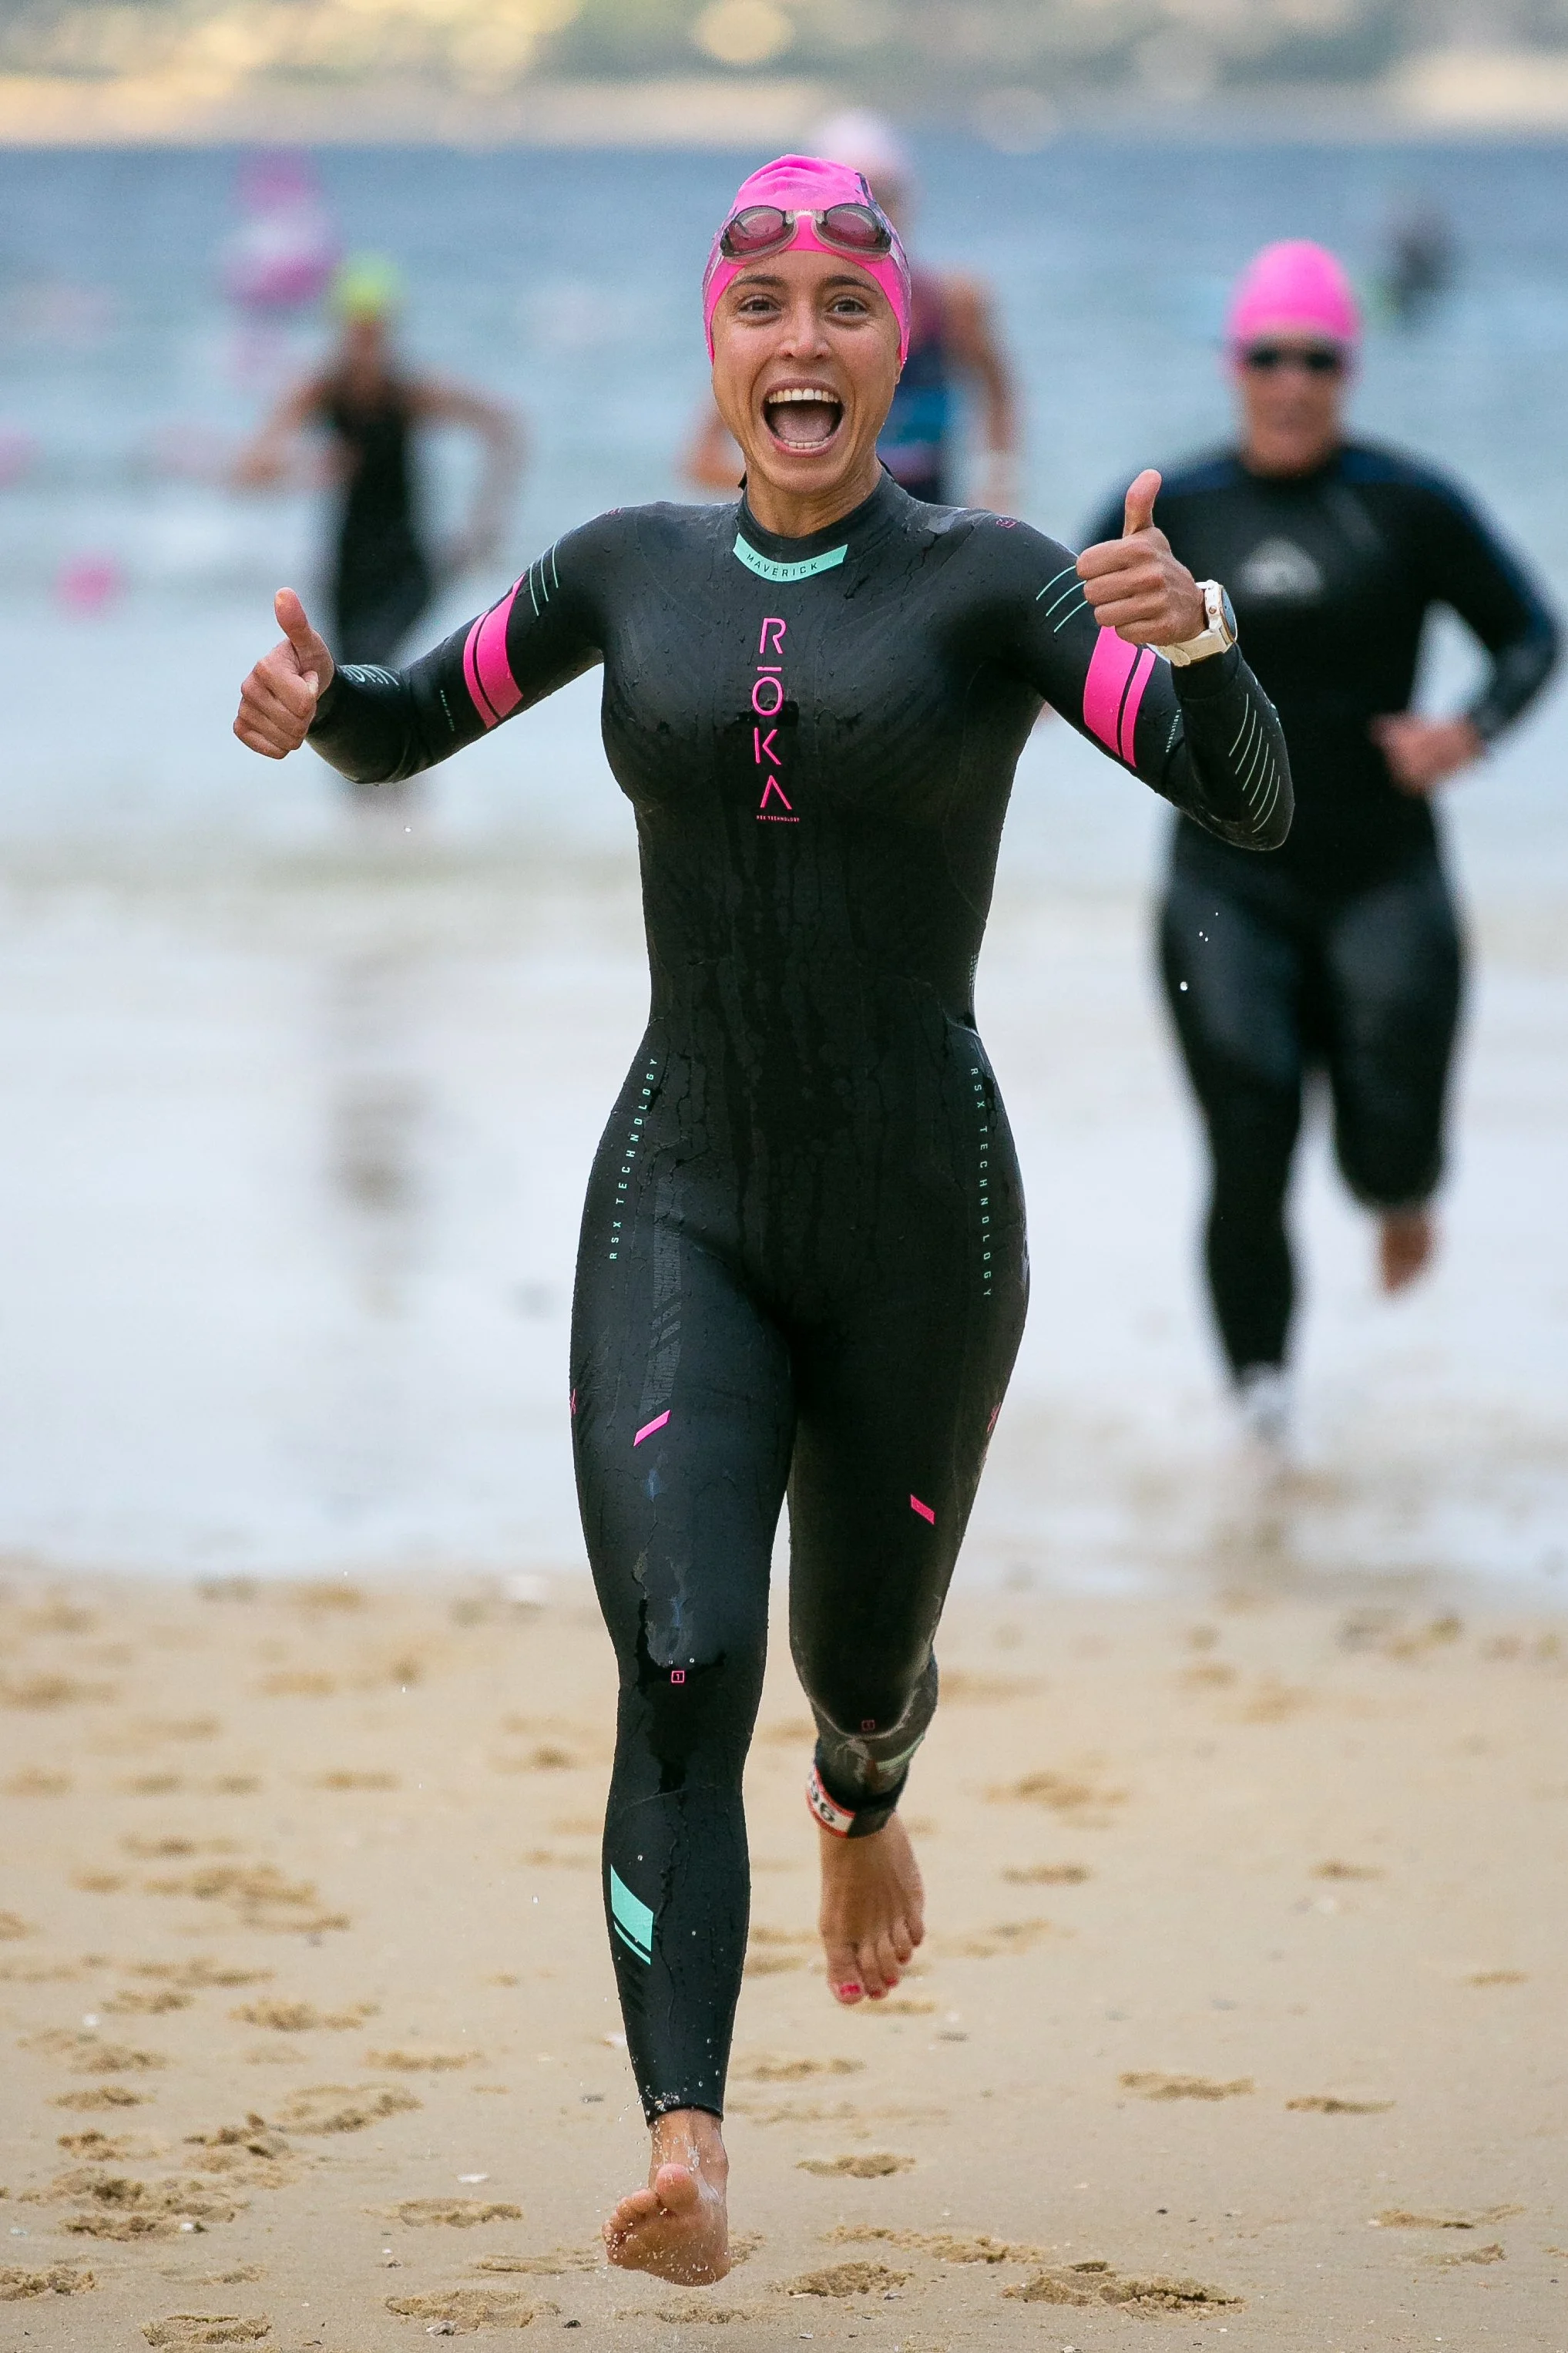
Coming off a big few weeks of shooting Australia Day events for Northern Beaches Council, we rolled straight into shooting the Sun Run on the first weekend of February. Harnessing a 10km course that snakes from Dee Why beach to finish on the iconic Manly beachfront, the 2022 Sun Run with 4300 entrants was by far the largest fun run in NSW since the start of the pandemic. This blog post won’t touch on the technical side of the photography, instead it is going to give you an insight into the planning and execution that goes into the successful coverage of a mass-participation event.

The start of the Sun Run 2022 at Dee Why Beach on the Northern Beaches of Sydney
The brief
This was our second year shooting the creative brief for the marketing team from Northern Beaches Council. Our role wasn’t to capture every competitor, the mass competitor photos were being handled by another group. Instead, our role was to capture a photography and videography package for NBC to use post-event and in the run-in to the event next year. Our photos and video end up all over their social media channels and, as you will see a bit later on, occasionally go much much further than that!
The brief for all NBC events is always nice and simple….capture the overall vibe of the event, capture happy people, capture the magic of the Northern Beaches coastline….basically, do justice to the time, effort, and money that the NBC Event Operations team put into organising and executing these events. I will always shoot NBC events to that overall brief, and the marketing team will let me know if there are any specifics they need captured.

The team
This year I had a larger budget, so I was able to bring on an extra hand to help with capturing the creative brief. I put together a team of three dedicated photographers, a dedicated videographer, and then a hybrid photographer/videographer whose role was to support the videographer and capture a few specific photos for me. It is a team that I can rely on, knowing they will just go about their work without fuss and have the professionalism to deal with anything that might get thrown their way. This last bit is the most important….you can be the most skilled, artful photographer, but if you don’t have the people skills and the ability to overcome obstacles with a “no worries” attitude, you won’t last in this type of work. People willing to undercut you on price are a dime-a-dozen, so your value that differentiates you from the pack comes from your organisational skills and the relationships you develop with clients.

The start area was super dark, and required the use of some artificial lighting. Not ideal, but better than dark photos!
The plan
Prior to this type of event, I draw up a detailed timeline of the event and then put together a plan for each photographer. I’ve lived on the Northern Beaches my whole life so I’m very familiar with the area, but I still go out prior to the event and spend an hour scouting locations to work out what our shots will be. That means that we aren’t just “winging” things on event day when we turn up to a location, we are turning up to shoot with a purpose.

Our opportunities for aerial photography were limited by the wind, but we still managed to grab a couple of shots
For some of the shots, there really aren’t any second chances, and the entire event from start to finish is done and dusted in around 2 hours. The plan is about getting the shots that we need, but also being realistic….we can’t afford to hang around at one location any longer that we absolutely need to in order to get the shot, because doing so could compromise a shot further down the course.

One of the shots you definitely cannot afford to miss.
The execution and delivery
With a solid plan in place, and everyone briefed on what they need to do, it just comes down to executing it on event day. Each of the photographers knows what they need to do, they’ve got their shot list, and they are armed with SD/CF cards supplied by me so that they can just drop them to me at the end of the event. I don’t have physical contact with each photographer, because some of them head straight to other areas (e.g. finish line or the second half of the course), so we all touch base via phone to ensure everyone is in place.

One of our planned shots. The final photo will be cropped tighter, but we have to shoot a bit wider than usual to give the marketing team the room they need to drop in their text copy over the top of the photo.
With these big events, I turn up a lot earlier than I actually need to be there. It’s not for my benefit, but the benefit of the client. I can touch base with the operations team before they get too busy, let them know that my team is ready and everything is under control, and then I don’t have to pester them again at all until the event is over. For the Sun Run, this meant a 4 a.m. alarm so that I could arrive just before 5 a.m.

This one didn’t make the final cut, but it had me in absolute stitches when I saw the expressions!
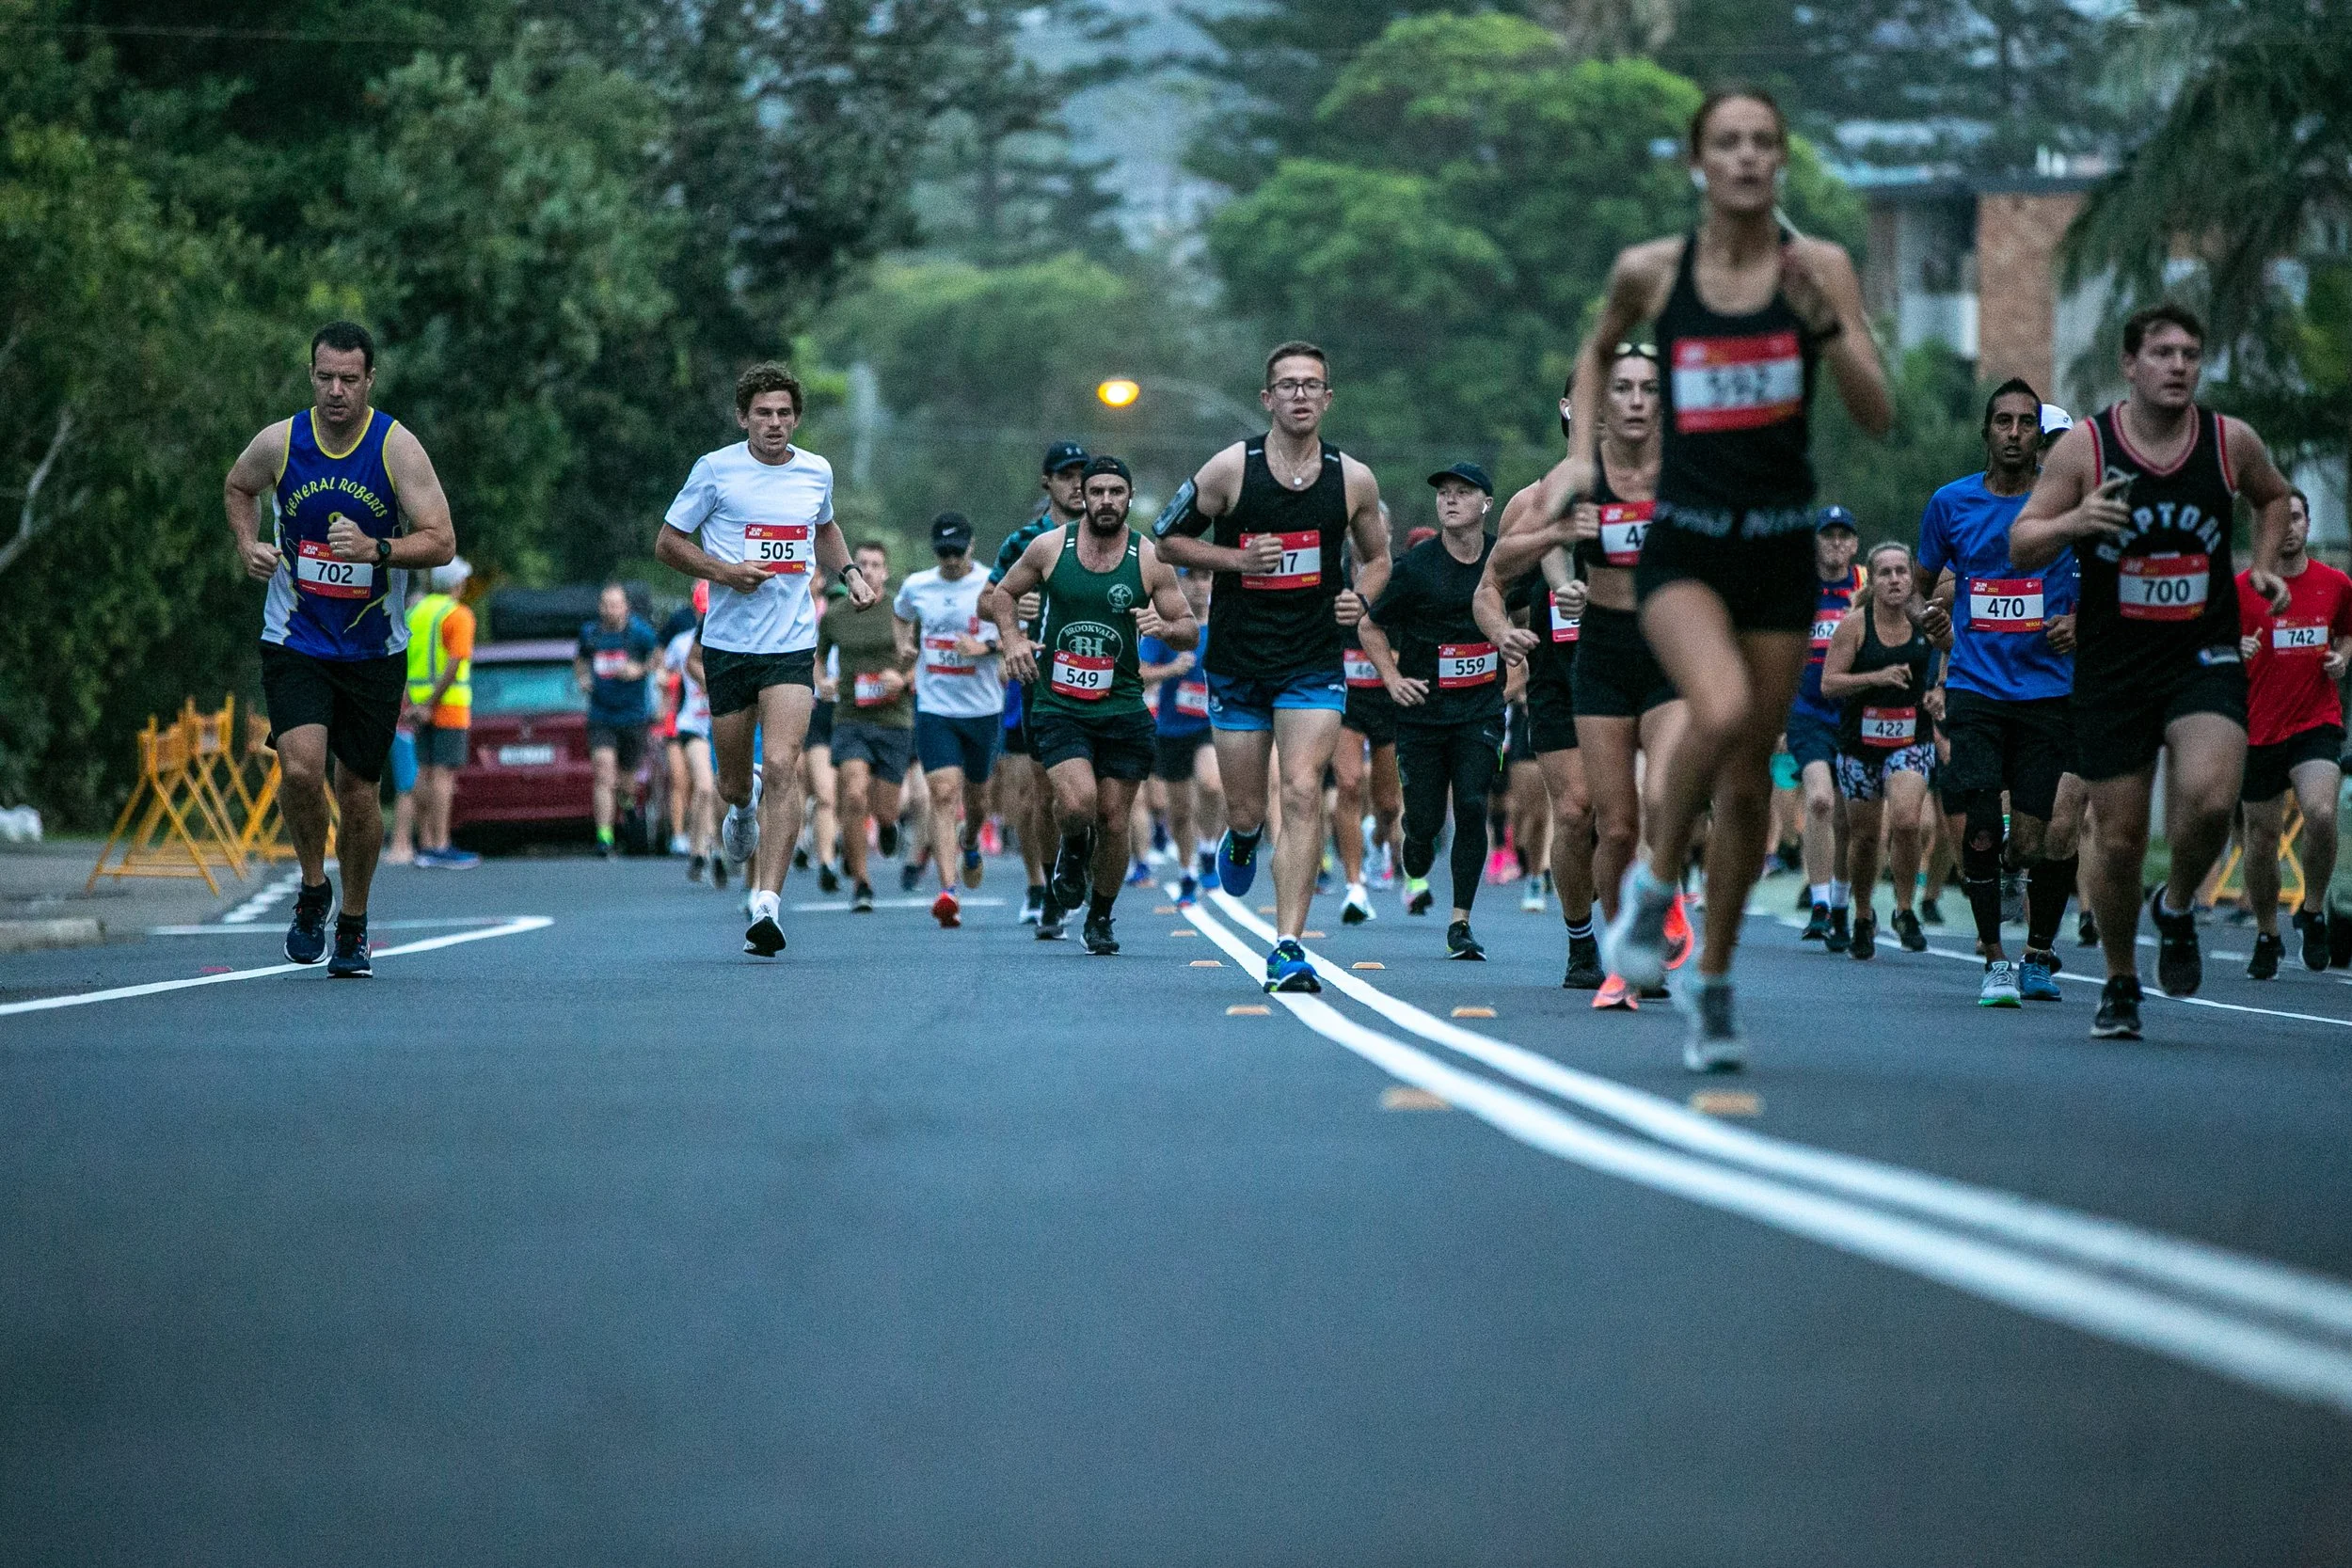
Before we know it, the SunRun is underway. I start skipping my way along the course capturing my planned shots, and the team keep each other updated with the progress of the competitors. The pointy end of the field finish the 10km run just 31 minutes after they started. The remainder of the field, including the families and kids in the 7km event, will stream through the finish arch at Manly over the next 90 minutes.

The event doesn’t go perfectly, it never does. Thankfully the rain held off, but some strong winds meant we couldn’t put up drones at some of the planned locations. At one location (where I’m glad I persisted because the final shot was worth it), I chewed through a drone battery in 5 minutes because it was fighting so hard to hold itself steady into the wind! These things happen, and in the grand scheme of things it isn’t a huge issue.

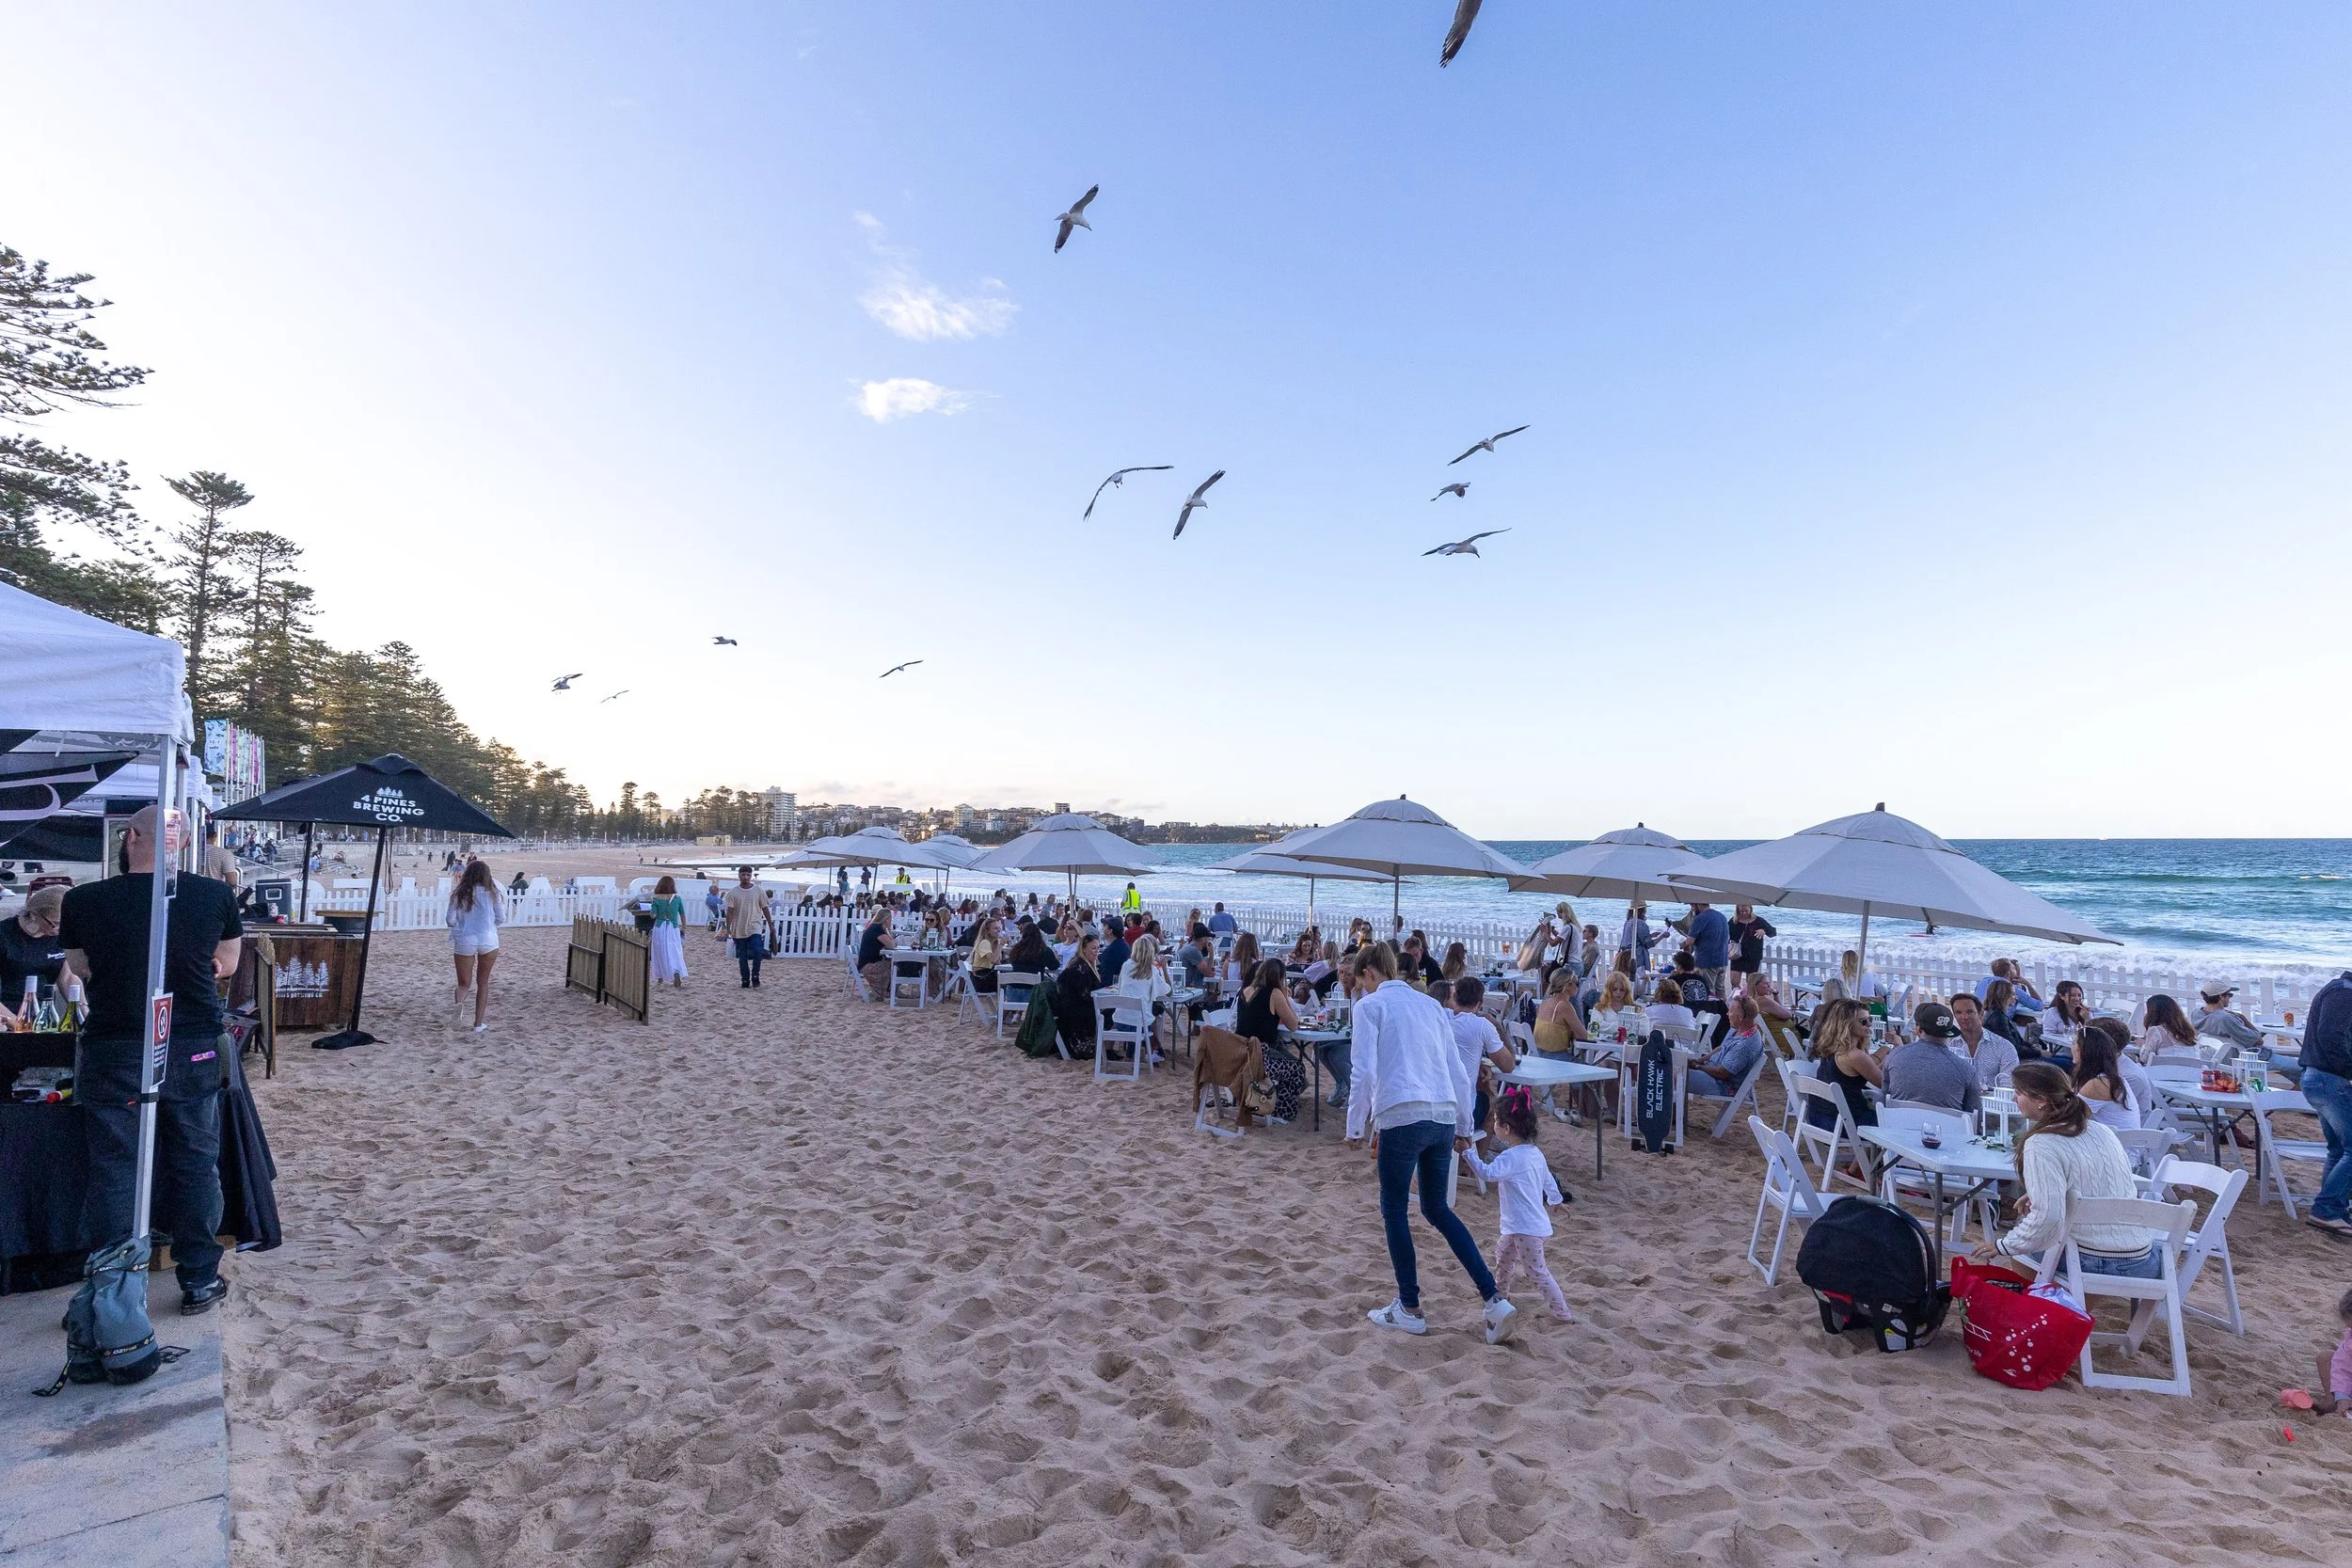
I got to the finish area about 20 minutes before the final finisher. The vibe around Manly was amazing, and it was so refreshing to see all the local cafes and restaurants doing a roaring trade with post-run patrons. There was also a huge crowd cheering home the back end of the field. I stayed at the finish area with one of my other photographers until the very last competitor crossed that line. In terms of marketing value, photos of that last competitor overcoming adversity to achieve their goal is far more valuable than the photo of the guy at the pointy end of the field smashing a 31 minute 10km. Once they’re done, I head straight home to get started on the delivery of the brief.

The delivery
For these types of events, we are on a very tight delivery timeline, because the marketing team want to be able to harness some of those post-event endorphins to get competitors thinking about entering next year. During the event, I get my photographers to rate or lock (depending on model of camera) a couple of their best shots, and these form the basis of the very first offload to the social media team. As soon as I get home, I pop the cards into my computer and Photomechanic pulls just the locked photos, leaving the rest to be dealt with shortly. I end up with about 10 photos, which I drag into Lightroom and apply a quick edit and then forward onto the marketing team. Less than half an hour after the last competitor finished, they’ve published some killer shots across all their social media platforms.

Families = marketing gold
While this is going on, the video team are hard at work. The first job is to quickly cut together 10 seconds of footage (3-5 clips) to be sent out with the event press release. They then get onto editing together the event wrap video. They have about 5 hours to get this done….a very tight timeline for a polished 1 minute event wrap video, but again it is important to get it turned around so that Council can send it out that afternoon on their social media platforms.
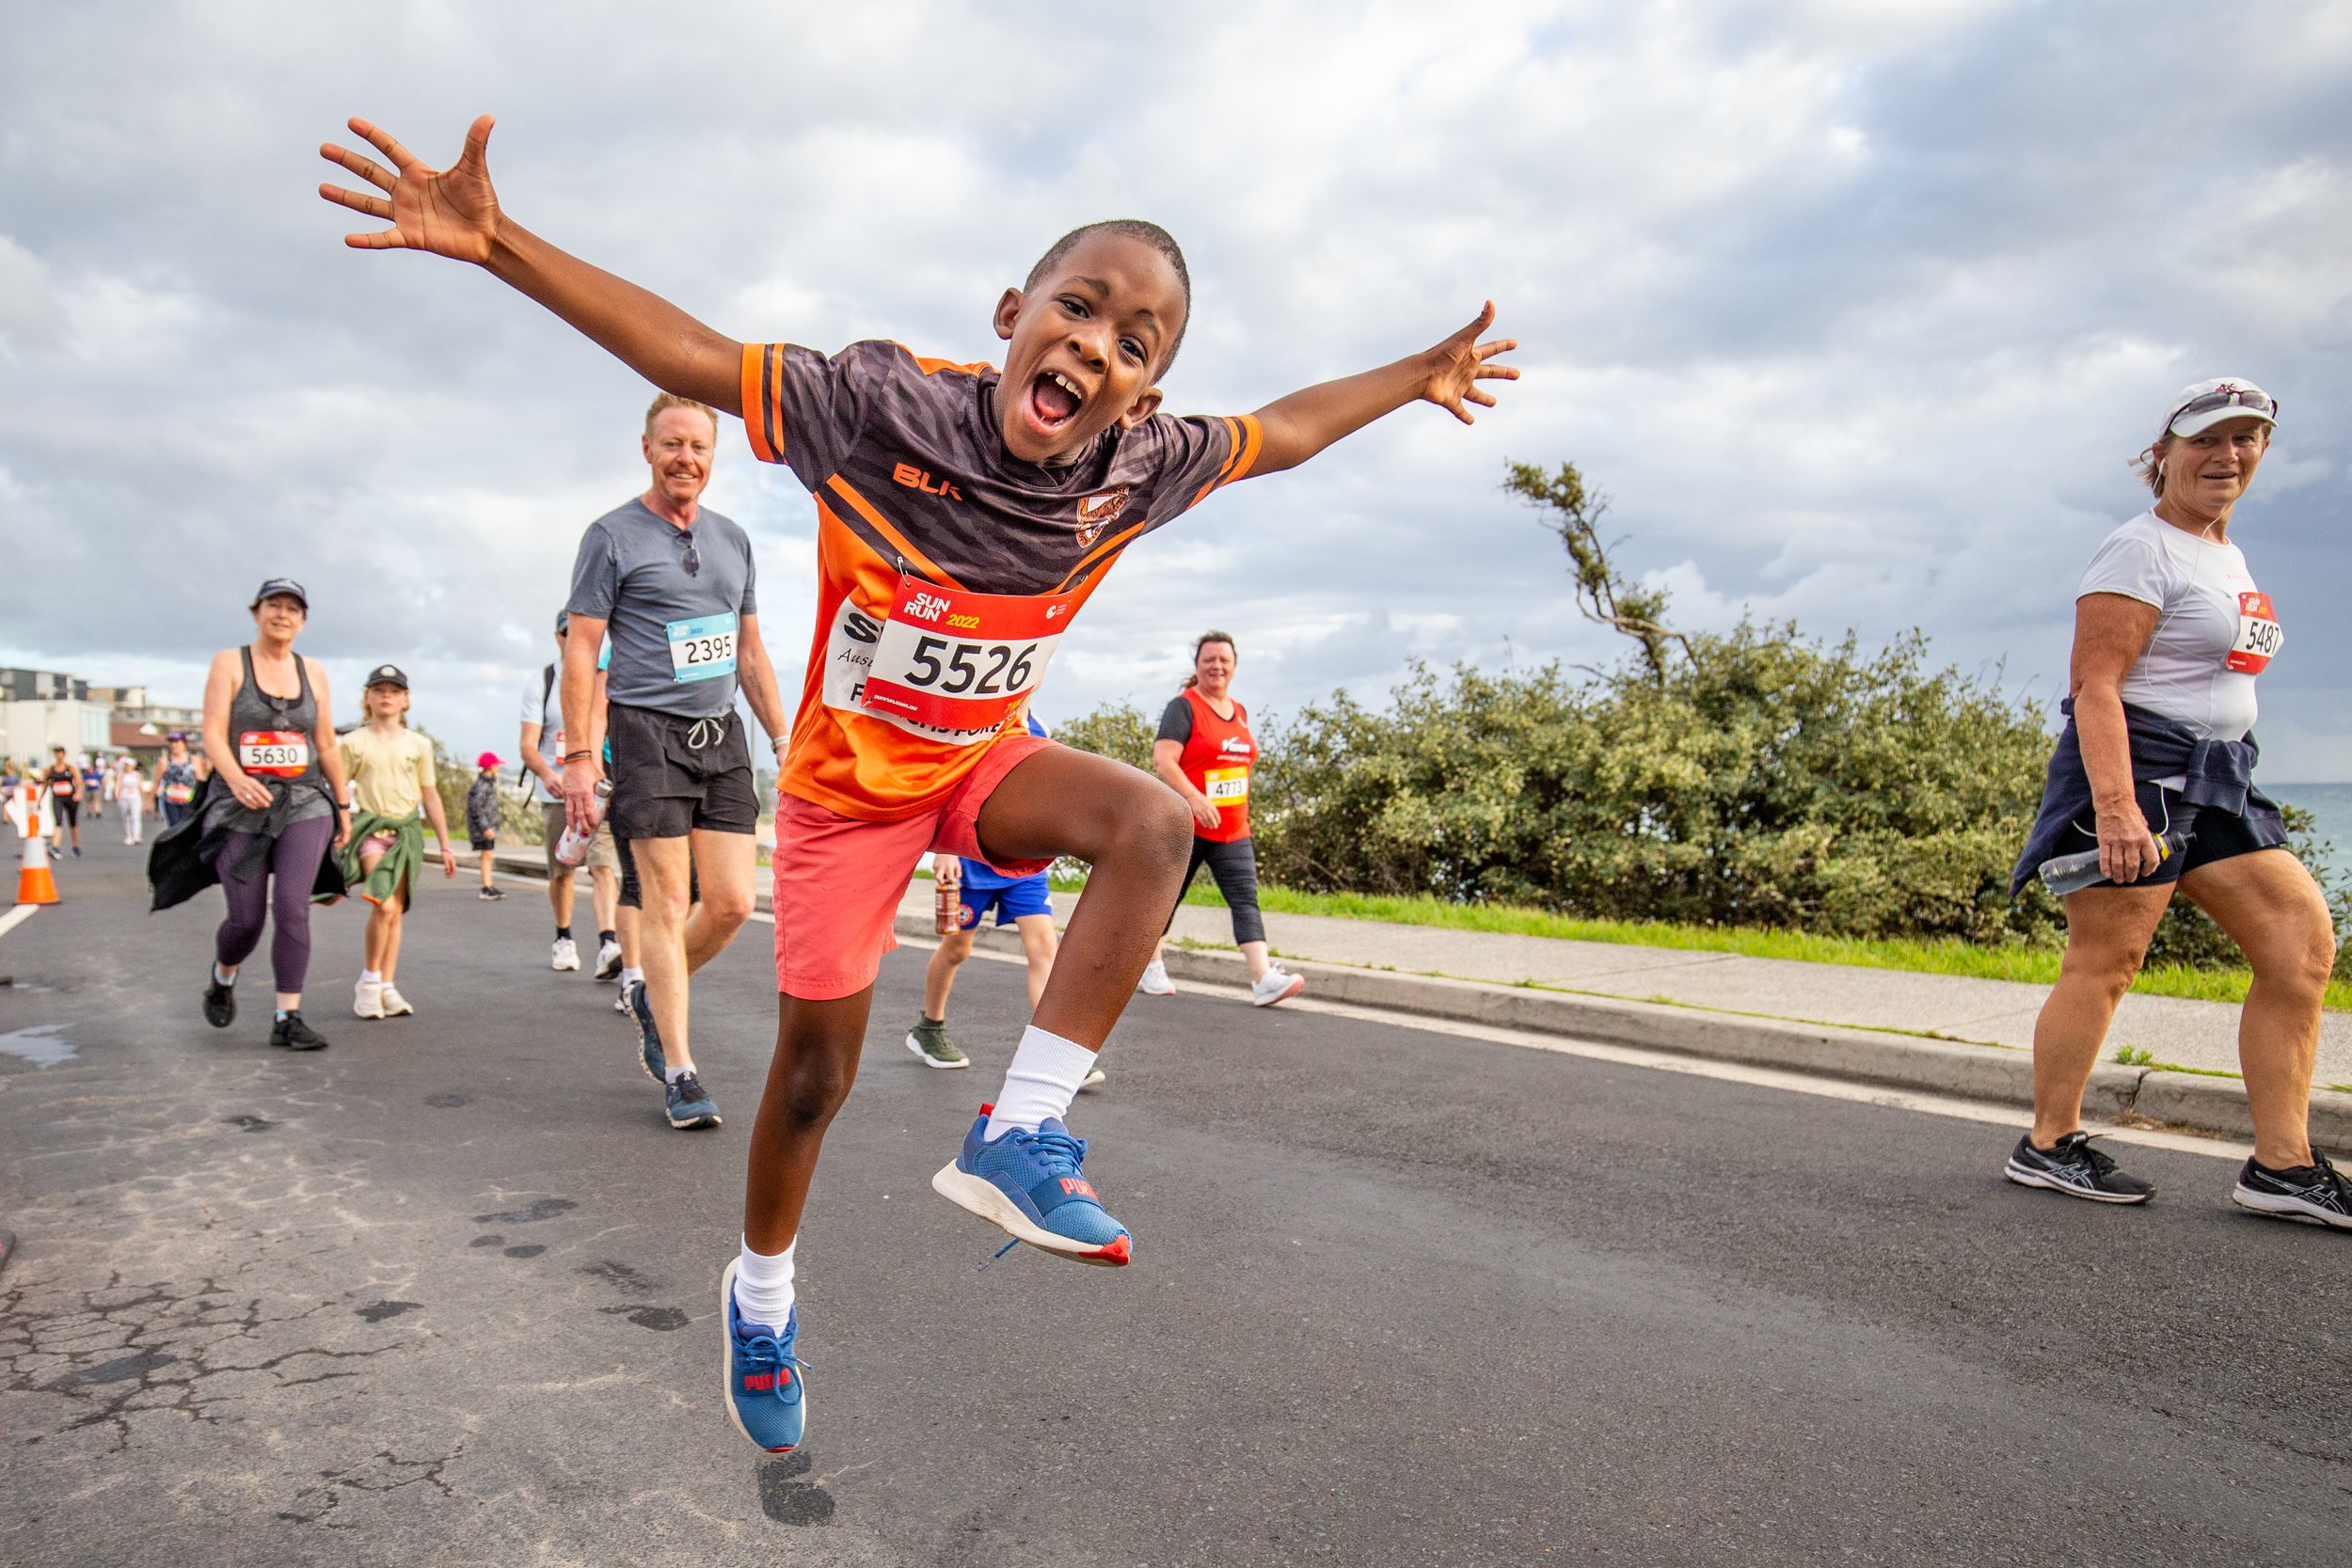
Probably my favourite photo of the day. These are the types of shots that the marketing teams love, because it really captures the vibe of the event. The little bloke told me he is already looking forward to the City2Surf (14km!!)
After a coffee and a bit of food, I get back to the bulk of the photo work. Between the photographers, we’ve ended up with about a thousand photos. Important lesson here: we really work on not overshooting, we always shoot with a purpose! The client doesn’t need hundreds of photos for their brief, and I don’t need to be culling thousands of photos.
My first cull in Photomechanic (I’ll touch on Photomechanic in another blog post) removes any where the composition just isn’t right, or focus has been missed. From there I do a second round of culling, where each photo is asked “do you meet the marketing brief?”. This process has to be ruthless. That final cull got me down to about 150 photos, which I dragged into Lightroom. We put a big emphasis on getting the shots as close to correct in camera as possible, so minimal editing is required, usually just a bit of exposure adjustment.
Around 2 hours after the event finished, the Council marketing team have received ~150 final photos and my work is essentially done.


A few hours later, the video team get their draft to the client and after one tiny tweak to one of the captions, the video is finalised and shared across their social media platform.
The awesome work done by James Walker of Skywalker Studios on behalf of Freshie Photography!
For us, that is the end of the work. The client was super happy, and we were satisfied with a busy, but very successful day. Then I got the message…..Channel 9 had picked up the footage sent out earlier with the press release, and they were likely to run it in their 6pm bulletin. For context, this is the most-watched news bulletin in Australia. I fully expected it would be run late into the bulletin as a bit of a filler piece. Then, whilst watching the third story of the bulletin, a piece about COVID recovery, our footage suddenly appeared with some voiceover about fun runs returning as a sign of COVID recovery. It was frankly surreal, and a nice bit of icing on the cake of a successful day shooting a great community sporting event!
Some of our video work (at 2:57 in this piece) making it’s way onto the 9News Sydney primetime bulletin!

There are some things that just don’t require words.


Getting clean backgrounds in an event that runs through suburban streets is next-to-impossible. You just have to do your best, and accept that A photo of that moment is better than NO photo of that moment!


Remember when I said the last competitor to cross the finish line is the most important one? Yep…..
Freshie Photography 2021 Year in Review
2021 Year in Review
2021. What an unforgettable year of ups and downs. I’ve given up trying to predict what will happen, and now just take it for what it is. Despite a highly disrupted year, including 107 days straight of lockdown, I was fortunate to be able to shoot over 15 events and work with some amazing corporate and private clients. I experienced some career highlights (including delivering my biggest project to-date) and all-the-while continued to grow Freshie Photography. I look back at the year that was with a sense of gratitude and achievement. Here’s my Year in Review 2021!
February
February of 2021 saw Sydney beginning to awaken from the COVID slumber as events began to come back online. My first major event of the year was the SunRun, which was the first mass-participation event (approx. 3000 competitors) in NSW since the start of COVID. I was grateful that the Northern Beaches Council engaged me to put together a team of photographers and videographers to cover the event and prove to other organisers that events could go ahead in a COVID-safe fashion. The event went really well, and you can read more about it here.

February also saw a return to shooting races for the Warringah Triathlon Club, and a new commercial partnership with Sports Group Australia.
March
Things really started to ramp-up in March. I worked with the legends at Wild Women on Top to cover Coastrek Sydney 2021, my biggest project to-date. Coastrek is a beast of an event to cover, traversing a 60km course over 18 hours, but my goodness was it an awesome event to work on! You can ready more about the event day experience here, and planning for Coastrek 2022 is already well underway!
The March WTC Triathlon was a soaking wet affair, but these are often some of my most enjoyable events to shoot because everyone is in the mood to embrace the ridiculous conditions!


April
April saw a return of the best surfers in the world to the Northern Beaches for the World Surf League event at Narrabeen. This event also marked the first outing for my new Canon EOS R6, and what a game-changing purchase that has been! Outside of the WSL comp, we also had some nice pre-winter swells roll through, which provided an opportunity to get out and do some surf projects for personal clients.

May
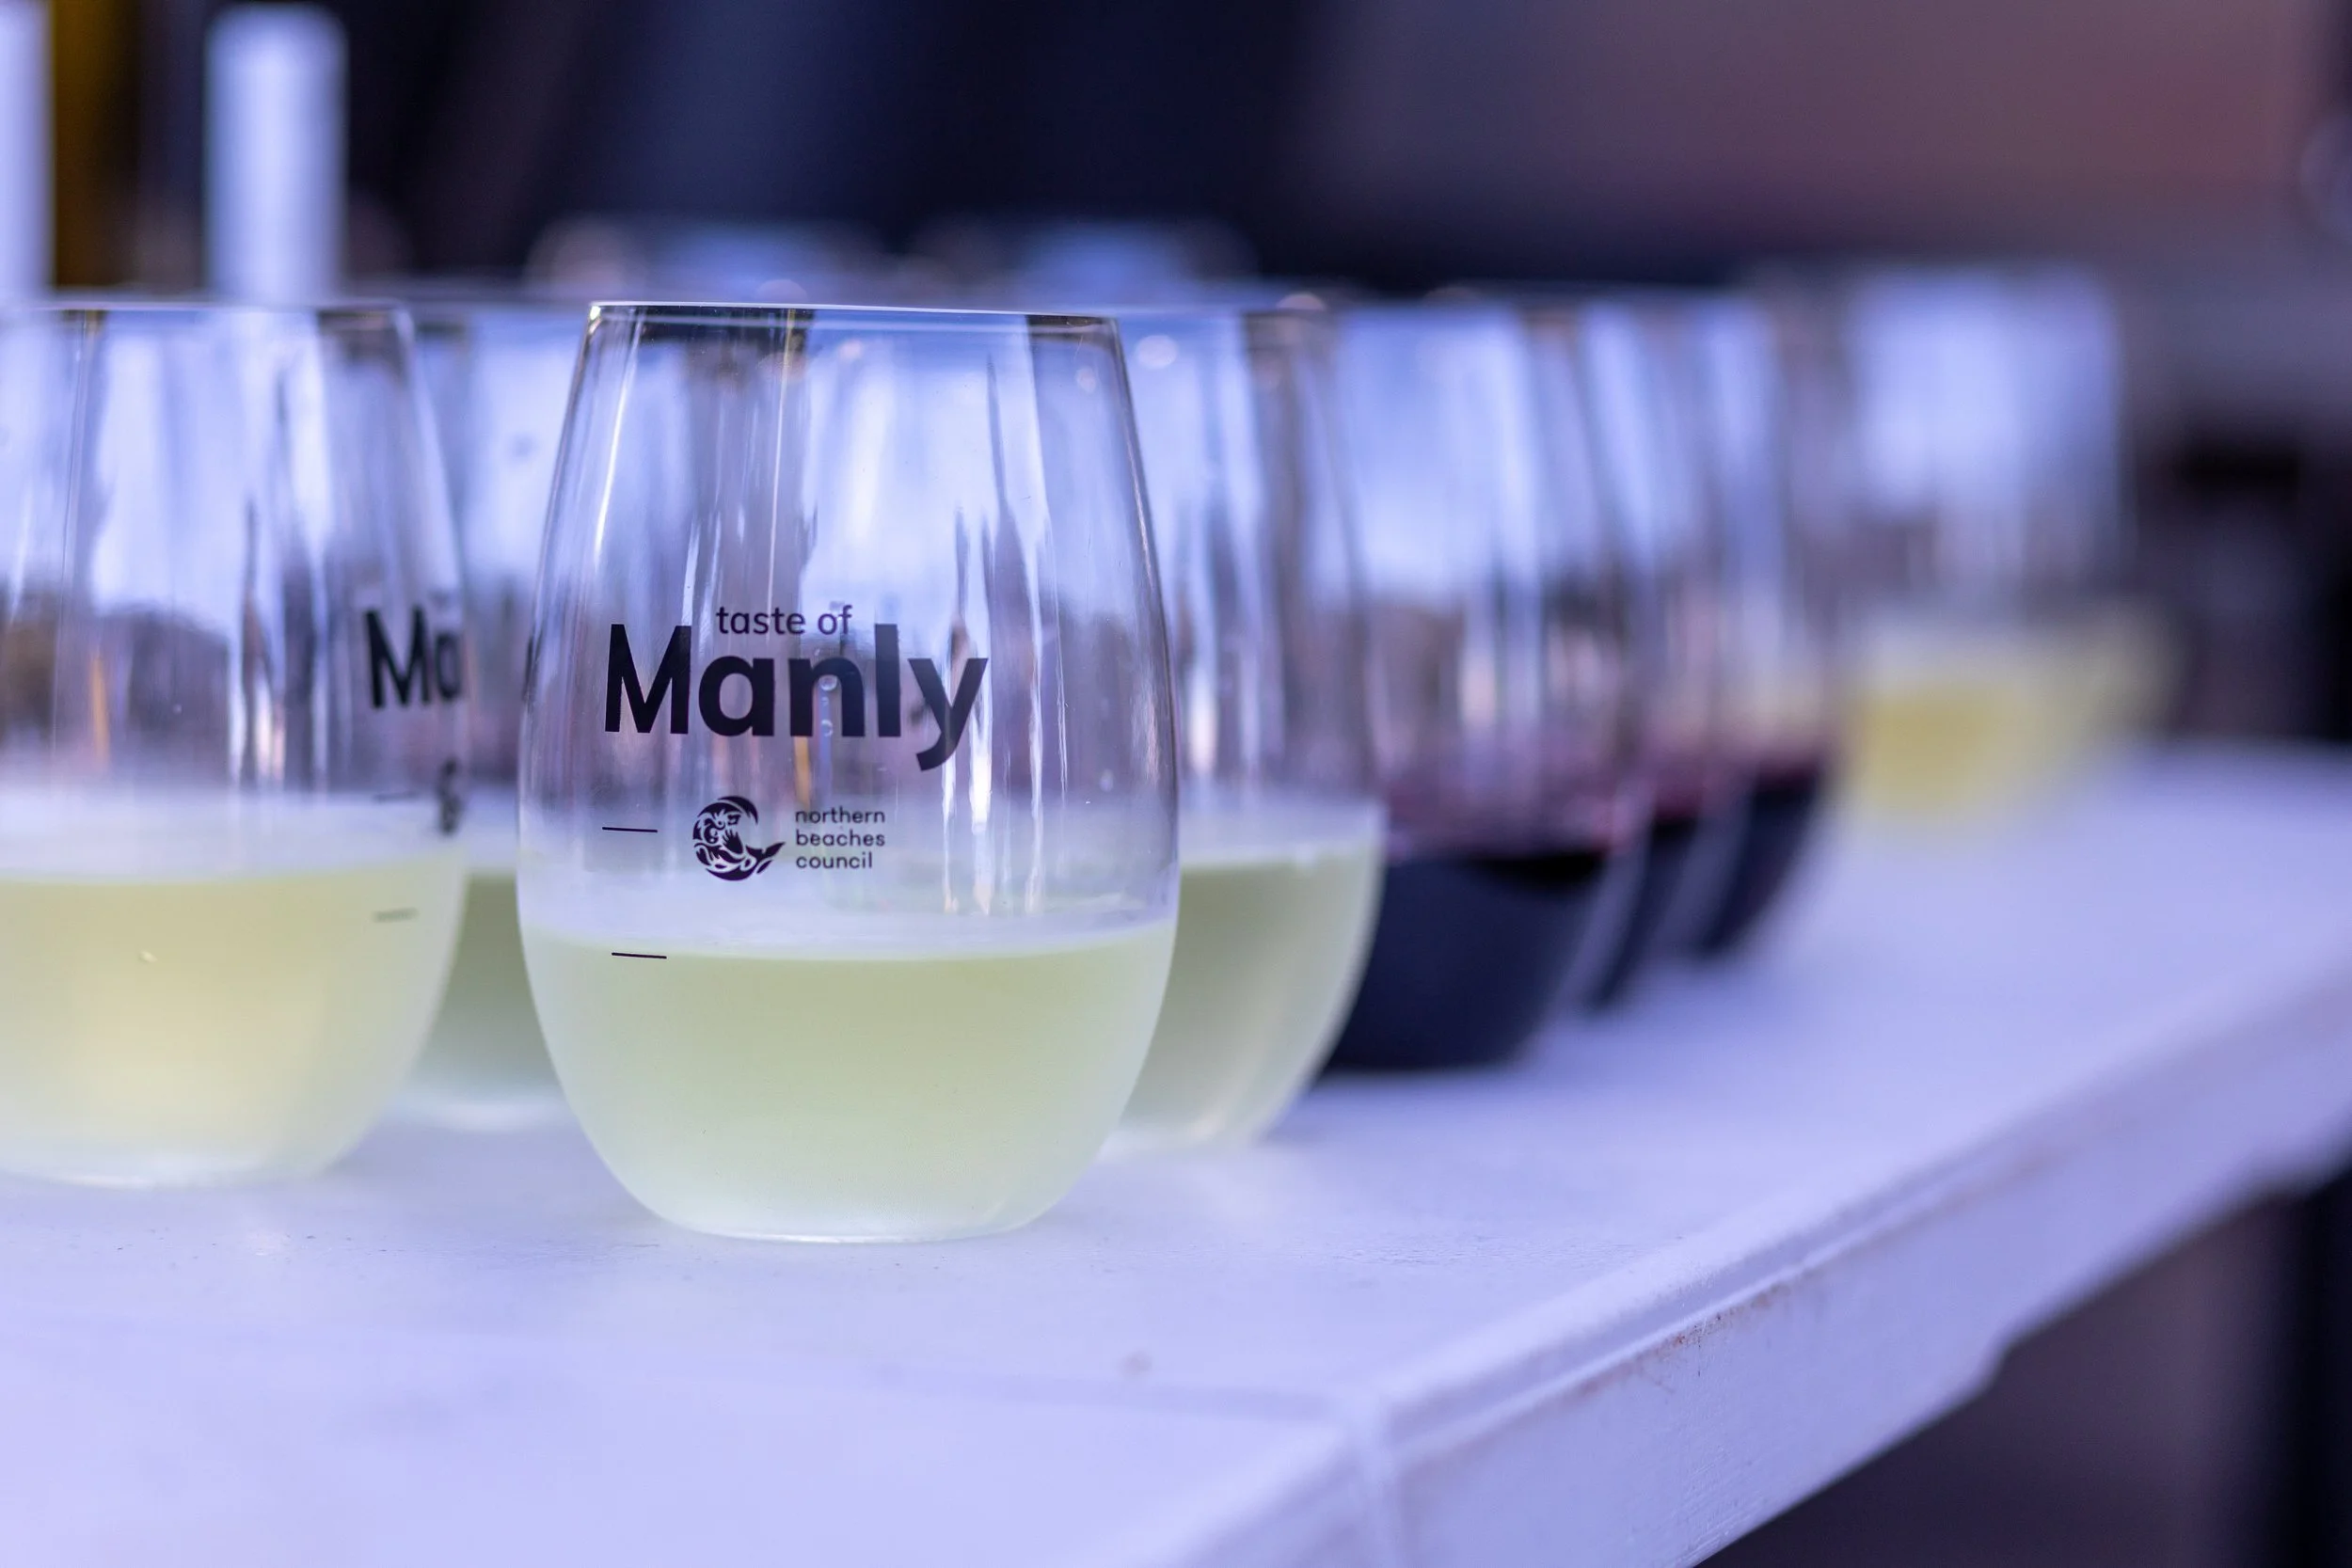
What a busy month! The Northern Beaches Council was holding their Taste of the Beaches event all throughout May, and they engaged me to shoot photo and video at six different events. The events started with the Manly Beach Bar and Corso Beer Garden on a beautiful Saturday afternoon, and then continued with a Food Truck Party, various evening events at local bars/restaurants, and wrapped up with the Palm Beach Wine Bar event. 6 events, approx. 2500 photos, and 4 separate videos.


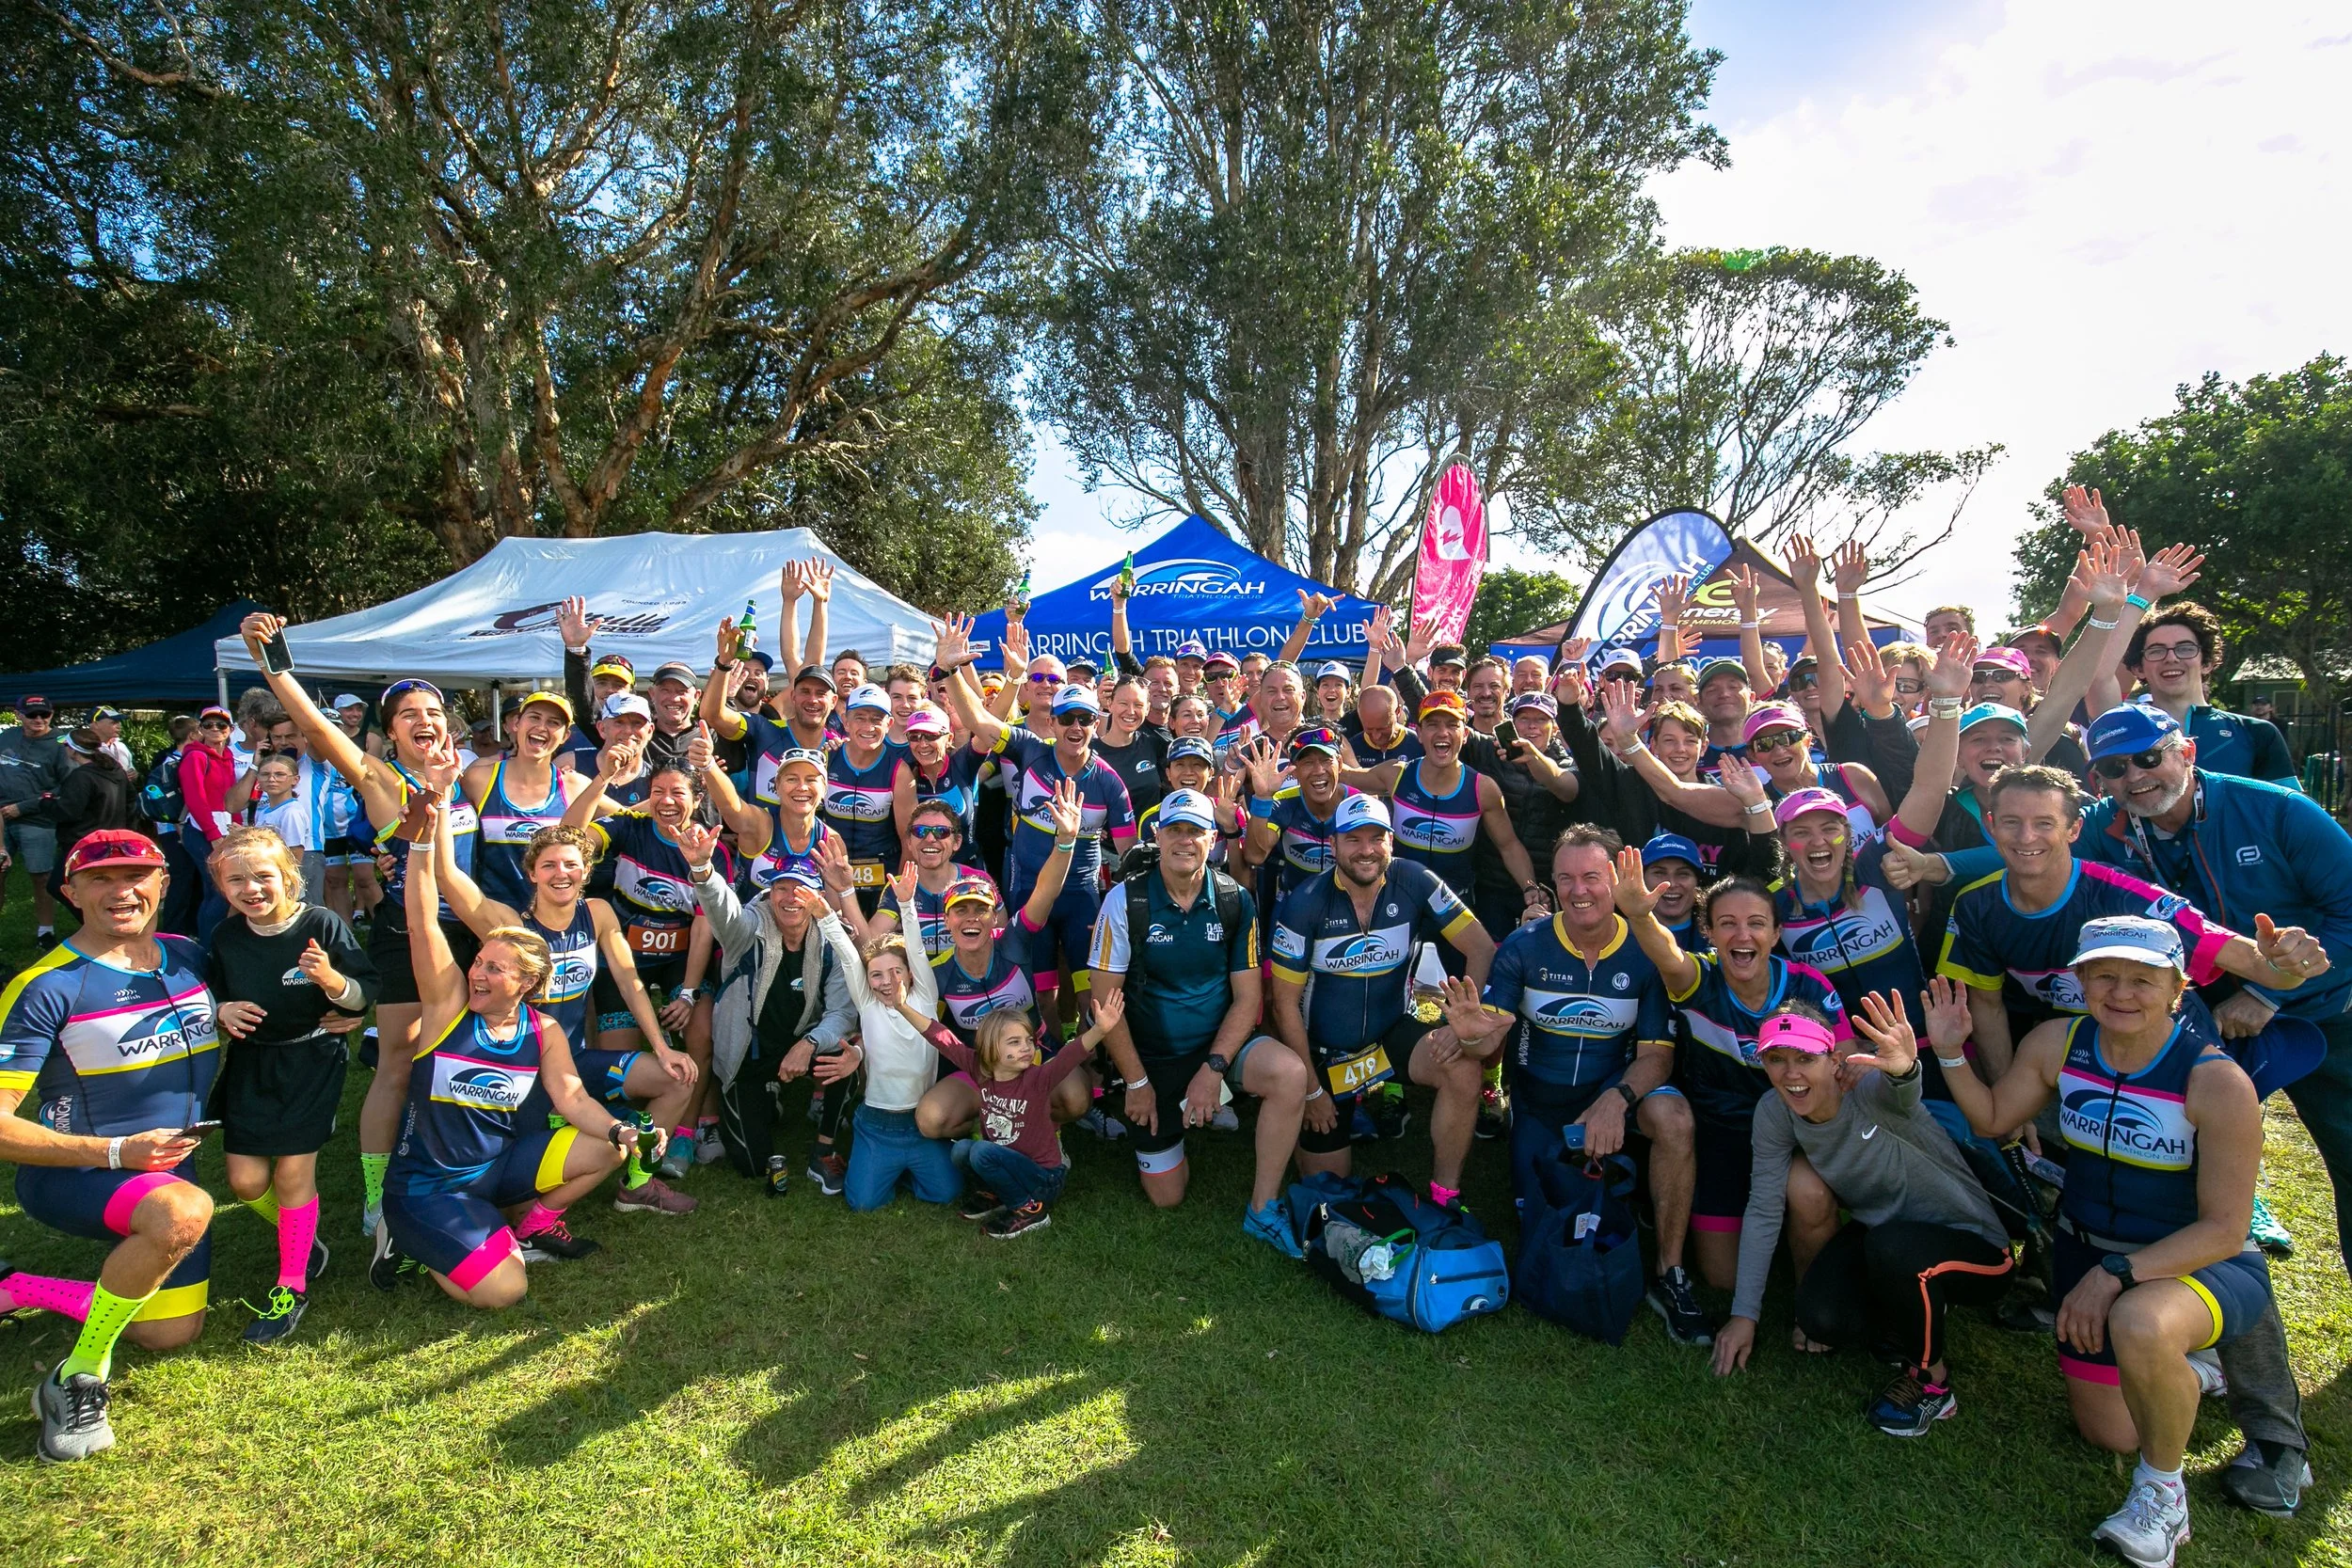
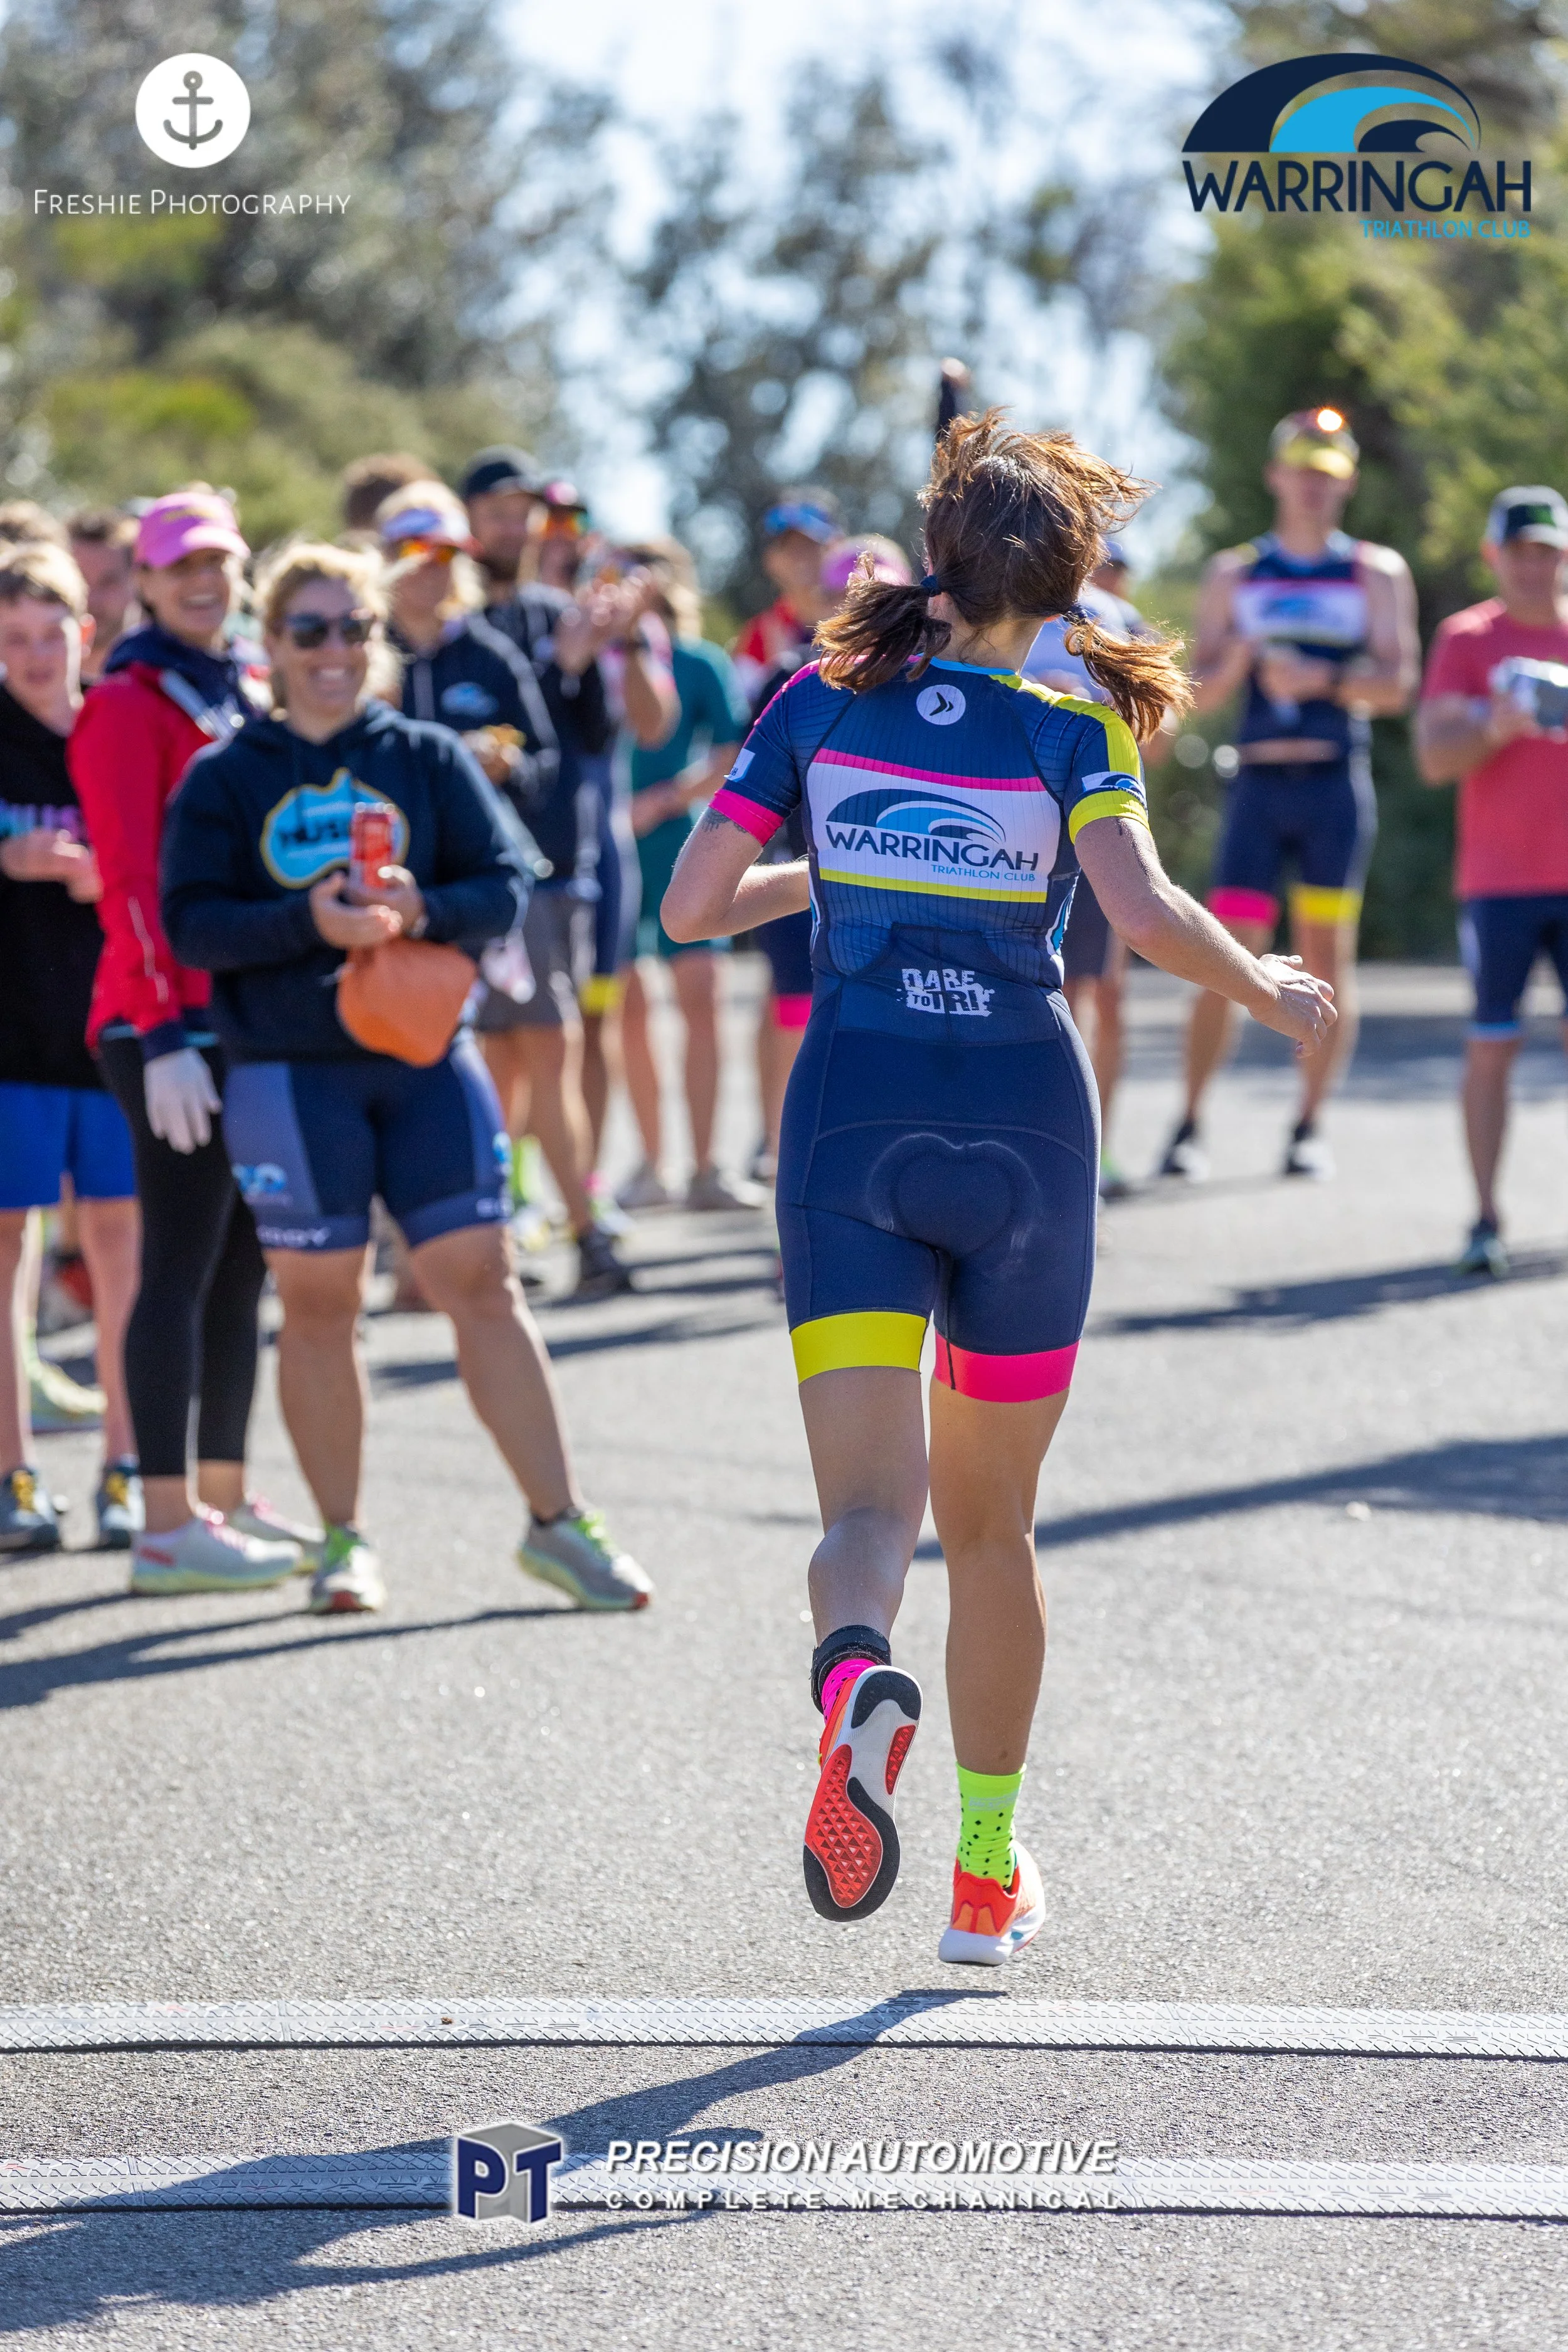
May also saw me travel to shoot my favourite triathlon of the year, the NSW Club Championships. Shooting for the Warringah Tri Club is always a joy, and Club Champs really brings out the very best in club camaraderie. The club dominated, bringing home the trophy with the largest winning margin in history, and I was privileged to be there to capture some unforgettable moments.

June
Oh no, not again! After months of life essentially being back to normal, COVID returned to a Sydney population that hadn’t yet had the chance to get fully vaccinated, and the month of June saw case numbers begin to steadily rise. I don’t need to harp on about this….things got bad, we got locked down again, all events got cancelled, and we started a long winter of lockdown. I’ll see you in a few months.
October
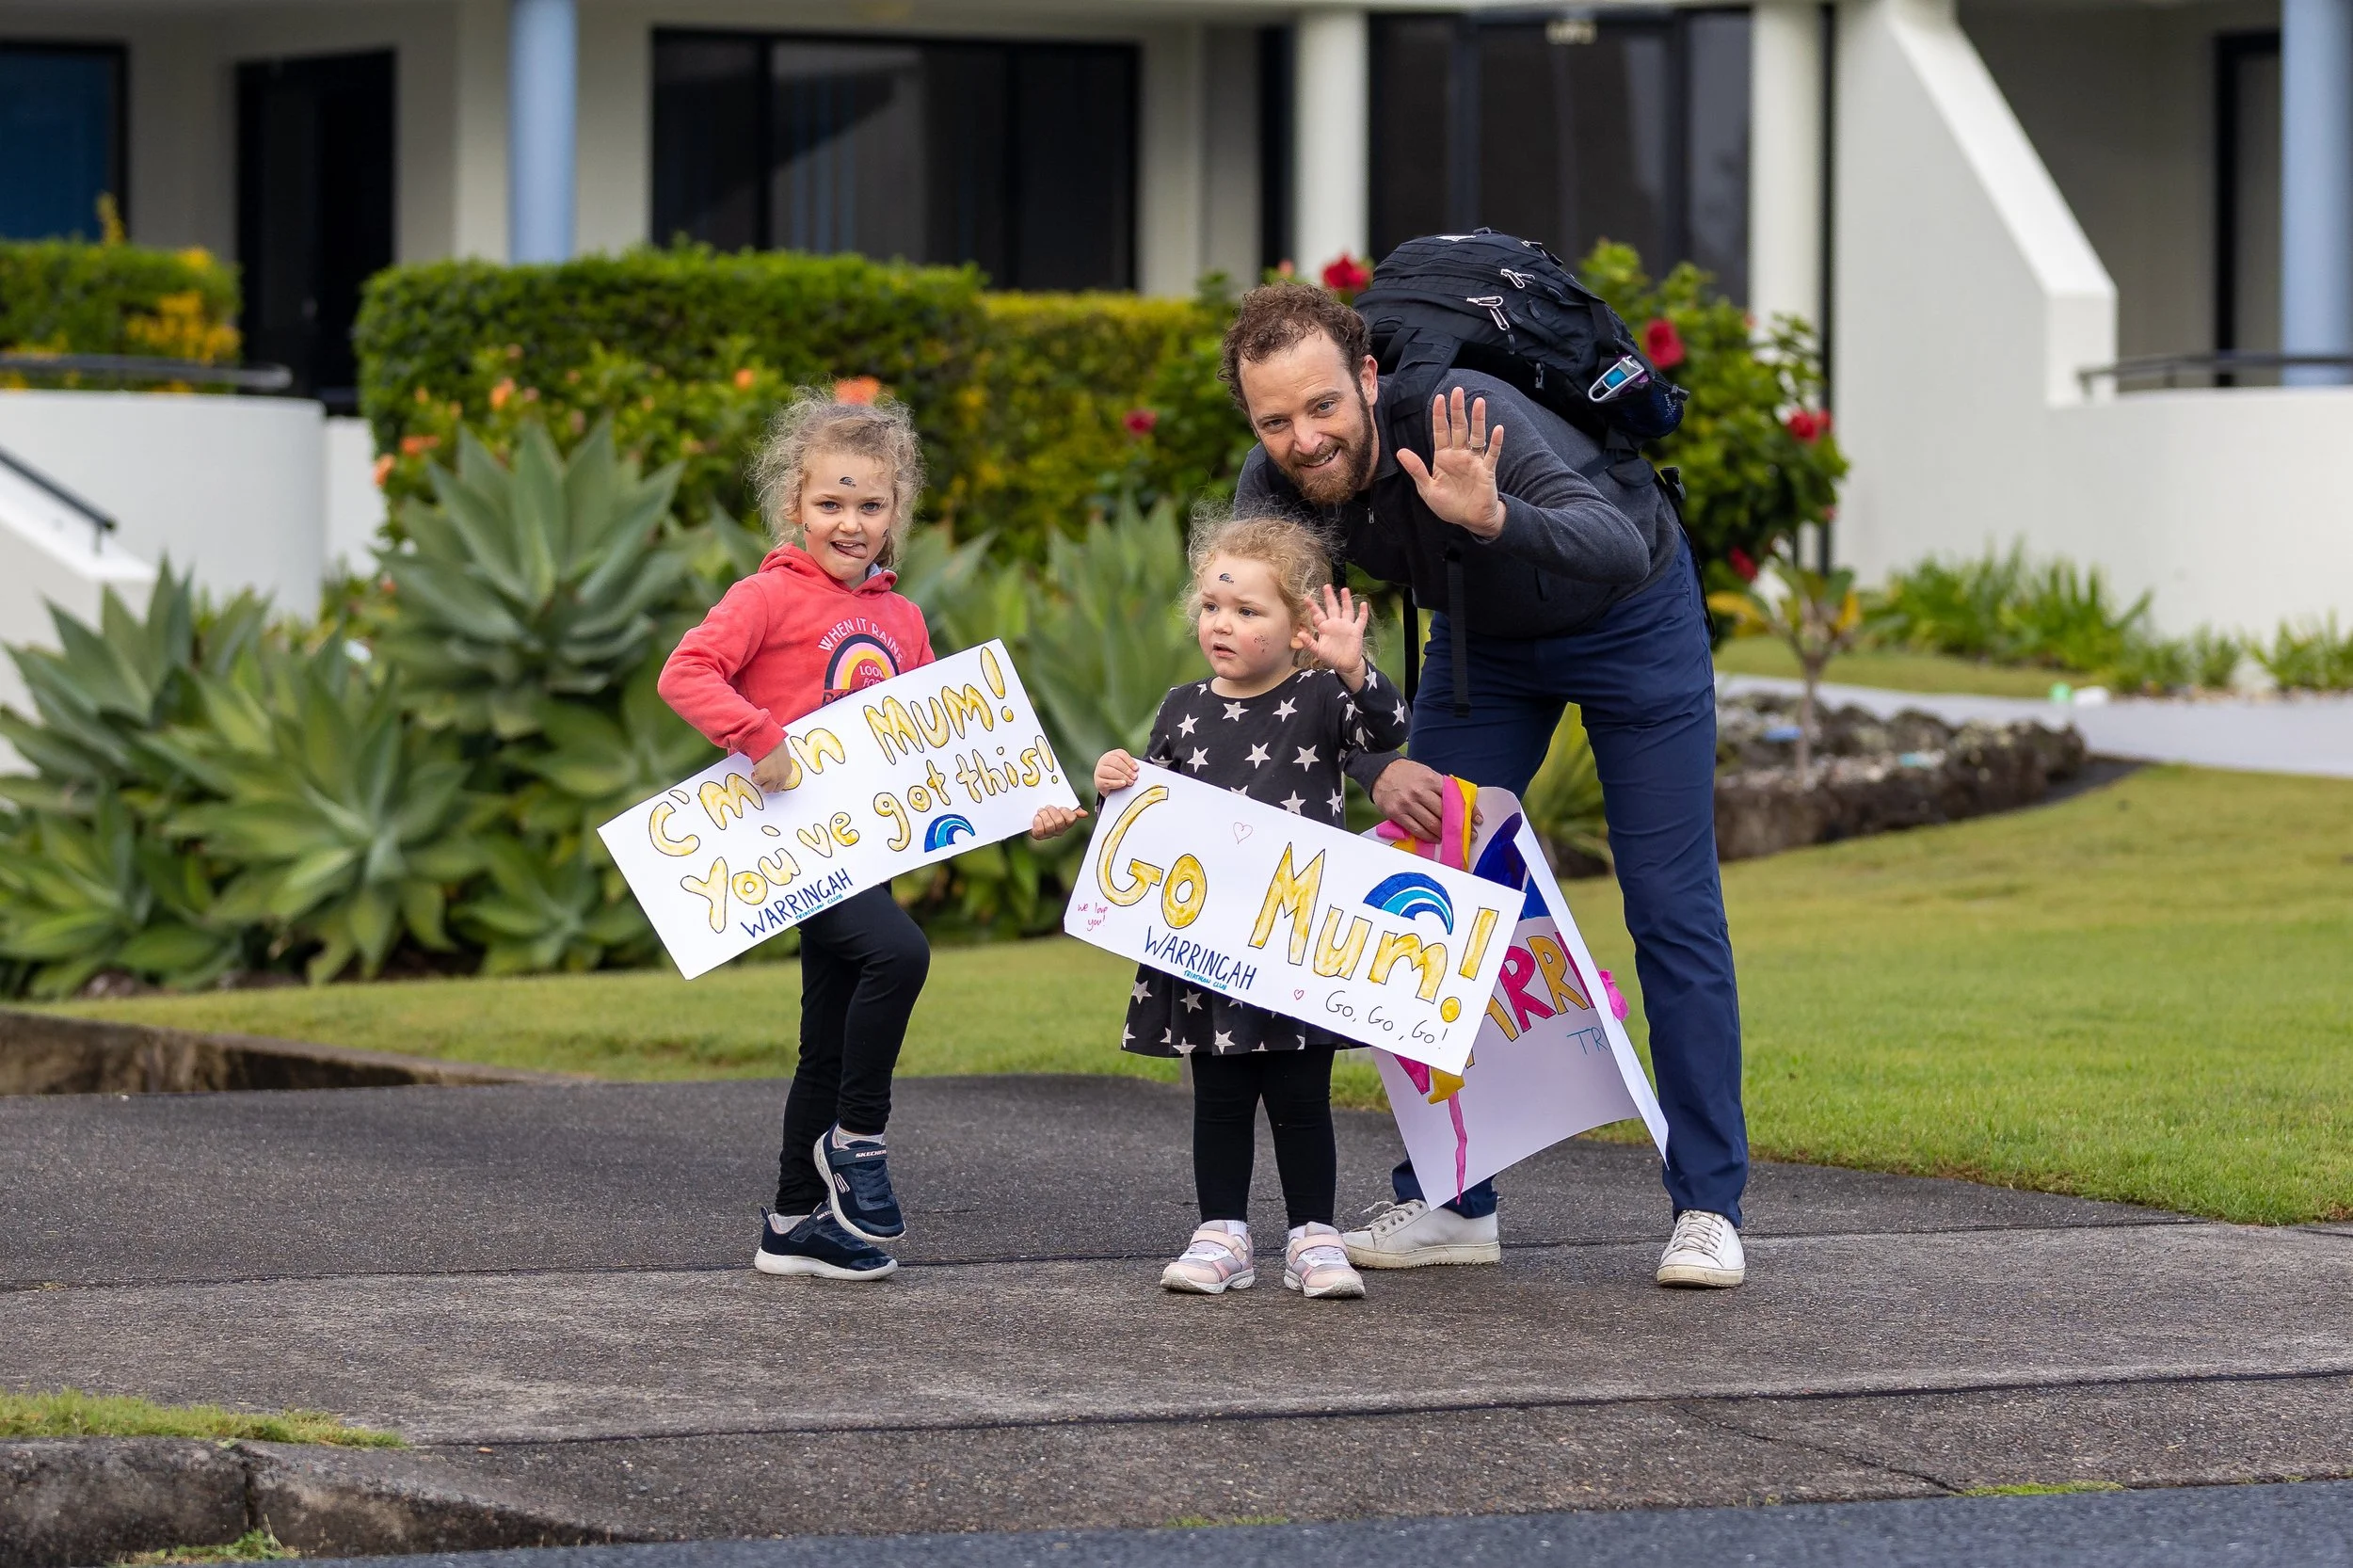
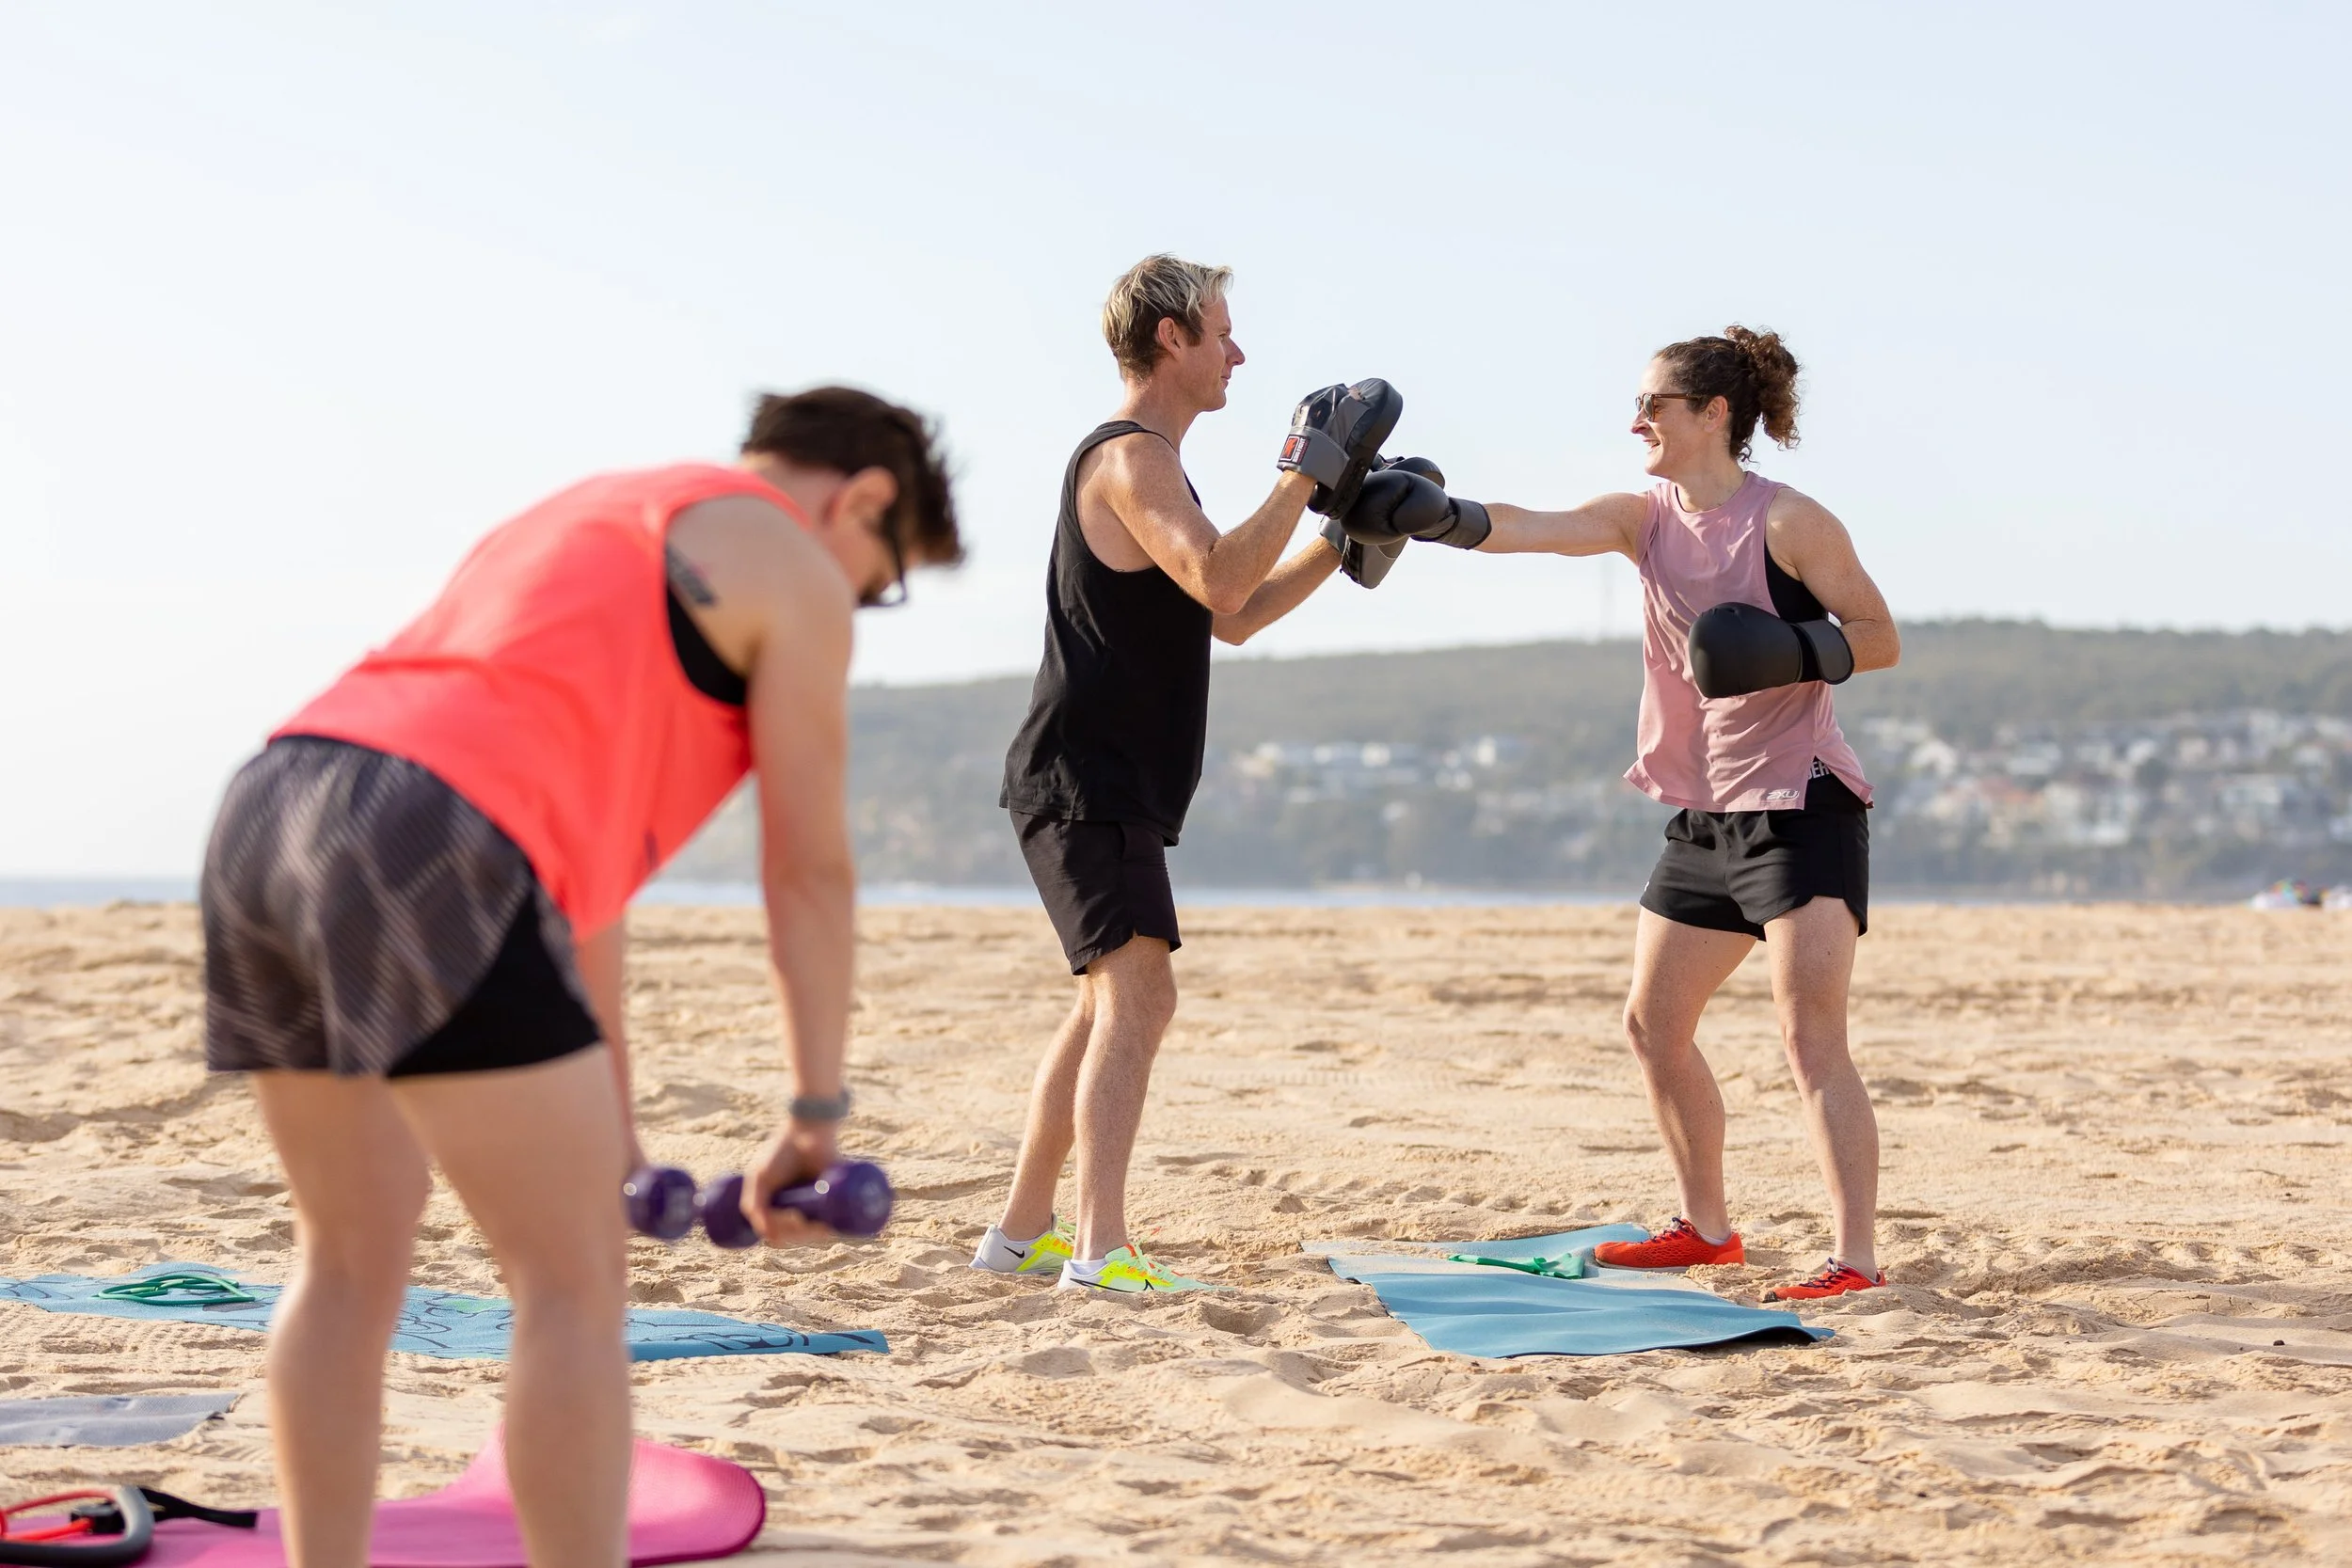
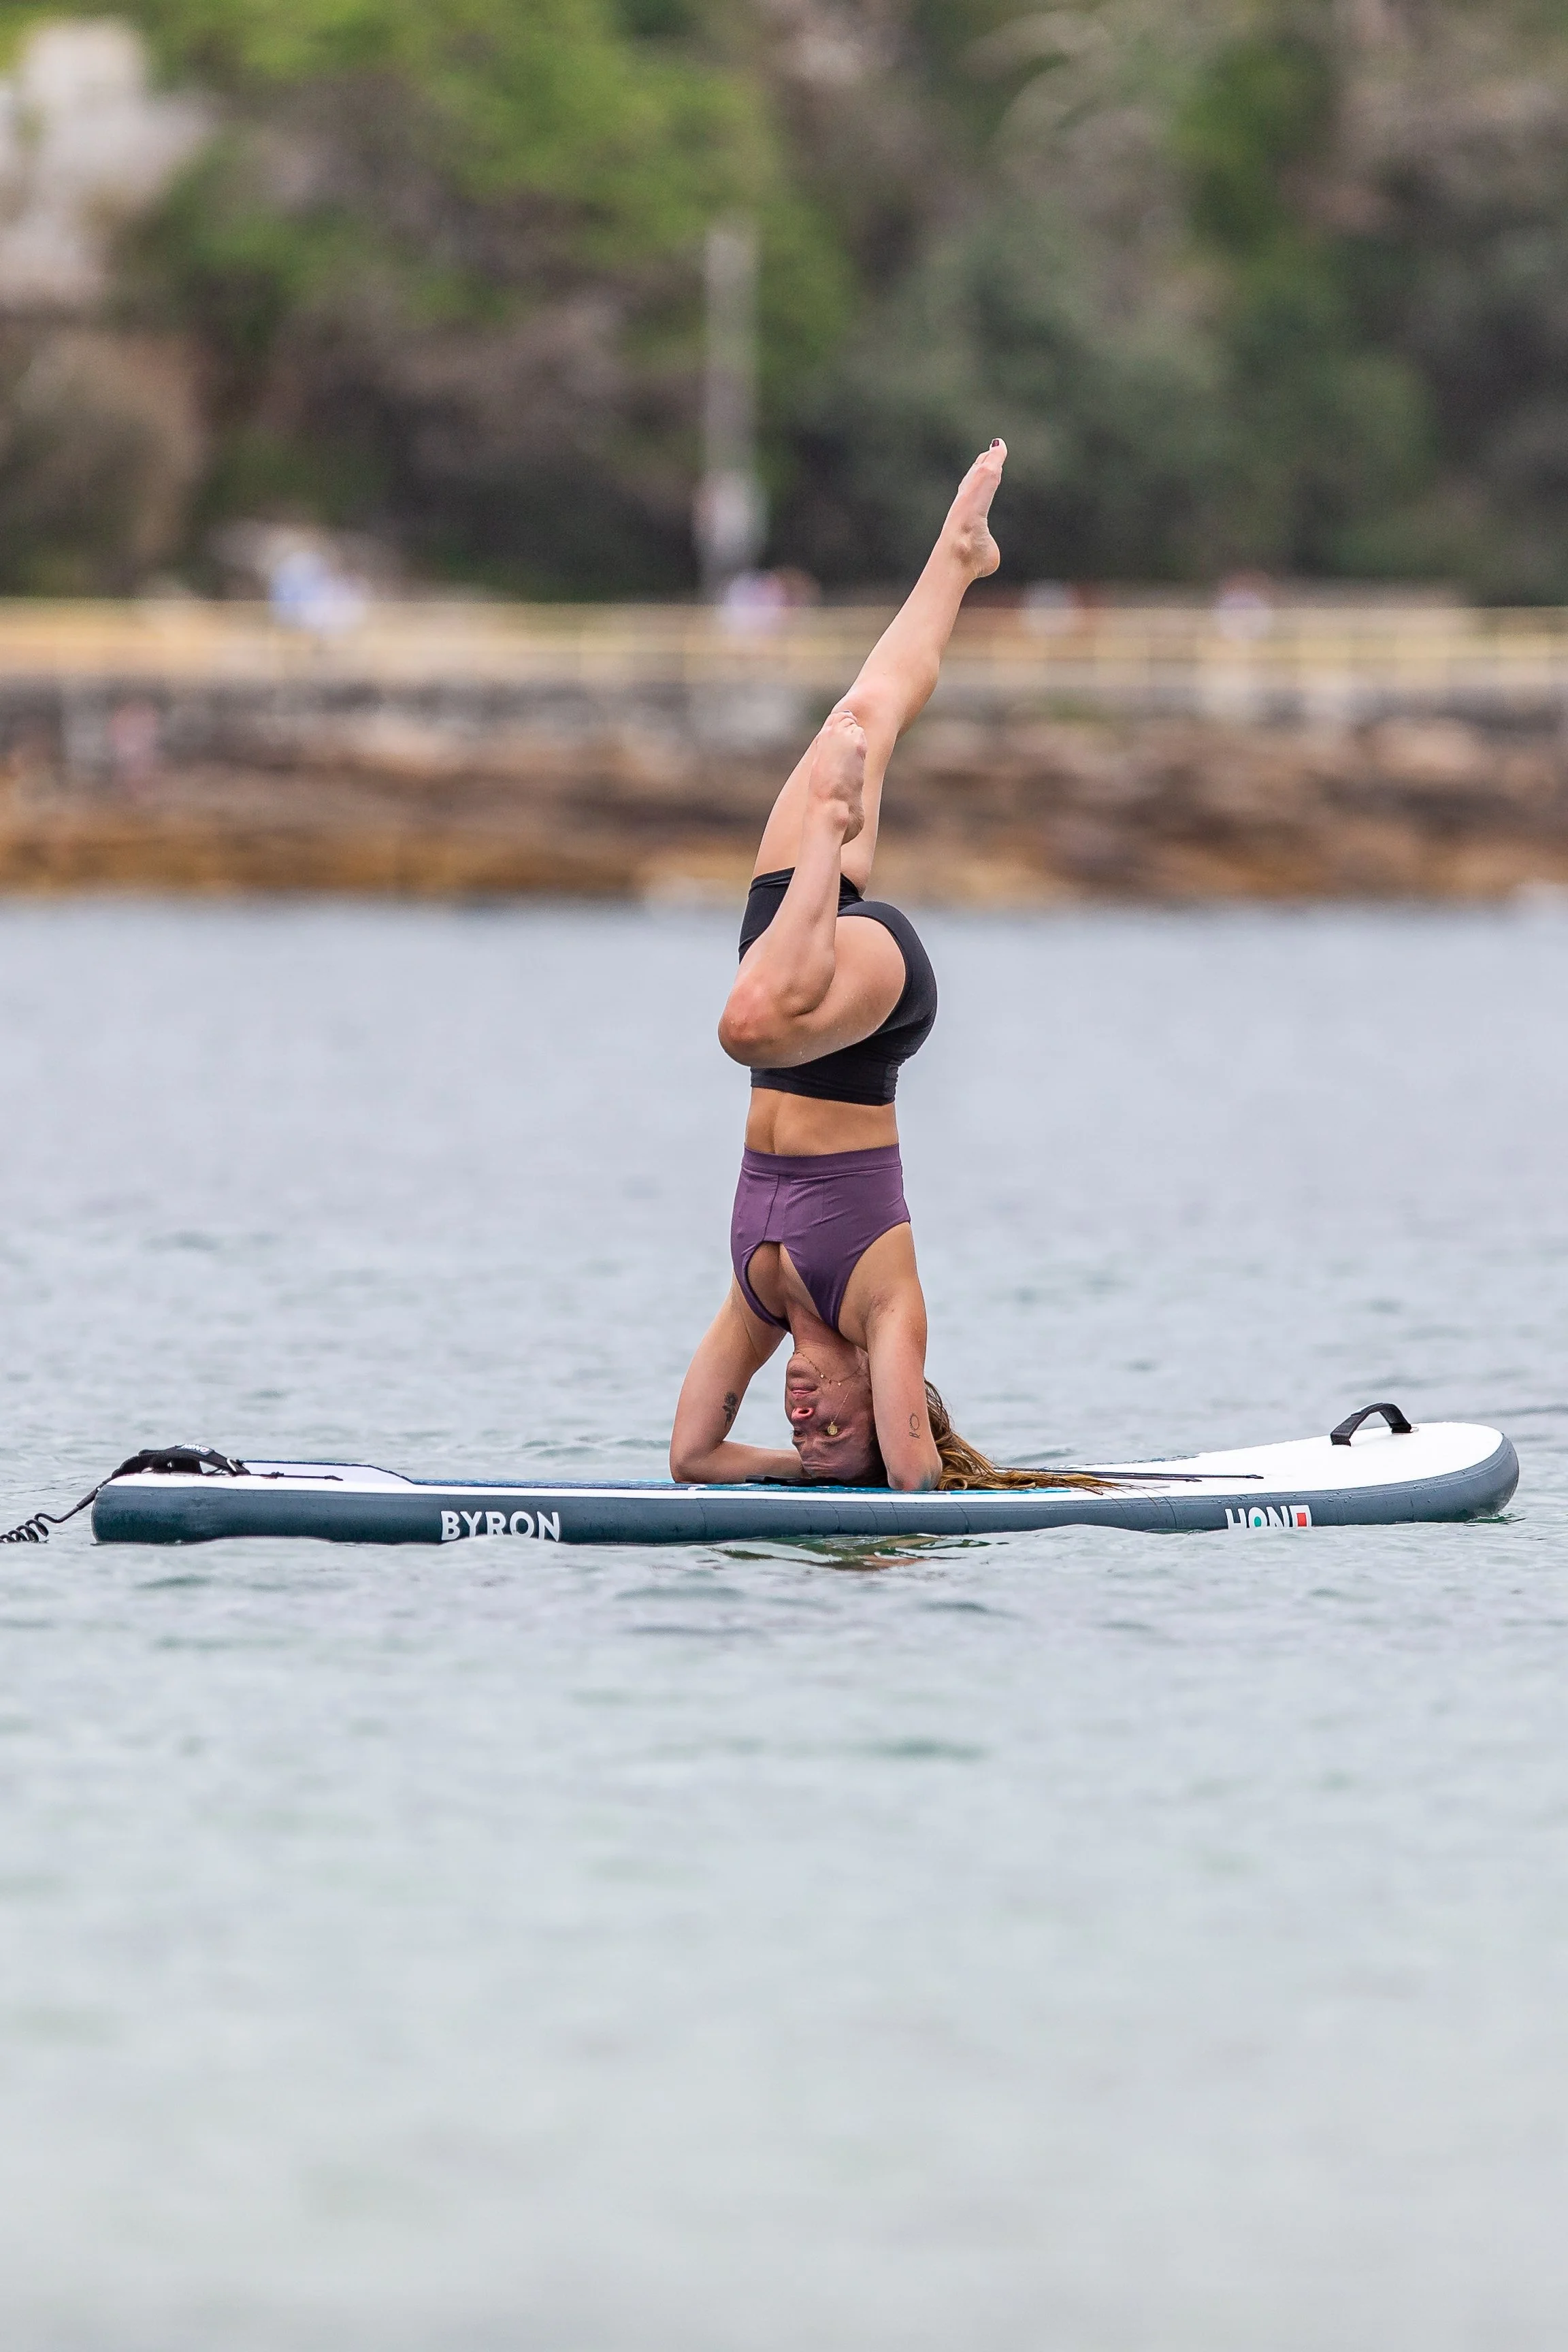
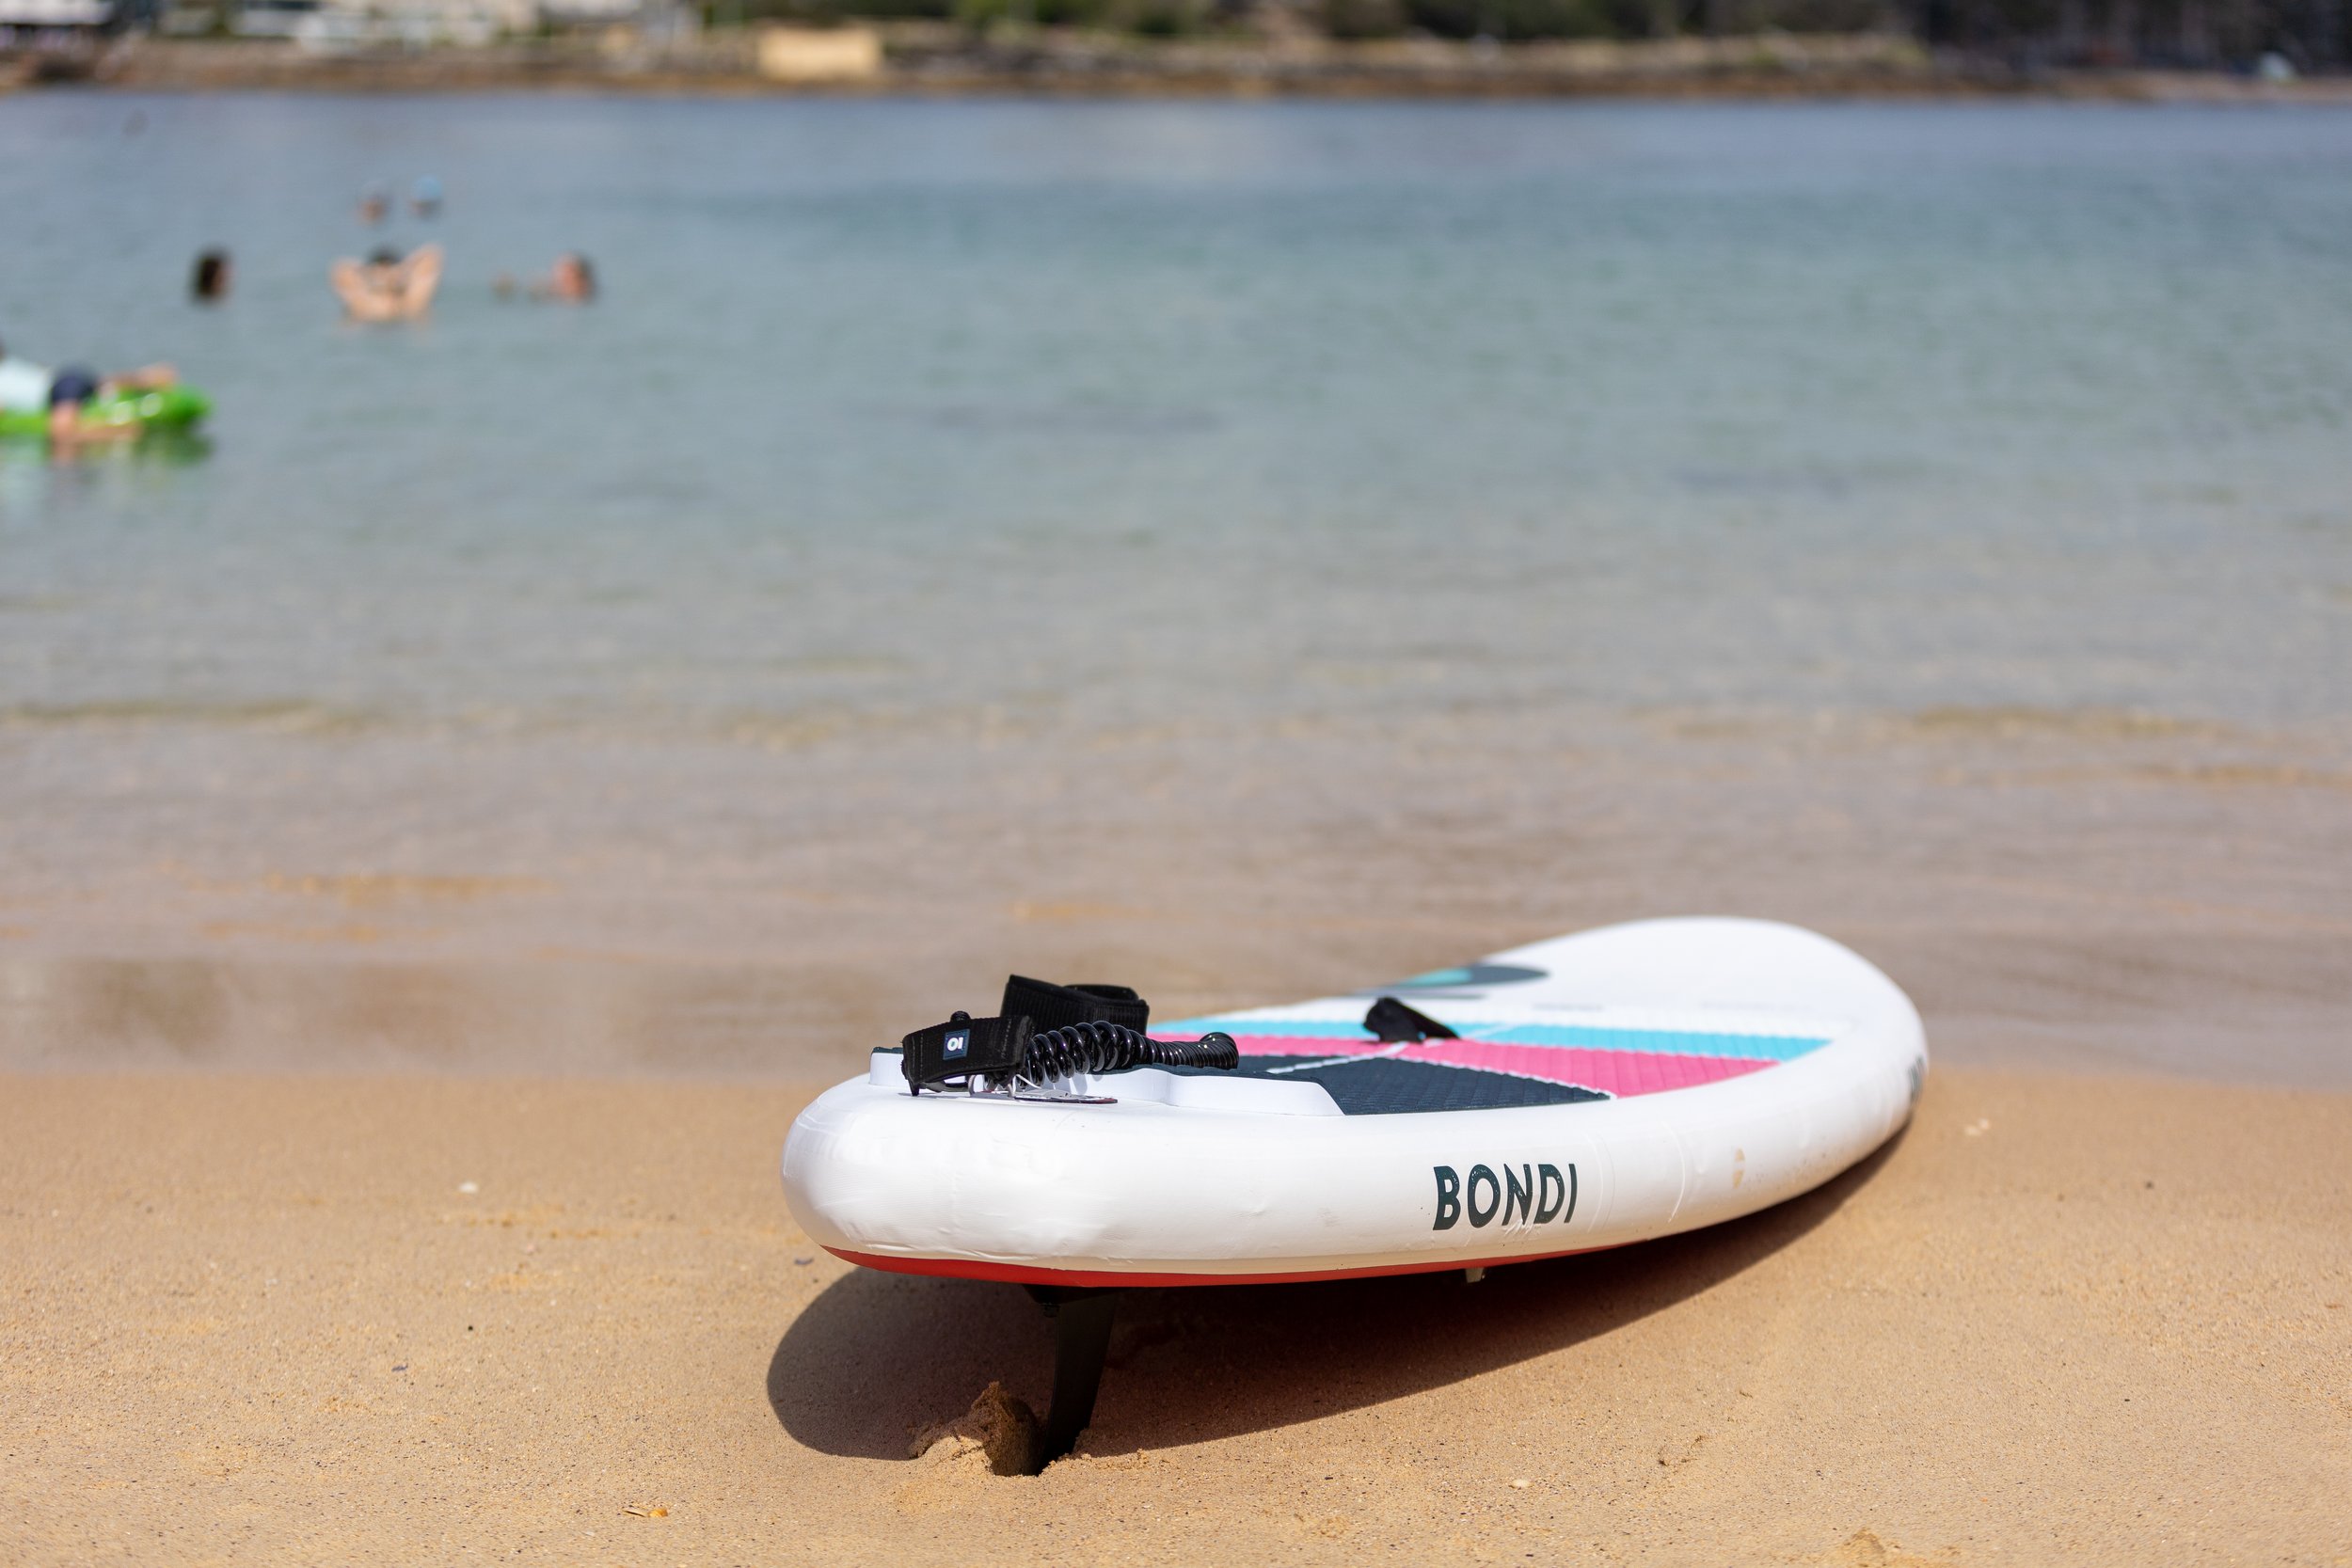
Oh, hi there, post-lockdown world. October saw an easing of some restrictions for vaccinated individuals. Whilst most large events weren’t back online, October did give me a chance to get some of my commercial/lifestyle projects back up and running. Shoots included a fun beach personal training shoot for Training Beaches, and the start of a very successful ongoing partnership with Honu paddleboards to produce their photo and video content.


November
Racing is back! Warringah Tri Club again lead the way with resuming club racing in a COVID-safe manner, and we were blessed with a beautiful morning for shooting. I also returned to work with my friends at Wild Women on Top to capture some corporate/lifestyle images at the beautiful Lavender Bay on Sydney Harbour. What a setting!


December
A busy month to end the year. Two Northern Beaches Council Xmas events, a triathlon, the Bare Creek Trail Run for Outer Image Collective, some more video work for Honu, and finally a fun morning shooting 7-time World Champion Layne Beachley at the Surfaid Santa Surf.


And that is 2021 done and dusted. Some 35,000 photos shot, a bucketload of amazing events, and one very content photographer. Thank you to all my amazing clients and business partners, working with you is what keeps me motivated each day! I’m looking forward to 2022, whatever it may bring!
What is in my Triathlon Photography Kit - Part 1 Camera Bodies
All the gear and some idea
Obsessing over camera gear is an expensive pitfall that many newer photographers can fall into. The most important part of your kit is the photographer behind the camera, but there is also a reality to sports photography….it is demanding on gear, and you need to make sensible decisions around gear acquisition.
I touched on some of my triathlon photography kit about a year ago in my post about How to Photograph Triathlons. Since then, I’ve grown as a photographer, and my kit has evolved a bit along with me. The additions to bring it up to my current kit are incremental, and are mainly centred around convenience and slight improvements in image quality.
Over the following series of blog posts I’ll talk through my current kit, which is by no means a budget set-up and has been funded through my work as a photographer. I’ll also be putting together my suggestions for a starter kit that can be put together with a budget of roughly $1500.
Part 1 - Camera bodies
Once you start getting serious about photography, and particularly once you start accepting paid jobs, you simply cannot rely on just one camera body. Having multiple bodies provides the convenience I need of being able to shoot with different focal length lenses without having to change them (more about lenses here), but above all else, having a second body will save your bacon if one body happens to fail. If you’re shooting an important event and your only body fails, resulting in no images for the client, then they won’t be having you back.
My current camera bodies
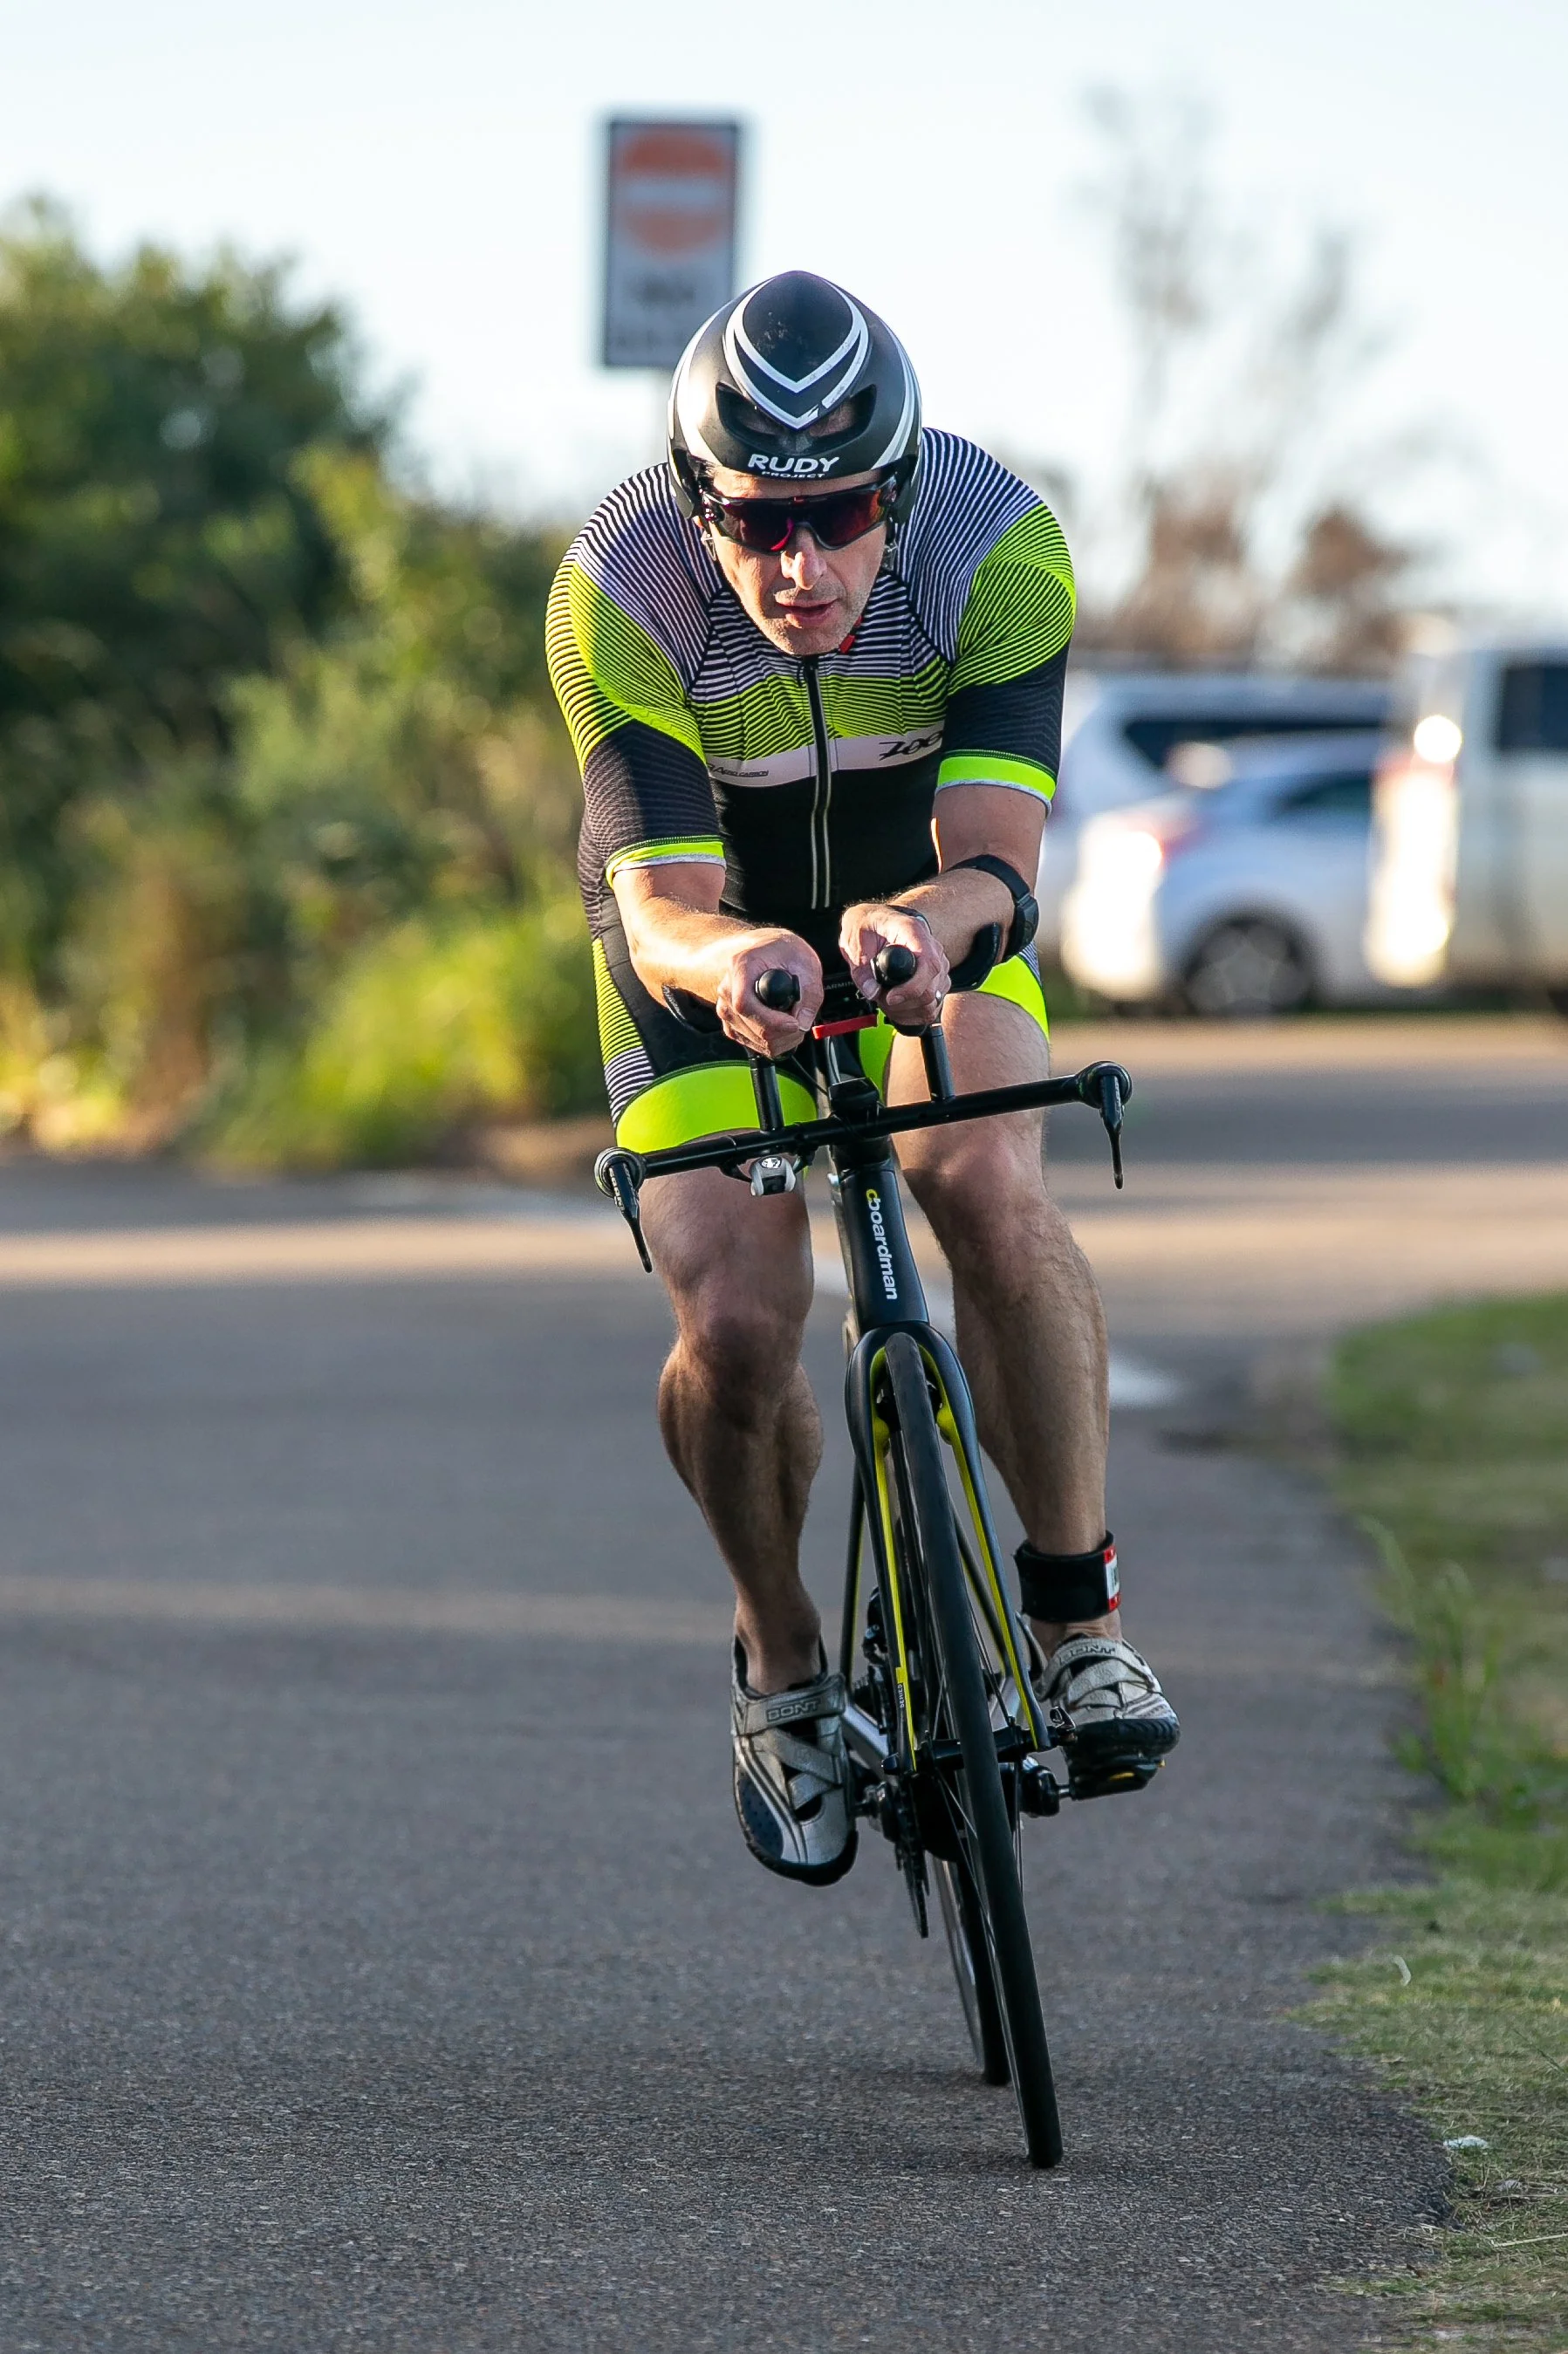
Canon EOS R6. Purchased earlier this year and was my first ever brand-new camera. It is an amazing camera, and the auto-focus system is out-of-this-world. I use all my “old” EF glass with the EF-RF adaptor, and the lenses perform flawlessly. The video capabilities are also very useful for some of my other non-sport projects that I’ve done. I’ve written more about the Canon EOS R6 for triathlon photography and general sports photography.
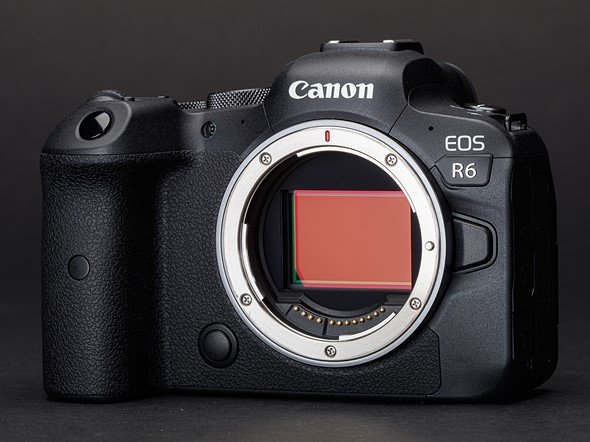
The Canon EOS R6 really is a game changer.
Canon 1Dx. Yes, the original 1Dx from 2011 (?). I picked this up second-hand just a few months ago for about $1300 to replace my 5Dmk3 which had started having some issues with a spot on the sensor. The 1Dx is still an exceptional camera and the price was right. This one has about 180,000 shutter actuations, so still has over half of its expected life. It is also built like a tank (something which the R6 lacks), so is perfect at those inevitable rainy triathlons.
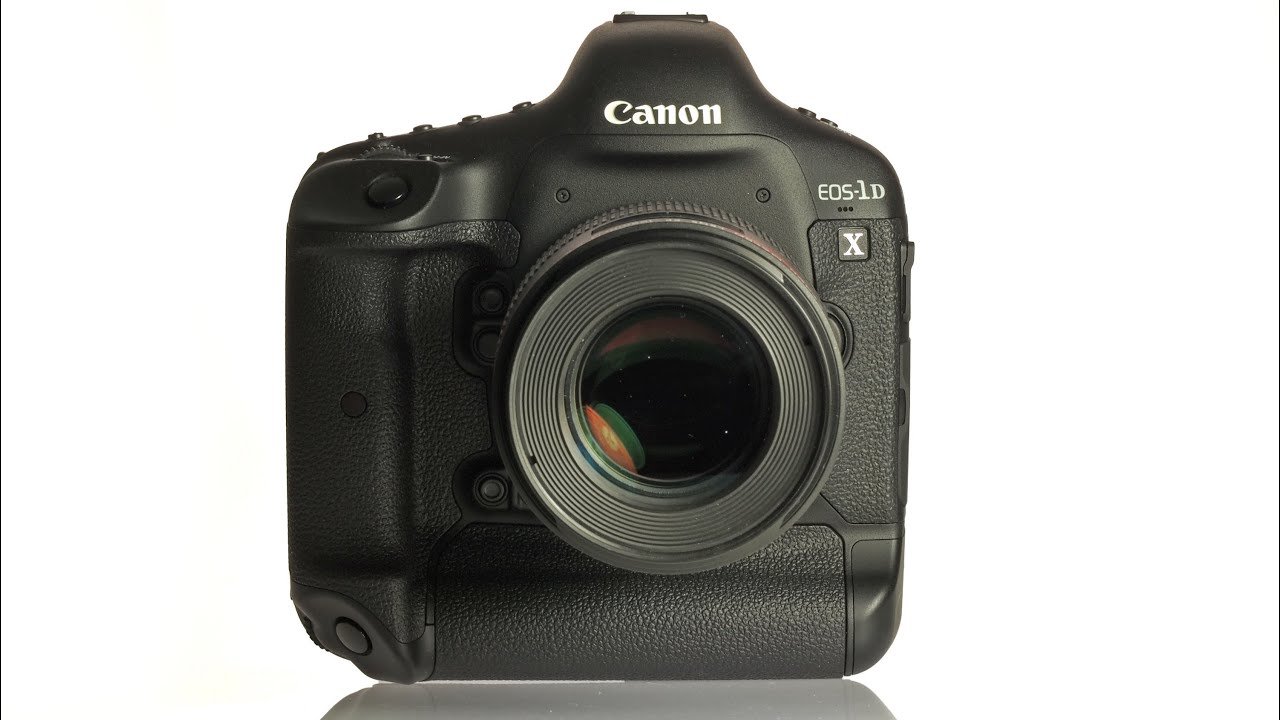
Built like a tank and heavy as all hell, you just know the Canon 1Dx is built for reliability.
Canon 5Dmk3. My staple workhorse for the better part of 2 ½ years. I picked this up second-hand for just over $1000, and it was an amazing camera. I’ve put tens of thousands of photos on this camera, it is still performs perfectly in that regard. Unfortunately, I’ve noticed a dark spot appearing in the top-right corner of all the photos, which persists with different lenses and has remained after cleaning the sensor hasn’t fixed it, so it may be a patch of dead pixels on the sensor. Cloning it out is an easy fix in Lightroom, but with thousands of photos at an event it isn’t practical. It won’t be on my hip anymore, but I’m still keeping it for when I need a remote camera set up (more on that below).

The sensor spot (circled in red) that just wont disappear from my beloved 5Dmk3. It is even more obvious with the sky as a background!
Conclusion
So that is my current complement of camera bodies. I will generally have my R6 and my 1Dx mounted on a Blackrapid Dual strap with whatever lenses I need at the time. Occasionally one of them will be mounted on a monopod if I am going to be in a single spot for a long time shooting with one of my larger telephoto lenses.
Read on for Part 2 where I talk about my selection of lenses for triathlon photography, and the Part 3 where I talk through some additional accessories that will take your triathlon photography to the next level.
Remote Camera for Sports Photography
Setting up a remote camera for sports photography
Have you ever looked at a photograph from a major sporting event and been unable to wrap your head around how they’ve captured it from a seemingly impossible position? The answer is most likely a remote camera.

It is not uncommon to see a bank of remote cameras at the 100m finish. Photo courtesy Pocketwizard.
You’ll find remote cameras in a heap of different sports in many different situations. Sometimes they’re used where there just isn’t room for a human to sit operating a camera and sometimes they’re used in situations where it is too dangerous for a human like on the outside of a sweeping corner at a motorsport rally.
Some of the most common remote camera shots that you’ll see come from:
Behind the backboard at a basketball game.
Up in the rafters at an ice hockey or basketball game. This can give an amazing top-down shot that seems almost impossible to comprehend.
Behind the goals at a soccer match.
All over the place at Olympics track and field events.

This type of setup might not be for you if you aren’t a fan of heights! Photo courtesy Pocketwizard.

I’m not shooting the Olympics and we certainly don’t have much ice hockey here in Australia, so where am I using remote cameras for my sports photography work?
My remote camera uses
The vast majority of my sport photography work is in mass-participation events including triathlons, trail running, road running and mountain-bike racing. I’ve used remote cameras in the following situations:
MTB racing at locations on the track where I know there is an amazing shot, but it is too dangerous for myself or the competitors to have me sitting there. I’ve used remotes on the inside of deep sweeping corners, or right at a big drop. In those instances I would rather the competitors not know they are being shot, because if they do they tend to take unnecessary risks.
Trail running. There are some beautiful locations out in the bush for trail running photos, but often there isn’t really enough room to get myself next to the track and frame the shot properly. In that instance I’ll hang a remote camera on a tree trunk.
Road running. If I’m shooting a relatively large event by myself, I’ll use a remote camera at the start line. I like to capture a telephoto shot of the competitors coming towards me from the start line, but I also want a nice wide shot right at the start so I’ll use a remote for that.
Triathlons. A bit of a mix of everything from above. There are some locations on the bike where I don’t want to distract the competitors, so I’ll set up a remote on the inside of a sweeping corner etc. I also use a remote at the finish line, particularly for busy races. I usually catch a shot of each competitor finishing with my 70-200, but if there are multiple competitors finishing at the same time they can often obscure one another. To account for that, I have a remote camera set up with a wide angle lens either adjacent to the finish line or hanging from above on the finish gantry. It might not make for the most perfect photo, but at least it is a shot of them finishing!
Setting up your remote camera
The basics that you need for a remote camera setup:
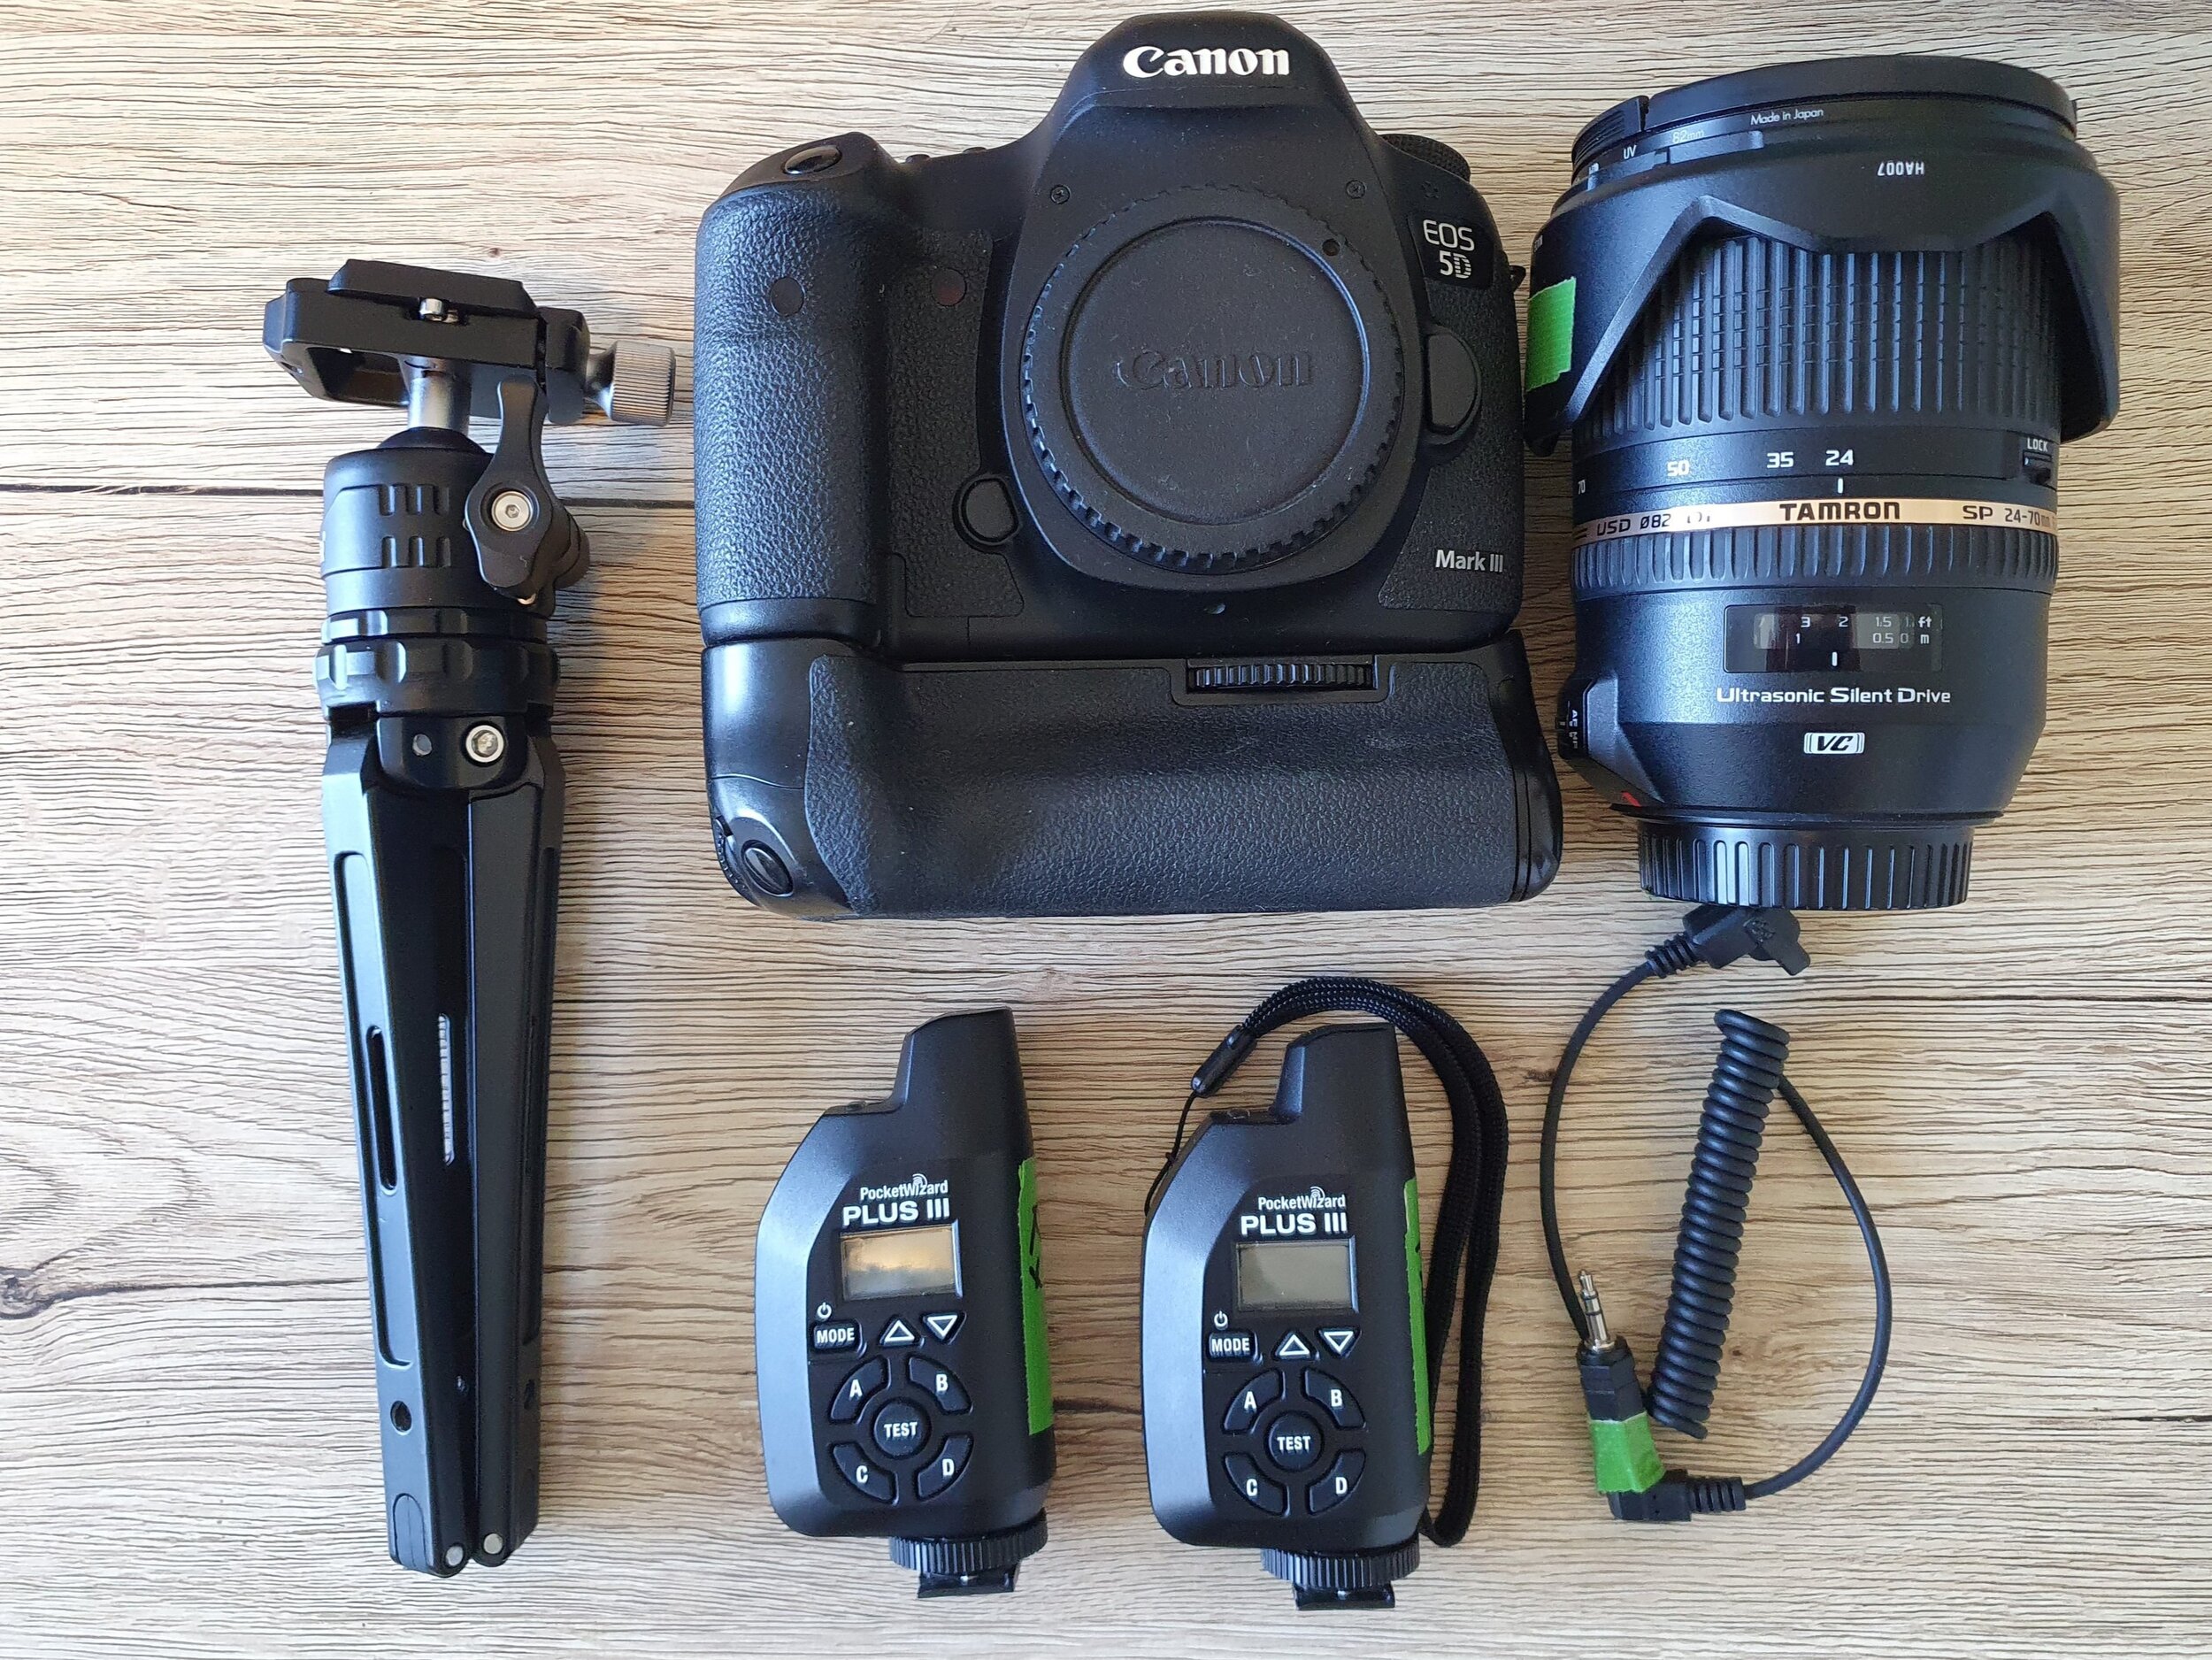
My basic remote camera kit
1) Camera and lens. This will depend on what sort of shot you’re aiming for. I tend to use a 24-70mm f/2.8 for my remote.
2) Remote triggers. I use Pocketwizard Plus III remotes, but if you are on a budget there are some cheaper options that work well enough for beginners.
3) Camera support. Depending on here you are placing your remote, this could be a mini-tripod, a ground plate, or something like a Manfrotto Magic Arm if you are going to be hanging the camera. I LOVE this Neewer mini-tripod; it is full-metal construction and is extremely sturdy. I’ve tried using a GorillaPod in the past, but they tend to droop over time with the weight of the lens.
4) Safety gear. If you are going to be hanging the camera, you absolutely must ensure that it can’t come free. Not only will it wreck your gear, but a camera + lens falling from the rafters is going to cause some serious damage to any humans in the way. Some thin steel cable attached to the camera strap mounts and then looped around a beam etc will catch your camera if the primary support fails.
How to set up your remote camera
Pick your spot. Think about composition and trying to capture peak action. For me, this would be on the inside of a fast corner at a MTB race, or at the finish line of a triathlon.
Get everything connected. Set up the receiver on your camera, mount the camera to your support, and fire off the transmitter to make sure everything is working. You will need to pick a channel that isn’t going to interfere with other photographers. Most large events will allocate channels, but if it is only a couple of you it should be easy enough to have a chat and work it out amongst yourselves.
Get your rig in position. Set your composition using the live view, and then focus on where you want to capture your subject. Once you have the focus point set, do not move your rig! Switch your lens to manual focus so it doesn’t try to re-focus when you trigger it, and tape the focus ring with some gaffer tape so that it can’t move.
Test, again. After making sure you’ve got cards in the camera, go to your shooting location and fire off a couple of shots with the trigger. Check the camera has fired properly. Now you’re ready to go.

A simple ground remote setup.

Have a play around with the different perspectves you can capture with a remote camera.
A few things to keep in mind:
Be mindful of your camera going to sleep. If it has gone to sleep, the first press on the transmitter will likely just wake the camera, it won’t actually take a shot. You can purchase a pre-release cable, but I find it’s just easier to set the camera to its longest sleep duration and then periodically fire off shots to keep it awake.
Think about how you want to trigger your remote. With Pocketwizards, you can either just fire them by pressing the button on the transmitter, or you can mount them into the hotshoe of your camera and it will fire the transmitter every time you take a photo with that camera. That can be an advantage because it means you don’t have to worry about a separate action to trigger the remote, but it will also mean that you end up with a bunch of photos that you might not want because the remote is firing even if you’re maybe shooting something completely different. I usually stick with triggering it manually using the transmitter in my hand.
Practice. It might take you a while to get a hang of the timing or placement of a remote camera. Technology can also sometimes go wrong. Do not rely on it to capture any “must capture” shots!
Other resources
“One Shot: Photographing the Olympic Games” is an amazing short-film produced in 2017. It has some great footage of remote cameras in use. The bank of cameras at the end of the 100m straight is absurd.
Pocketwizard.com has a great blog section with plenty of ideas for remote cameras